
Related Manuals for Uninet iColor 350


Summary of Contents for Uninet iColor 350
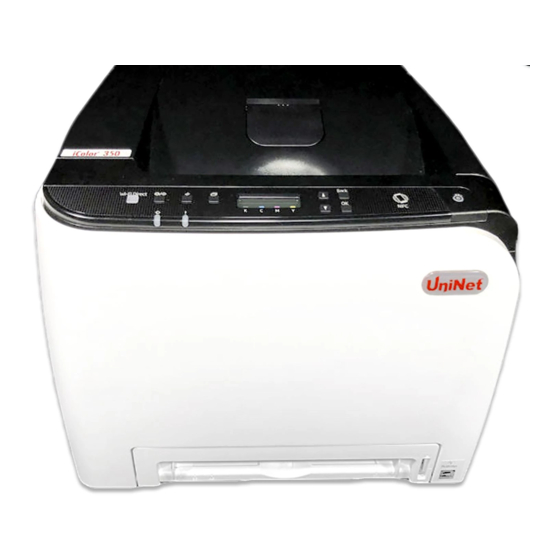
- Page 1 iColor 350 Dye Sublimation ® Transfer Media Printer User Manual February 2019 Edition – A newer version of this manual may be available at www.icolorprint.com/support...
-
Page 2: Table Of Contents
Cleaning the Registration Roller Page 34 Cleaning the Paper Tray, Friction Pad and Paper Feed Roller Page 34 - 35 Removing Paper Jams Page 33 - 37 iColor® 350 Printer Spec Sheet Page 38 UniNet iColor Printing Solutions sales@icolorprint.com | www.icolorprint.com... - Page 3 No clogged heads resulting from non-use. Toner based systems do not have this maintenance issue. Much longer expiration date on toner (ink expires within one year). Uninet suggests the cartridges are used within a 2 year period. Much higher page yield options What is Dye Sublimation? The iColor®...
-
Page 4: Unpacking And Installing Consumables
Unpacking and installing consumables 1. Remove orange security tape and packing material from around the printer. 2. Open front cover and remove the security tape from inside the printer. UniNet iColor Printing Solutions sales@icolorprint.com | www.icolorprint.com... - Page 5 3. Flip up the blue handles to engage the fuser, then close the front cover. 4. Open the top cover and remove orange security tape and packing material from inside the printer. UniNet iColor Printing Solutions sales@icolorprint.com | www.icolorprint.com...
- Page 6 5. Remove the black toner cartridge from the front of the machine. Place it on a flat, solid surface and carefully remove the orange security tape and protective paper. 6. Be careful not to touch the drum or the contacts on the side of the cartridge. UniNet iColor Printing Solutions sales@icolorprint.com | www.icolorprint.com...
-
Page 7: Loading Paper
Do not change the cartridge order in the iColor 350. Once installed, close the top cover. ® Loading Paper 1. Pull out the paper cassette and push down the metal base. UniNet iColor Printing Solutions sales@icolorprint.com | www.icolorprint.com... - Page 8 Ensure the paper stack does not exceed the upper limit mark inside the paper tray. To avoid paper jams, make sure the tray is securely inserted and the media is not excessively stacked. UniNet iColor Printing Solutions sales@icolorprint.com | www.icolorprint.com...
- Page 9 5. To use the bypass tray, load paper with the print side down and in the short-edge feed direction. Insert the top edge of the paper into the machine. Adjust the paper guides to the paper size. Support the paper with both hands, and insert it carefully until it stops. UniNet iColor Printing Solutions sales@icolorprint.com | www.icolorprint.com...
-
Page 10: Control Panel Layout
6. Insert power cord and power on the unit. If connecting via USB, do not plug in the USB cable until instructed to do so by the software. Control Panel Layout UniNet iColor Printing Solutions sales@icolorprint.com | www.icolorprint.com... - Page 11 Administrator privileges on the computer to proceed. If you encounter a warning that the driver is potentially unsafe, ignore and proceed. 1. Click ‘Continue’ to install the iColor® 350 driver. 2. Click ‘Quick Install’ to continue the installation. UniNet iColor Printing Solutions sales@icolorprint.com | www.icolorprint.com...
- Page 12 Your network will automatically assign an IP address to the printer, but it is suggested that you program a static IP address to the printer to avoid possible reassignment of the IP address should the machine be powered off (see page 26 for instructions). UniNet iColor Printing Solutions sales@icolorprint.com | www.icolorprint.com...
- Page 13 5. Select ‘Network Connection’ or ‘Wireless Connection’ depending on how your printer is set up and click ‘Next’. 6. Select ‘Automatically configure the printer network’ and click ‘Next’. UniNet iColor Printing Solutions sales@icolorprint.com | www.icolorprint.com...
- Page 14 PC. Click ‘Yes’. 8. The software will detect the printer on your network. Click on the printer and click ‘Next’. The driver will now install. 9. Select ‘RICOH SP C261DNw PS’ ONLY. Click ‘Next’. UniNet iColor Printing Solutions sales@icolorprint.com | www.icolorprint.com...
- Page 15 If prompted to restart your PC, click No. Do not restart. USB Setup: 1. Connect the USB cable to the printer and power on the printer. Do not connect to your PC yet. UniNet iColor Printing Solutions sales@icolorprint.com | www.icolorprint.com...
- Page 16 2. Select ‘USB Connection’ and click ‘Next’. 3. Now, connect the USB cable to your PC and wait 30 seconds. 4. Select ‘RICOH SP C261DNw PS’ ONLY. Click ‘Next’. UniNet iColor Printing Solutions sales@icolorprint.com | www.icolorprint.com...
-
Page 17: Wireless Setup
2. Press the [Menu] key. 3. Using the up/down keys, select [Host Interface], and then press the [OK] key. 4. Using the up/down keys, select [Network Setting], and then press the [OK] key. UniNet iColor Printing Solutions sales@icolorprint.com | www.icolorprint.com... - Page 18 21. Using the up/down keys, select [Wi-Fi Status], and then press the [OK] key. When "Connected" is displayed, the connection has been established. If "Disconnected" is displayed, the connection has not been established. Start again from the beginning. UniNet iColor Printing Solutions sales@icolorprint.com | www.icolorprint.com...
- Page 19 (access point), then try the connection again. 18. Configuring the Wi-Fi settings is complete. 19. Once complete, follow the steps for ‘Network Setup’ beginning on page 12, but choose ‘Wireless Connection’ as the connection type. UniNet iColor Printing Solutions sales@icolorprint.com | www.icolorprint.com...
-
Page 20: Setting A Static Ip
Address. Use the arrow keys to set the IP address. You can set the subnet mask and default gateway under the same menu. Your printer will now be listed along with your other printers and devices. UniNet iColor Printing Solutions sales@icolorprint.com | www.icolorprint.com... - Page 21 You are now ready to install the iColor 350 Sublimation ICC Profile. 1. Locate the file named ‘iColor 350 Sublimation ICC Profile’ on the flash drive that came with your printer. 2. Right-click on the file, then left click on ‘Install Profile’...
-
Page 22: Before You Print With The Icolor® 350
ICC profiles, use the provided ICC profile. For photographs (especially for skintones) which require more accurate color representation, UniNet suggests the use of the provided ICC profile. Pressed images will have more accurate colors, but will not be as vibrant. -
Page 23: Printing With The Icolor® 350
– not doing so could result in a lighter final result. The use of STC9 solution or SubliClean sheets will be needed for most hard surfaces (not textiles), to remove transferred toner residue. Refer to instructions below for suggested press times and peeling method: UniNet iColor Printing Solutions sales@icolorprint.com | www.icolorprint.com... -
Page 24: Specific Substrate Recommendations
6) Open the press slowly and peel immediately (hot peel). 7) Cool substrate as quickly as possible. 8) Clean excess toner residue with STC9 solution, or use a SubliClean sheet during the pressing stage. UniNet iColor Printing Solutions sales@icolorprint.com | www.icolorprint.com... - Page 25 4) Open the press slowly and peel immediately (hot peel). Dunk into warm water to stop the sublimation process. 5) Clean excess toner residue with STC9 solution, or use a SubliClean sheet during the pressing stage. UniNet iColor Printing Solutions sales@icolorprint.com | www.icolorprint.com...
- Page 26 Removing the polymer residue left behind on hard surfaces: SubliClean For most hard surfaces, the use of UniNet SubliClean film will prevent toner residue from transferring to the substrate during the pressing process. SubliClean is available in rolls, and is used in between the substrate and the printed transfer.
- Page 27 Use Geniune UniNet iColor Consumables ® Only use genuine UniNet iColor® consumables. The use of incompatible supplies (toner, transfer belts, fusers and registration assemblies) may cause damage to your printer not covered by your warranty. Suggested storage conditions: Whenever not in use, be sure to store the Dye Sublimation cartridges in a dark, safe place with their plastic drum covers.
-
Page 28: Replacing The Print Cartridges
Change the color mode setting to Black and White using the machine's driver. • If black toner runs out, you cannot print at all until the black print cartridge is replaced. UniNet iColor Printing Solutions sales@icolorprint.com | www.icolorprint.com... - Page 29 4. Hold the print cartridge and shake it from side to side five or six times. Even distribution of toner within the bottle improves print quality. 5. Remove the protective cover from the print cartridge. 6. Check the toner color and corresponding location, and then carefully insert the print cartridge vertically. UniNet iColor Printing Solutions sales@icolorprint.com | www.icolorprint.com...
-
Page 30: Replacing The Waste Toner Bottle
• Make sure the transfer unit is installed. If the transfer unit is not installed, install it before turning on the power. • Before removing the waste toner bottle from the machine, spread paper or similar material around the area to keep toner from dirtying your workspace. UniNet iColor Printing Solutions sales@icolorprint.com | www.icolorprint.com... - Page 31 7. To prevent the waste toner bottle from coming into contact with the intermediate transfer unit (the position shown by the arrow in the illustration below), do not lift the bottle while pulling it out. 8. Close the bottle cap. UniNet iColor Printing Solutions sales@icolorprint.com | www.icolorprint.com...
-
Page 32: Non User Replaceable Components
If the Alert indicator on the control panel lights up and the "Replace Intermdt Transfer Belt", "Replace Fusing Unit" or "Replace Transfer Roller" message appears on the display, contact your sales or service representative. UniNet iColor Printing Solutions sales@icolorprint.com | www.icolorprint.com... -
Page 33: Cleaning The Toner Density Sensor
Slide the toner density sensor lever once to the left. Carefully insert the print cartridge removed in Step 2 vertically. Using both hands, hold the center of the top cover and close the cover carefully. Be careful not to trap your fingers. UniNet iColor Printing Solutions sales@icolorprint.com | www.icolorprint.com... -
Page 34: Cleaning The Registration Roller
Turn off the power and uplug the power cord. Pull out Tray 1 carefully with both hands. 2. Place the tray on a flat surface. If there is paper in the tray, remove it. Wipe the friction pads and the inside of the paper tray with a cloth. UniNet iColor Printing Solutions sales@icolorprint.com | www.icolorprint.com... -
Page 35: Removing Paper Jams
LEDs, or other fragile parts that are shown in this manual. Doing so may cause malfunctions. For the location of the sensors in the machine and extended options, see the following illustrations: UniNet iColor Printing Solutions sales@icolorprint.com | www.icolorprint.com... - Page 36 • Since the temperature around the guide is high, wait for it to cool down before checking for jammed paper. Pull the front cover open lever and then carefully lower the front cover. Lower the fusing unit lever, and pull out the jammed paper carefully. 3. Do not touch the fusing unit. UniNet iColor Printing Solutions sales@icolorprint.com | www.icolorprint.com...
- Page 37 Once the jam is cleared, using both hands, carefully push up the front cover until it closes. When closing the front cover, push the upper area of the cover firmly. After closing the cover, check that the error is cleared. UniNet iColor Printing Solutions sales@icolorprint.com | www.icolorprint.com...
- Page 38 Paper Weight: Standard Tray: 60 - 160 g/m; Optional Tray: 60 - 105 g/m; Bypass: 60 - 160 g/m; Duplex: 60 - 90 Size: (WxDxH): 15.8" x 17.7" x 12.6" (40 cm x 45 cm x 32 cm Weight: 62.4 lb. (28.3 kg) Power: 120v (230v coming soon) UniNet iColor Printing Solutions sales@icolorprint.com | www.icolorprint.com...
Need help?
Do you have a question about the iColor 350 and is the answer not in the manual?
Questions and answers