Table of Contents
Advertisement
Advertisement
Table of Contents

Related Manuals for Uninet DTF 1000


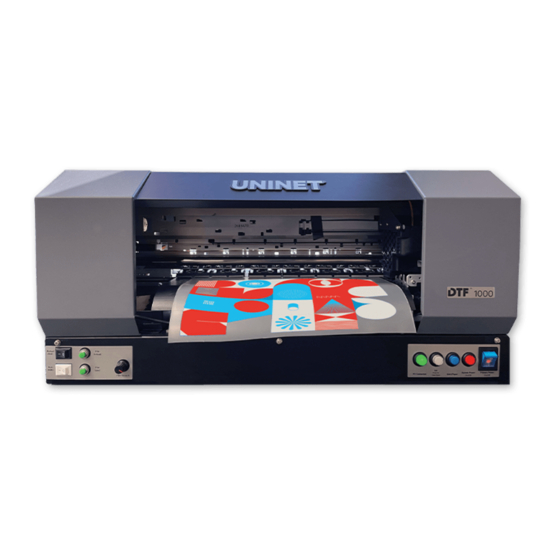
Summary of Contents for Uninet DTF 1000
- Page 1 USER MANUAL...
- Page 2 Date Version Language 12/08/2022 1.03 08/22/2022 1.02 01/13/2021 1.01 pg. 2 UNINET DTF 1000...
-
Page 3: Table Of Contents
HOW TO RESET THE WASTE PADS ..........................21 HEAT ELEMENT & OVEN ............................. 22 OPTIONAL SOFTWARE ............................... 23 IMPORTANT GENERAL WARNINGS ..........................27 PC SYSTEM REQUIREMENTS ............................27 TROUBLESHOOTING ..............................28 TECHNICAL SUPPORT ..............................28 TECHNICAL DATA ............................... 29 pg. 3 UNINET DTF 1000... -
Page 4: Warning
IT IS RECOMMENDED THAT ALL THE STAFF THAT WORK WITH AND / OR WHO ARE RESPONSIBLE FOR THE USE AND MAINTENANCE OF THE SYSTEM CAREFULLY READ THIS MANUAL AND BE FAMILIAR WITH THE NECESSARY PRECAUTIONS, OPERATIONAL AND MAINTENANCE PROCEDURE pg. 4 UNINET DTF 1000... -
Page 5: General Safety Precautions
Leaving the machine please move away from this product and consult plugged in may cause fire, electric shock, or damage to your doctor. the machine, depending on the thunder storm. pg. 5 UNINET DTF 1000... - Page 6 If irritation to eyes or skin persists, scheme or your household waste disposal service. obtain medical advice immediately. (EEA: Norway, Iceland and Liechtenstein) Never touch the electrical contacts on a Print Head or • pg. 6 UNINET DTF 1000...
-
Page 7: General Information
When performing TEST PRINTS, you can print directly to regular paper, by feeding the paper just like you would a regular printer. IDENTIFICATION Brand: DTF Model: DTF 1000 GENERAL WARNINGS • The minimum age of staff / operators is 18 years. Keep away from children or untrained operators. -
Page 8: Warranty
8 days after delivery of the goods. The replacement of defective material during the first twelve months from the date of purchase of the machine will be borne by UNINET™ except for damage or otherwise not dependent on manufacturing defects. -
Page 9: Instructions For Use
• Do not spill liquid on the printer and / or handling system of the media; • Inspection and repair should be performed by trained personnel as recommended by UNINET™ - tampering, improper use, repairs and / or action taken by anyone not authorized by UNINET™ void the warranty. -
Page 10: Read This First
• If you are experiencing personal injury, property damage and / or faults caused by misuse of the products and / or aftermarket parts and / or different from those recommended in the specific operating and maintenance or UNINET™. pg. 10... -
Page 11: Placement Of The Printer
REMOVE THE PRINTER FROM THE BOX AS SHOWN IN THE IMAGE BELOW. RIMUOVERE LA STAMPANTE DALLA SCATOLA COME MOSTRATO NELLA FIGURA. DÉPLACER L’IMPRIMANTE DE LA BOÎTE COMME INDIQUÉ DANS L’IMAGE CI-DESSOUS. REMOVER LA IMPRESORA DE LA CAJA COMO ESTA INDICADO EN EL DIBUJO SIGUIENTE. pg. 11 UNINET DTF 1000... -
Page 12: Roll Feeder Setup
Secure the roll feeder to the printer using two screws with their accompanying bolts. Front View Side View Small brackets on the backside of the printer pg. 12 UNINET DTF 1000... -
Page 13: Materials
• Top Green Button: Activates rollers to move paper/media backward. • Botton Green Button: Activates rollers to move paper/media forward. • Black & White Switch: Activates the White Ink Management System (WIMS), these should be on at all times. pg. 13 UNINET DTF 1000... -
Page 14: Wims-Setup
When filling, the only plug that should be open is the large one of the color that is being filled, be sure to seal it before continuing on to the next color. Example of what sealed breather holes pg. 14 UNINET DTF 1000... -
Page 15: Priming Dampers
5. After you have primed all the dampers and they have been placed back into the head you pg. 15 UNINET DTF 1000... -
Page 16: Loading Film
6. Using the two green buttons that control the rollers, adjust your film so that it is aligned with the last row of holes on the righthand side of the printing platform. Film feeding into the back of printer pg. 16 UNINET DTF 1000... -
Page 17: Powering The Printer On
After agreeing to the terms and conditions, another window will appear asking for the area you are located. The United States is not specified on the list, you want to select “Others” then press “OK”. User License Agreement window User’s Area window pg. 17 UNINET DTF 1000... -
Page 18: Do Not Stop Printer
If it is absolutely necessary that the printer needs to halt right where it is, the main power to the entire unit can be turn off by flipping the large blue switch on the right-hand side of the front on the unit. pg. 18 UNINET DTF 1000... -
Page 19: Cleaning & Maintenance
CMYK channel. Check to verify that both the black and white WIMS switches are set to ON, they should always be on so that the white ink lines agitate on the built in timer. pg. 19 UNINET DTF 1000... - Page 20 2. Check the dampers to ensure they are full and there are no air bubbles taking up large space in them. 3. Run a Nozzle Check, if there are more than two breaks in any of the ink channels run a head cleaning. pg. 20 UNINET DTF 1000...
-
Page 21: How To Reset The Waste Pads
5. If it reports that one or both of the waste pads are full, you will need to purchase a reset key. Reset keys are available via: https://www.2manuals.com/product_info.php?cPath=56_92&products_id=1138&ref= 6. Purchase the necessary amount of keys you need to reset your waste pads. pg. 21 UNINET DTF 1000... -
Page 22: Heat Element & Oven
If your images cover more surface area of the heating unit and you have found that there are small spots where the powder is not fully baked, simply rotate the image 180 degrees and bake at the same temperature for another 2 minutes. pg. 22 UNINET DTF 1000... -
Page 23: Optional Software
This needs to be done by the user, click “Manual”. You will be brought to a new window with a list of available ports, select “COM 1: Serial Port” the click “OK”. pg. 23 UNINET DTF 1000... - Page 24 R1800 driver. You can click “OK” to close the window. 6. Install the 8PRT program using the link below: https://www.dropbox.com/s/e6wg2cvqu2puygr/8PRT%20%2020201210.zip?dl=0 7. A window will appear asking if you will allow the software to run. Click “Run”. pg. 24 UNINET DTF 1000...
- Page 25 12. Going back to the 8PRT 20201210 folder that was placed in the C Drive, there is a file within named “Connection Test” with a small printer for an icon, click on it to run it. 13. A window will open up, click on the name dropdown box and select “Epson Stylus Photo R1800”. pg. 25 UNINET DTF 1000...
- Page 26 After entering the quantity, click the “Printing” button on the bottom right-hand corner. You will see that the “Printing” button changes to “Stop It”. This does not stop the current print but will stop any prints afterwards. pg. 26 UNINET DTF 1000...
-
Page 27: Important General Warnings
• Always use the included printer cover to cover the machine from dust and debris. • Do not operate or store your DTF 1000 printer or the UNINET™ inks in an environment with a temperature over 77º F or under 64º F. -
Page 28: Troubleshooting
Check on the status monitor in the WIC program. If the screen says that some parts inside your printer need to be serviced, then you need to reset the waste pads. TECHNICAL SUPPORT You should always contact an authorized dealer of UNINET™ for assistance or for any technical pg. 28 UNINET DTF 1000... -
Page 29: Technical Data
If you need further assistance you can contact UNINET™ via email at Support@DTGPRO.com TECHNICAL DATA BRAND: UNINET™ MODEL: UNINET™ DTF 1000 COLORS (Ink cartridges): CYAN – MAGENTA – YELLOW – BLACK – WHITE MAX PRINTING AREA: 13”...
Need help?
Do you have a question about the DTF 1000 and is the answer not in the manual?
Questions and answers
im having trouble reactivating uninet sofeware i need my system id
The system ID required for reactivating Uninet DTF 1000 software is shown as {{result.system_id}}.
This answer is automatically generated