Advertisement
Quick Links
Advertisement

Related Manuals for Resource Adam


Summary of Contents for Resource Adam
- Page 1 Assembly Instructions Adam | Adam Tavolo...
- Page 2 Warranties for all products purchased from Resource Furniture, LLC are only valid if the product has been properly assembled, Installed by a trained professional, and operated in accordance with the assembly instructions. Resource Furniture accepts no responsibility for any damage or injury caused by Improper Installation.
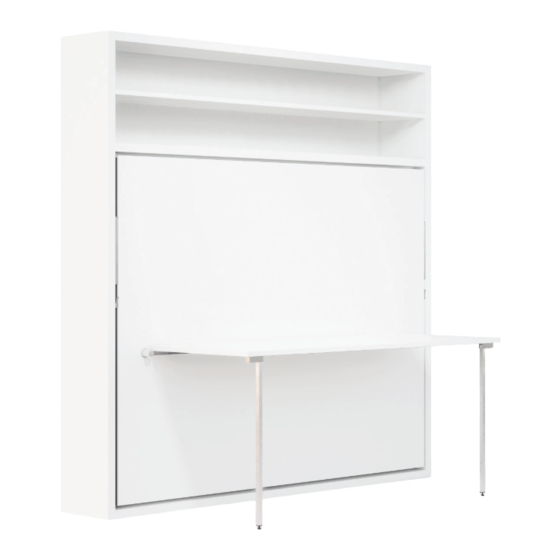
- Page 3 ADAM | ADAM TAVOLO OVERVIEW Adam Adam Tavolo Max weight for desk 105lb ADAM | ADAM TAVOLO MATTRESS SPECIFICATIONS Recommended weight: ~ 66 lbs Recommended dimensions: 78 3/4 x 59 x 7” Recommended dimensions with headboard: 75 x 59 x 7”...
- Page 4 ADAM | ADAM TAVOLO OVERVIEW...
- Page 5 ADAM | ADAM TAVOLO OVERVIEW Note: Bed base cannot be disassembled...
- Page 6 ADAM | ADAM TAVOLO COMPONENTS CODE QTY. COMPONENTS Right side panel Left side panel Top horizontal panel Bottom horizontal panel Bed base Lower back panels Spline to join lower back panels Top back panels Structural shelf Shelf ADAM TAVOLO COMPONENT CODE QTY.
- Page 7 ADAM | ADAM TAVOLO STRUCTURAL HARDWARE CODE QTY. DESCRIPTION Pins Cam connectors Wood screws for attaching back panels to structure wall mounting bracket shelf support Machine bolt and washer to attach bed base to structure ADAM | ADAM TAVOLO TOOLS QTY.
- Page 8 STRUCTURE ASSEMBLY Screw 6 (A) pins into both the (1) right vertical and (2) left vertical panels. Attach the (4) horizontal bottom panel; (3) horizontal top panel (9) structural shelf to the vertical panels by inserting and tightening 12 (B) cams.
- Page 9 STRUCTURE ASSEMBLY Attach the (6) lower back panels to the structure using (C) wood screws. Insert (7) back panel spline into lower back panel. Then place the (6) upper back panel on top of the spline, fastening it to the structure using (C) wood screws. Attach the (8) top back panel to the structure using (C) wood screws.
- Page 10 STRUCTURE ASSEMBLY Insert the (10) shelf using the (E) shelf support.
- Page 11 OPTIONAL WAND LIGHTING Drill 1/2” hole at 40 1/2” measured from the bottom of the structure (from inside) and 1 1/2” in from the side. Install mounting Plate with provided wood screws, aligning the 1/2” drill holes. Wand Light Exploded Diagram Cord Length = 118”...
- Page 12 LEVELING THE STRUCTURE Ensure that the structure is level and plumb. To compensate for any floor unevenness, use the adjustable feet on the bottom panel (det. 21a) to level the structure. detail...
- Page 13 WALL BED ATTACHMENT After the unit is level and plumb it must be securely attached to the wall using the metal angle mounting brackets as shown in the images below. A proper wall anchor suitable for the wall’s construction must be selected by the contractor or installer.
- Page 14 BED BASE INSTALLATION Hold the bed base (5) in the horizontal position (Image 4) ,lining up the holes in the side panels with the holes in the bed base (Image 5) Insert and fasten machine bolt (F) on the left and right side of the bed base.
- Page 15 PISTONS INSTALLATION Connecting the pistons requires a minimum of 2 installers. 3rd installer must be inside the structure of the bed to attach the pistons.
- Page 16 PISTONS INSTALLATION The pistons can only be installed after the structure has been anchored to the wall and the bed base is securely attached to the structure. (as shown in image 4,5,6). Remove the pistons from the sides of the bed by loosening the “acorn” nut. Fit the fork shaped connection of each piston over the bolts located on the bed base (A).
- Page 17 DESK INSTALLATION Position the desk (11) between the two support brackets that are already attached tot the bed base, and slide the pins into the two holes on the support brackets. It is recommended to lower the legs of the desk while attaching the desk. The front of the desk connects to the bed base when closed by latching onto a pre installed bracket.
-
Page 18: Desk Operation
DESK OPERATION If the desk is no level, adjust the feet at the bottom of the legs. Do not lift the desk past the open (horizontal) position as this will damage the desk and front panels. Adjust the tension on the locking mechanism by loosening or tightening the nut located below the knob. - Page 19 SAFELY OPERATING YOUR ADAM | ADAM TAVOLO BED Release Latches are located on both sides in the space between the outer structure Latch and the front panel. Reach in with your index finger and release either one of the latches, pulling forward slightly on the release latch.
- Page 20 Just one more thing – you can stand on principle, but never stand on the table! NOTE: Your Adam | Adam Tavolo is designed so that most bedding can remain on the bed when closed. If you experience difficulty closing the bed, your bedding might be too thick.
- Page 21 ResourceFurniture.com...
Need help?
Do you have a question about the Adam and is the answer not in the manual?
Questions and answers