Advertisement
Quick Links
Advertisement

Related Manuals for Resource Nuovoliola


Summary of Contents for Resource Nuovoliola
- Page 1 Assembly Instructions Nuovoliola...
- Page 2 Warranties for all products purchased from Resource Furniture, LLC are only valid if the product has been properly assembled, Installed by a trained professional, and operated in accordance with the assembly instructions. Resource Furniture accepts no responsibility for any damage or injury caused by Improper Installation.
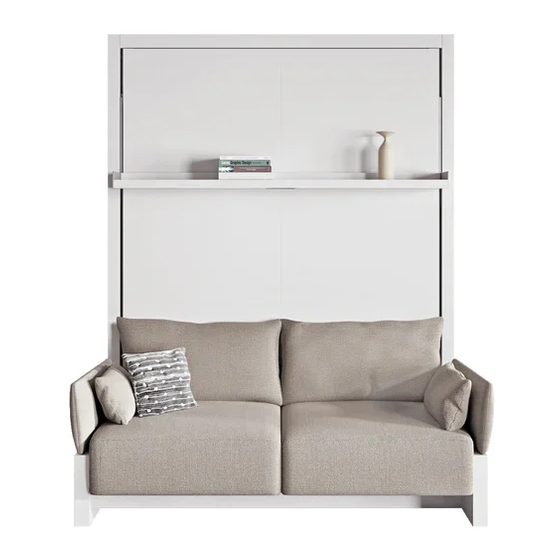
- Page 3 NUOVOLIOLA OVERVIEW Carpet can be placed up to or against wooden arm base NUOVOLIOLA MATTRESS SPECIFICATIONS Recommended weight: ~ 64 lbs Recommended dimensions: 79 1/2 x 60 x 7”...
- Page 4 NUOVOLIOLA OVERVIEW...
- Page 5 NUOVOLIOLA OVERVIEW...
- Page 6 NUOVOLIOLA OVERVIEW...
- Page 7 NUOVOLIOLA COMPONENTS CODE QTY. COMPONENTS Right side panel Left side panel Top horizontal panel Base with sofa seat Left/right small side panels (already attached to 1 & 2) Right back panel Left back panel Bed frame Mattress support bar Front shelf...
- Page 8 NUOVOLIOLA STRUCTURAL HARDWARE CODE QTY. COMPONENT DESCRIPTION 7 x 36 6MA Pins D15 L17 Cam Connectors Wood screws for back 3.5 x 20 panels 5MA x 50 Screws for side panels Screws for mattress support 4MA x 18 4 x 40...
- Page 9 and 2 (B) cam connectors, and to the back panels with 4 (F) screws. STRUCTURE ASSEMBLY Attach the (2) left side panel to the (4) base using 2 (D) screws. S S S S E E M M B B L L Y Y O O F F T T H H E E S S T T R R U U C C T T U U R R E E AGE 4 (1) right side panel to the (4) base using 2 (D) screws, and ch the...
- Page 10 A A S S S S E E M M B B L L Y Y O O F F T T H H E E S S T T R R U U C C T T U U R R E E STRUCTURE ASSEMBLY IMAGE 4 (1) right side panel to the (4) base using 2 (D) screws, and...
- Page 11 OPTIONAL WAND LIGHTING Drill 1/2” hole at 18 1/8” below upperbed structure panel (from inside) and 11/2” in from the side. Install mounting plate with provided wood screws, aligning the 1/2” drill holes. Wand Light Exploded Diagram Cord Length = 118” Front Back...
- Page 12 LEVELING THE BED LEVELING THE STRUCTURE IMAGE 14: Ensure that the structure is level and plumb. To compensate for any floor unevenness, use the adjustable feet on the Ensure that the structure is level and plumb. To compensate for any floor unevenness, bottom panel (det.
- Page 13 ASSEMBLY OF THE BED FRAME LEVELING THE BED BED FRAME INSTALLATION IMAGE 5 IMAGE 14: Unscrew the safety plates fixed to the (4) base, as shown in det. Ensure that the structure is level and plumb. 5a. The safety plates must be securely reattached after the levers To compensate for any floor unevenness, use the adjustable feet on the Unscrew the safety plates fixed to the (4) structure base, as shown in det.
- Page 14 BED FRAME INSTALLATION Attach the (9) mattress support bar to the bed frame using six (E) screws.
- Page 15 ASSEMBLY OF THE BED FRAME ASSEMBLY OF THE BED FRAME FRONT SHELF INSTALLATION MAGE 7 ttach the (9) mattress support bar to the bed frame using six E) machine bolts. MAGE 7 ttach the (9) mattress support bar to the bed frame using six Attach the shelf to the feet of the bed frame, as shown, using 4 (G) screws.
- Page 16 PADDED SOFA ARMS INSTALLATION Insert the padded sofa arms (14-15) into the wooden sofa arms (12-13) and fasten using (8) wood screws 4x40 . NING THE BED NG THE BED E 10: the handle in the center of the shelf and pull down the bed, gently accompanying the e handle in the center of the shelf and pull down the bed, gently accompanying the h both hands until it reaches the ground.
- Page 17 PADDED SOFA CUSHION INSTALLATION Place the (11) padded sofa seat on top of the metal sofa seat and attach to the back of the metal sofa seat using the velcro located in back of the padded seat cushion.
- Page 18 MATTRESS AND HEADBOARD INSTALLATION Attach the headboard (if purchased by client) to the back of the structure. Secure the mattress to the bedframe by fastening the two buckled straps.
- Page 19 DJUSTING THE TENSION ON THE BED FRAME SPRINGS BED AND HEADBOARD INSTALLATION AGE 12: balance the bedframe, adjust the spring tension controllers with the 8mm allen wrench vided. Turn clockwise to adjust the tension in order to close the bed with ease. Ensuring that To balance the bedframe, adjust the spring tension controllers with the 8mm allen wrench h side of the bedframe is adjusted equally.
- Page 20 SAFELY OPERATING YOUR NUOVOLIOLA BED Make sure that any and all items on shelf are stable and secure at all times. Prior to opening bed, remove any items taller than approx. 12.” Remove back cushions. To store the cushions or bedding under seat, lift sofa seat from bottom front edge for Nuovoliola.
- Page 21 Replace cushions. Have a great day! NOTE: Your Nuovoliola is designed so that most bedding can remain on the bed when closed. If you experience difficulty closing the bed, your bedding might be too thick.
- Page 22 ResourceFurniture.com...
Need help?
Do you have a question about the Nuovoliola and is the answer not in the manual?
Questions and answers