Numatic NX300 Original Instructions Manual
Compact scrubber dryer
Hide thumbs
Also See for NX300:
- Original instructions manual (116 pages) ,
- Instructions manual (36 pages) ,
- Operating instructions manual (28 pages)

Subscribe to Our Youtube Channel
Related Manuals for Numatic NX300


Summary of Contents for Numatic NX300
- Page 1 NUC244NX COMPACT SCRUBBER DRYER Original Instructions CAUTION, Read instructions before using the machine Keep for future reference numatic.com...
-
Page 2: Table Of Contents
Information for Scrubber Dryer ..... Page 16 Battery Information ......... Pages 17 - 20 In the event of a breakdown contact Recommended Spare Parts ......Page 20 your Numatic dealer or the EU Declaration Document ......Page 21 Numatic Technical help line +44 (0)1460 269268 Warranty ......... -
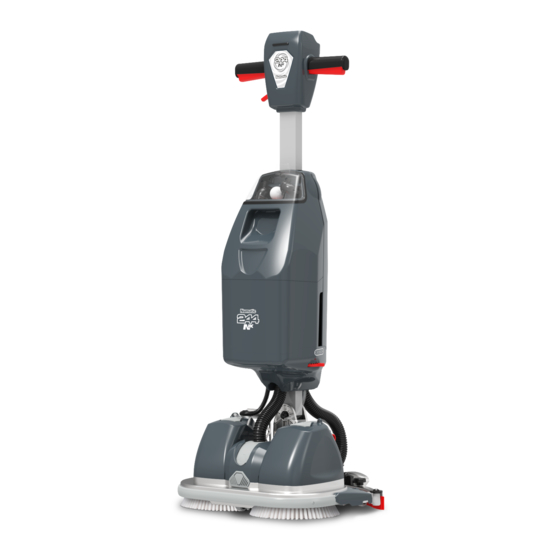
Page 3: Machine Overview
Machine Overview... -
Page 4: Control Panel Overview
Battery Charge Level Meter Vacuum On / Off In the event of a breakdown contact In the event of a breakdown contact Water Flow On / Off your Numatic dealer or the your Numatic dealer or the Triggers Numatic Technical Numatic Technical... -
Page 5: Quick Set Up Guide
Quick Set-up Guide NUC244NX CONTENTS ● Owner Manual ● Battery Charger & Lead PLEASE READ BEFORE COMMENCING ANY ● Battery Pack OPERATION AFTER THE REMOVAL OF ALL THE PACKAGING, CAREFULLY OPEN AND CHECK THE ● Scrub Brushes x 2 CONTENTS. ●... -
Page 6: Clean Water Tank Removal & Filling
Quick Set-up Guide Clean water tank removal and filling Over head cut away view Over head cut away view After lifting onto a suitable work surface, Slide your hand under the tank and curl Remove the clean water tank from the tilt the tank assembly slightly forward and your fingers up in the space in front of the main body of the tank holder. -
Page 7: Battery Fitting & Water Flow Setting
Quick Set-up Guide Battery fitting and water flow settings Lift the battery using the battery handle. Place the battery into the battery compartment ensuring it is securely in place and the orientation is correct (battery handle folds down towards the machine handle (A)). -
Page 8: Machine Handle Operation
Quick Set-up Guide To lower the floor-tool, press down on the left foot pedal lever at the rear of the machine (8-A). To lower the machine deck to the ground. Stand behind the machine, grip the handles. With your right foot push the right pedal forward (9-B). (By pushing lever the front support wheel retracts under the deck (9-C)). -
Page 9: Storage & Transportation
Storage and Transport Handle lock button Make sure the handle is in the upright position and locked in place, push the handle lock button and locate handle in correct position. Storage and Transport mode option 1 To put the machine into storage mode start with the handle locked in the upright position and the floor-tool down (1), pull the handle backwards until the floor-tool moves up and the transport wheels click out into position the front support wheel is deployed (2). -
Page 10: Regular Maintenance
Regular Maintenance Separator removal and cleaning Using thumb and index finger grip the tab of the Lift the separator away from the tank. Take the separator to a suitable cleaning station. separator and pull forwards. Once the separator has been removed, wash thoroughly under a tap making sure to run water through the tubes and to clean the grid filter (A). -
Page 11: Float Valve Removal & Cleaning
Regular Maintenance Float valve removal and cleaning To remove the float valve twist the red retainer clip in Lift the float valve from the tank, Place the float valve back down into the direction shown by the arrow on the retainer clip. wash and inspect for damage. -
Page 12: Changing The Floor-Tool Blades
Changing the Floor Tool Blades ALWAYS MAKE SURE THAT THE MACHINE IS SWITCHED OFF AND THE BATTERY IS REMOVED PRIOR TO ANY MAINTENANCE. To change the floor-tool, firstly lower the floor-tool using the left side floor-tool lowering foot pedal (A). Pull the floor-tool away from the machine (B). -
Page 13: Battery Removal & Charging
Batttery Removal and Charging Removing the battery Remove the tank assembly from the front of the machine using the inset handle on the front of the tank assembly, lift the tank assembly straight up (A). Pull the tank assembly from the machine and place on the ground. The battery can then be lifted from the machine for storage or charging using the handle on the battery (B). -
Page 14: Specifications
Incorrect water flow setting Adjust fluid control levers (page 7) Blocked clean water tank outlets Remove and clean (page 10) Failure to rectify the problem or in the event of a breakdown contact your Numatic dealer or Numatic Technical helpline +44 (0)1460 269268... -
Page 15: Rating Label / Personal Protective Equipment / Recycling
Wet Floor Sign NOTE: A risk assessment should be conducted to determine which PPE should be worn. In the event of a breakdown contact Safety Critical Component: your Numatic dealer or the Charging Leads: HO5VV-F x 0.75mm x 3 CORE Numatic Technical... -
Page 16: Information For Scrubber Dryer
Information for Scrubber Dryer COMPONENT INTERVAL INSPECT FOR Mains Lead DAILY Scuffi ng, cracks, splits, conductors showing Brushes DAILY Bristle damage, wear, drive collar wear Squeegee Blade BEFORE EACH USE Wear, cracks, splits Filters BEFORE EACH USE Clogging and debris retention Tanks AFTER EACH USE Rinse dirty water tank after use... -
Page 17: Battery Information
36V | 8400mAh | 300Wh | 10INR19/65-3 It is important that you observe the following information and warnings! Emergency Contact Informa� on Address: CBAK BATTERY HEADQUARTERS NUMATIC INTERNATIONAL LTD Shenzhen BAK ENERGY Co. LTD, Millfi eld Road, 2603A BAK Tech Bldg, Chard,... - Page 18 • Do not use defective or deformed batteries. • Use only original NUMATIC chargers to charge the battery. • STORAGE: Good batteries should be stored in a protected area away from sources of direct heat and sunlight and should be kept dry.
- Page 19 Warning: The battery included in this product must only be charged by the Numatic Charger and docking system supplied with the product and in NO circumstances should an alternative non Numatic charger be used as there is risk severe damage and fi re could result.
-
Page 20: Recommended Spare Parts
Disposal of batteries together with household waste is prohibited; batteries must be collected separately according to type. Return the battery free of charge to your NUMATIC servicing dealer for disposal or hand it over to an appropriate public •... - Page 23 Notes...
-
Page 24: Company Address
Tel: 0861 686 284 www.numatic.co.za Numatic International Schweiz AG. Sihlbruggstrasse 3A, 6340 Baar. SCHWEIZ Tel: 0041 (0) 41 76 80 76 - 0 www.numatic.ch Numatic International ULDA. Rua da Boa Viagem, 177 4470.210 Maia. PORTUGAL Tel: +351 220 047 700 www.numatic.pt Numatic International SLU.
Need help?
Do you have a question about the NX300 and is the answer not in the manual?
Questions and answers