Numatic NX300 Instructions Manual
Compact scrubber dryer
Hide thumbs
Also See for NX300:
- Original instructions manual (116 pages) ,
- Instructions manual (36 pages) ,
- Operating instructions manual (28 pages)
Table of Contents
Advertisement
Available languages
Available languages
Quick Links
Advertisement
Chapters
Table of Contents

Subscribe to Our Youtube Channel
Related Manuals for Numatic NX300


Summary of Contents for Numatic NX300
- Page 1 GB/ / PL NUC244NX COMPACT SCRUBBER DRYER SZOROWARKA KOMPAKTOWA Original Instructions CAUTION, Read instructions before using the machine. Tłumaczenie oryginalnej instrukcji obsługi PRZESTROGA, Przed przystąpieniem do używania maszyny należy zapoznać się z niniejszą numatic.com...
-
Page 2: Table Of Contents
Information for Scrubber Dryer ..... Page 16 Recommended Spare Parts ......Page 17 Schematic Diagram ......... Page 17 Lithium-Ion Battery Warranty ......Page17 In the event of a breakdown contact your Numatic dealer EU Declaration Document ......Page 17 Company Address ......... Page 36... -
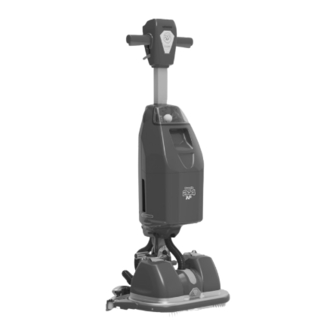
Page 3: Machine Overview
Machine Overview... -
Page 4: Control Panel Overview
Control Panel Overview Battery Charge Level Meter Vacuum On / Off Water Flow On / Off In the event of a breakdown contact Triggers your Numatic dealer Handle Lock Button (In the upright position) Handle Release Lever Start Button... -
Page 5: Quick Set Up Guide
Quick Set-up Guide NUC244NX CONTENTS ● Owner Manual ● Battery Charger & Lead PLEASE READ BEFORE COMMENCING ANY ● Battery Pack OPERATION AFTER THE REMOVAL OF ALL THE PACKAGING, CAREFULLY OPEN AND CHECK THE ● Scrub Brushes x 2 CONTENTS. ●... -
Page 6: Clean Water Tank Removal & Filling
Quick Set-up Guide Clean water tank removal and filling Over head cut away view Over head cut away view After lifting onto a suitable work surface, Slide your hand under the tank and curl Remove the clean water tank from the tilt the tank assembly slightly forward and your fingers up in the space in front of the main body of the tank holder. -
Page 7: Battery Fitting & Water Flow Setting
Quick Set-up Guide Battery fitting and water flow settings Lift the battery using the battery handle. Place the battery into the battery compartment ensuring it is securely in place and the orientation is correct (battery handle folds down towards the machine handle (A)). -
Page 8: Machine Handle Operation
Quick Set-up Guide To lower the floor-tool, press down on the left foot pedal lever at the rear of the machine (8-A). To lower the machine deck to the ground. Stand behind the machine, grip the handles. With your right foot push the right pedal forward (9-B). (By pushing lever the front support wheel retracts under the deck (9-C)). -
Page 9: Storage & Transportation
Storage and Transport Handle lock button Make sure the handle is in the upright position and locked in place, push the handle lock button and locate handle in correct position. Storage and Transport mode option 1 To put the machine into storage mode start with the handle locked in the upright position and the floor-tool down (1), pull the handle backwards until the floor-tool moves up and the transport wheels click out into position the front support wheel is deployed (2). -
Page 10: Regular Maintenance
Regular Maintenance Separator removal and cleaning Using thumb and index finger grip the tab of the Lift the separator away from the tank. Take the separator to a suitable cleaning station. separator and pull forwards. Once the separator has been removed, wash thoroughly under a tap making sure to run water through the tubes and to clean the grid filter (A). -
Page 11: Float Valve Removal & Cleaning
Regular Maintenance Float valve removal and cleaning To remove the float valve twist the red retainer clip in Lift the float valve from the tank, Place the float valve back down into the direction shown by the arrow on the retainer clip. wash and inspect for damage. -
Page 12: Changing The Floor-Tool Blades
Changing the Floor Tool Blades ALWAYS MAKE SURE THAT THE MACHINE IS SWITCHED OFF AND THE BATTERY IS REMOVED PRIOR TO ANY MAINTENANCE. To change the floor-tool, firstly lower the floor-tool using the left side floor-tool lowering foot pedal (A). Pull the floor-tool away from the machine (B). -
Page 13: Battery Removal & Charging
Batttery Removal and Charging Removing the battery Remove the tank assembly from the front of the machine using the inset handle on the front of the tank assembly, lift the tank assembly straight up (A). Pull the tank assembly from the machine and place on the ground. The battery can then be lifted from the machine for storage or charging using the handle on the battery (B). -
Page 14: Specifications
Incorrect water flow setting Adjust fluid control levers (page 7) Blocked clean water tank outlets Remove and clean (page 10) Failure to rectify the problem or in the event of a breakdown contact your Numatic dealer or Numatic Technical helpline +44 (0)1460 269268... -
Page 15: Rating Label / Personal Protective Equipment / Recycling
Approval Mark WEEE symbol Part Number Machine yr/wk Serial number Numatic Support WEEE (Waste, Electrical and Electronic Equipment) Scrubber dryer Accessories and packaging should be sorted for environmentally-friendly recycling. Only for EU countries. Do not dispose of scrubber-dryer into household waste. -
Page 16: Information For Scrubber Dryer
Information for Scrubber Dryer READ MANUAL BEFORE USE COMPONENT INTERVAL INSPECT FOR Mains Lead DAILY Scuffi ng, cracks, splits, conductors showing Brushes DAILY Bristle damage, wear, drive collar wear Squeegee Blade BEFORE EACH USE Wear, cracks, splits Filters BEFORE EACH USE Clogging and debris retention Tanks AFTER EACH USE... -
Page 17: Recommended Spare Parts
To claim warranty the following details must be supplied i. Serial number of the machine ii. Battery date code iii. Date purchased iv. Proof of Purchase v. Maintenance history and charging regime Failure to use the correct Numatic charger will void your warranty. - Page 18 Dźwignia zwalniania ssawy Zalecane części zamienne .......Strona 33 Koła transportowe/magazynowe Schemat .........Strona 33 Akumulator litowo-jonowy — gwarancja...Strona 33 Dokument deklaracji UE .........Strona 34 W razie wystąpienia poważnej awarii Adres firmy .........Strona 36 należy skontaktować się z lokalnym przedstawicielem firmy Numatic.
-
Page 19: Informacje Ogólne Na Temat Maszyny
Informacje ogólne na temat maszyny... -
Page 20: Omówienie Panelu Sterowania
Omówienie panelu sterowania Miernik poziomu naładowania akumulatora Ssanie Wł./Wył. W razie wystąpienia poważnej awarii Przepływ wody Wł./Wył. należy skontaktować się z lokalnym Dźwignie sterownicze przedstawicielem firmy Numatic. Przycisk blokujący uchwyt (w pozycji pionowej) Dźwignia zwalniająca uchwyt Przycisk startowy... -
Page 21: Poradnik Szybkiej Instalacji
Poradnik szybkiej instalacji NUC244NX – ZAWARTOŚĆ ● Instrukcja użytkownika ● Ładowarka i kabel do PRZED ROZPOCZĘCIEM PRACY NALEŻY ZAPOZNAĆ ładowania akumulatora SIĘ Z INSTRUKCJĄ. PO USUNIĘCIU WSZYSTKICH ● Akumulator MATERIAŁÓW PAKOWYCH OSTROŻNIE OTWORZYĆ ● Szczotka szorująca x 2 I SPRAWDZIĆ ZAWARTOŚĆ. ●... -
Page 22: Demontaż I Napełnianie Zbiornika Wody Czystej
Poradnik szybkiej instalacji Demontaż i napełnianie zbiornika wody czystej Widok z góry. Widok z góry. Po ustawieniu na odpowiedniej Wsunąć rękę pod zbiornik i zgiąć palce, Wyjąć zbiornik wody czystej z korpusu powierzchni roboczej, delikatnie przechylić wsuwając je w przestrzeń z przodu głównego uchwytu zbiornika. -
Page 23: Montaż Akumulatora I Ustawianie Przepływu Wody
Poradnik szybkiej instalacji Montaż akumulatora i ustawianie przepływu wody Unieść akumulator, posługując się uchwytem akumulatora. Umieścić akumulator we wnęce na akumulator, pamiętając o solidnym zamocowaniu i zachowaniu prawidłowej orientacji (uchwyt akumulatora składa się w kierunku uchwytu maszyny (A)). Ponownie zamontować zbiornik główny na maszynie. -
Page 24: Obsługa Uchwytu Maszyny
Poradnik szybkiej instalacji Aby obniżyć ssawę, wcisnąć dźwignię lewego pedału znajdującą się z tyłu maszyny (8-A). Opuszczanie płyty maszyny na podłoże. Stanąć za maszyną, złapać uchwyty. Prawą nogą pchnąć prawy pedał do przodu (9-B). (Po wciśnięciu dźwigni przednie koło nośne jest chowane pod płytę... -
Page 25: Przechowywanie I Transport
Przechowywanie i transport Przycisk blokady uchwytu Sprawdzić, czy uchwyt jest ustawiony w pozycji pionowej i zablokowany w jednej pozycji. Nacisnąć przycisk blokujący uchwyt i ustawić go w prawidłowym położeniu. Tryb przechowywania i transportu, opcja 1 1/2/3. Aby ustawić maszynę w tryb przechowywania, należy rozpocząć z uchwytem zablokowanym w pozycji pionowej i opuszczoną ssawą... -
Page 26: Demontaż I Czyszczenie Separatora
Regularna konserwacja Demontaż i czyszczenie separatora Za pomocą kciuka i palca wskazującego chwycić Wyjąć separator ze zbiornika. Przenieść separator na odpowiednie stanowisko do klapę separatora i popchnąć ją do przodu. czyszczenia. Po wyjęciu separatora dokładnie przepłukać go pod kranem, pamiętając o przepłukaniu rur i oczyszczeniu filtra siatkowego (A). Po dokładnym oczyszczeniu sprawdzić... -
Page 27: Regularna Konserwacja
Regularna konserwacja Demontaż i czyszczenie zaworu pływakowego Aby zdemontować zawór pływakowy, obrócić Wyjąć zawór pływakowy ze Umieścić zawór pływakowy z powro- klamrę mocującą w kierunku wskazywanym przez zbiornika, przepłukać go i sprawdzić tem w zbiorniku. umieszczoną na niej strzałkę. pod kątem uszkodzeń. Delikatnie przechylić... -
Page 28: Wymiana Piór Ssawy
Wymiana piór ssawy PRZED PRZEPROWADZENIEM DOWOLNEJ KONSERWACJI ZAWSZE SPRAWDZAĆ, CZY MASZYNA JEST WYŁĄCZONA, A AKUMULATOR ZDEMONTOWANY. Aby wymienić ssawę, najpierw opuścić ją za pomocą lewego pedału obniżającego ssawę (A). Odciągnąć ssawę od maszyny (B). Odkręcić dwa pokrętła zabezpieczające Zdjąć uchwyt pióra (2). Wymienić... -
Page 29: Demontaż I Ładowanie Akumulatora
Demontaż i ładowanie akumulatora Wyjmowanie akumulatora Zdemontować akumulator z przedniej części maszyny, używając uchwytu wpuszczanego znajdującego się z przodu zespołu zbiornika, aby unieść zbiornik w linii prostej (A). Wyciągnąć zespół zbiornika z maszyny i ustawić go na podłożu. Akumulator może być wymontowany z maszyny w celu jego przechowania lub naładowania przy pomocy umieszczonego na nim uchwytu (B). -
Page 30: Dane Techniczne
Nieprawidłowe ustawienie przepływu wody. Wyregulować dźwignie sterujące przepływem płynu (strona 23). Wyloty zbiornika wody czystej są zablokowane Zdemontować i wyczyścić (strona 26). W razie niemożności rozwiązania problemu lub poważnej awarii skontaktować się z lokalnym przedstawicielem firmy Numatic. -
Page 31: Tabliczka Znamionowa / Środki Ochrony Indywidualnej / Recykling
Znak Symbol WEEE Numer katalogowy Maszyna Rok/Tydz. Nr seryjny Numatic Support WEEE (zużyty sprzęt elektrotechniczny i elektroniczny) Akcesoria i opakowanie maszyny należy odpowiednio posegregować i przekazać do utylizacji. Tylko dla krajów UE. Maszyny nie wolno utylizować wraz z odpadami domowymi. -
Page 32: Informacje Dotyczące Szorowarki Automatycznej
Informacje dotyczące maszyny czyszczącej PRZED UŻYCIEM ZAPOZNAJ SIĘ Z INSTRUKCJĄ ELEMENT INTERWAŁ ZAKRES KONTROLI Przewód zasilający CODZIENNIE Rysy, pęknięcia, rozdarcia, przetarcia Szczotki CODZIENNIE Uszkodzenie włosia, zużycie szczotki, zużycie kołnierza napędu Pióro wycieraczki PRZED KAŻDYM UŻYCIEM Zużycie, pęknięcia, rozdarcia Filtry PRZED KAŻDYM UŻYCIEM Zapchanie i obecność... -
Page 33: Zalecane Części Zamienne
Aby wystąpić z roszczeniami z tytułu gwarancji, należy podać następujące informacje I. Numer seryjny maszyny ii. Kod daty akumulatora iii. Datę zakupu iv. Dowód zakupu v. Historię konserwacji i reżim ładowania Niezastosowanie odpowiedniej ładowarki Numatic spowoduje utratę gwarancji. -
Page 34: Dokument Deklaracji Ue
Notes... -
Page 36: Company Address
Tel: 0861 686 284 www.numatic.co.za Numatic International Schweiz AG. Sihlbruggstrasse 3A, 6340 Baar. SCHWEIZ Tel: 0041 (0) 41 76 80 76 - 0 www.numatic.ch Numatic International ULDA. Rua da Boa Viagem, 177 4470.210 Maia. PORTUGAL Tel: +351 220 047 700 www.numatic.pt Numatic International SLU.
Need help?
Do you have a question about the NX300 and is the answer not in the manual?
Questions and answers