
Subscribe to Our Youtube Channel
Related Manuals for AmScope T670


Summary of Contents for AmScope T670
- Page 1 OPERATOR’S MANUAL (Please Read This Manual Before Using the Microscope) T670 Microscope Compound Microscope...
- Page 2 T670 Microscope Copyright © 2015 United Scope LLC DBA AmScope. All rights reserved. Copyright Notice This document and the contents within are the exclusive property of United Scope LLC, and are subject to copyright law. This material is not to be copied or altered -- in whole or in part -- without the express written permission of United Scope LLC.
-
Page 3: Table Of Contents
T670 Microscope Contents BEFORE USE ..................................4 Introduction ................................4 Precautions ................................. 4 1. M ..............................5 ICROSCOPE ARTS 1.1 Parts Diagram ..............................5 1.2 Features ................................6 2. O ................................... 7 PERATION 2.1 Unpacking ................................7 2.2 Assembly ................................8 2.3 Adjusting the View .............................. -
Page 4: Before Use
T670 Microscope Before Use Introduction Congratulations on the purchase of your new AmScope Microscope! This manual is designed for T670 microscope. Please take a few minutes to familiarize yourself with the features and functions of your new microscope. If you want more information on microscope, parts, and accessories, please visit our website at: www.AmScope.com... -
Page 5: Microscope Parts
T670 Microscope 1. Microscope Parts 1.1 Parts Diagram AmScope Proprietary Page 5 of 19... -
Page 6: Features
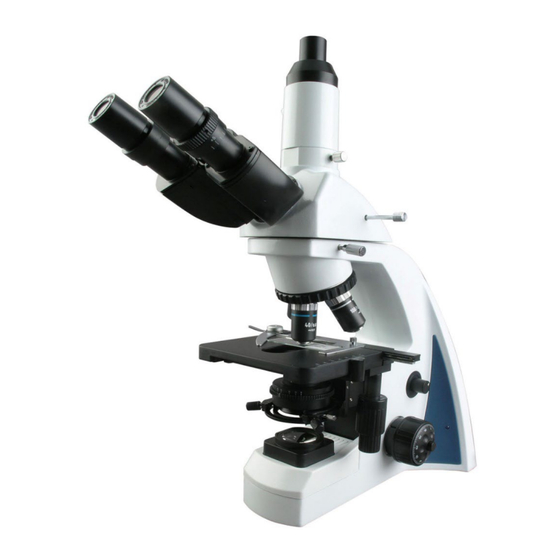
T670 Microscope 1.2 Features A superior professional infinity trinocular compound microscope, this instrument comes with an extreme widefield infinity optical system, which provides crystal clear images for high level microscopy work. The ideal level of comfort when in use is achieved by its 30 degree inclined ocular... -
Page 7: Operation
T670 Microscope 2. Operation 2.1 Unpacking 2.1.1 Unpack the Box 1. Very carefully slide the Styrofoam container out of the cardboard carton. 2. Lay the Styrofoam container on its side. Make sure the side labeled up is up. 3. Remove the tape. -
Page 8: Assembly
T670 Microscope 2.2 Assembly 2.2.1 Carefully Remove Microscope from Box Remove the microscope body from the box and remove the plastic protective covering. The body of the microscope is composed of the base, the stage, the arm, and the nosepiece. - Page 9 T670 Microscope 2.2.4 Install the Trinocular Port and C-Mount (For Trinocular Microscopes Only) Unscrew and remove the photo port cap from the top side of the microscope head. Screw in the Trinocular port If your camera has a c-mount, insert the c-mount adapter onto the Trinocular port.
- Page 10 T670 Microscope 2.2.6 Insert Objective Lenses Unpack the objective lenses. Screw the objectives into the microscope nosepiece. Start with the lowest magnification, and in order of magnification, insert each lens, without touching the glass. 2.2.7 Plug it in, turn it on, and adjust the dimmer if more light is needed.
-
Page 11: Adjusting The View
T670 Microscope 2.3 Adjusting the View 2.3.1 Choose forward or reverse viewing The microscope head rotates to allow for forward or reverse viewing. There is no difference as far as the optics; it depends on what’s comfortable. In forward position you are looking over the stage, in reverse position you are looking at the stage. -
Page 12: Specimen Set Up
T670 Microscope 2.4 Specimen Set Up 2.4.1 Prepare the Specimen Place the specimen to be studied on a glass slide (or use a prepared slide, sold separately). 2.4.2 Secure the Slide Place the slide on the stage, holding it snugly in place with the metal slide holders (clips) of the mechanical stage. - Page 13 T670 Microscope To adjust the illumination, slowly turn the dimmer on the right side of the base until the desired intensity of light is achieved. AmScope Proprietary Page 13 of 19...
-
Page 14: Focusing
T670 Microscope 2.5 Focusing 2.5.1 Choose an Objective Lens Turn the nosepiece to choose an objective. It is easiest to use the lowest magnification first to locate and focus on the specimen. As you move up in magnification you will need to refocus the image a little each time. -
Page 15: Using The Trinocular Port
T670 Microscope 2.6 Using the Trinocular Port The AmScope T670 model is uniquely designed so that you can view the image through the eyepieces and the Trinocular port simultaneously, as well as fine tune the focus of the camera with a C-mount focus adjustment. -
Page 16: Setting The Stage's Stop-Limit
T670 Microscope 2.8 Setting the Stage’s Stop-Limit Unlock the stop-limit on the stage. Adjust the stage to the desired maximum height. Lock the stop-limit. This allows you to limit the movement of the stage from the bottom of the range up to the point it is set at. -
Page 17: Adjusting The Iris
T670 Microscope 2.11 Adjusting the Iris By changing the aperture (hole size) of the iris/diaphragm of the condenser, you can adjust the background brightness. Adjust the aperture of the iris diaphragm using the iris adjustment slider located directly under the stage. -
Page 18: Using Oil Immersion
T670 Microscope 2.14 Using Oil Immersion When using the 100X objective, a drop of immersion oil should be placed between the cover slip and the objective to minimize distortion caused by air. Place the slide on the stage and center the specimen. - Page 19 T670 Microscope Adjust the focusing knob, watch for the field of view to come into focus. This is best seen when the iris of the condenser is smaller than the field of the objective. Use the fine focusing knob to make adjustments.
Need help?
Do you have a question about the T670 and is the answer not in the manual?
Questions and answers