Table of Contents
Advertisement
Quick Links
Advertisement
Table of Contents

Subscribe to Our Youtube Channel
Related Manuals for AmScope 330 Series


Summary of Contents for AmScope 330 Series
- Page 1 330 Series User’s Manual...
-
Page 2: Table Of Contents
330 Series Table of Contents Before Use ..........................3 Introduction ......................3 Safety Precautions ....................4 Parts ..........................5 B330 ......................... 5 T330 ......................... 6 Definition of Parts ....................7 Getting Started ......................8 Assembly ......................... 8 Operation ........................Setting Up ........................ -
Page 3: Before Use
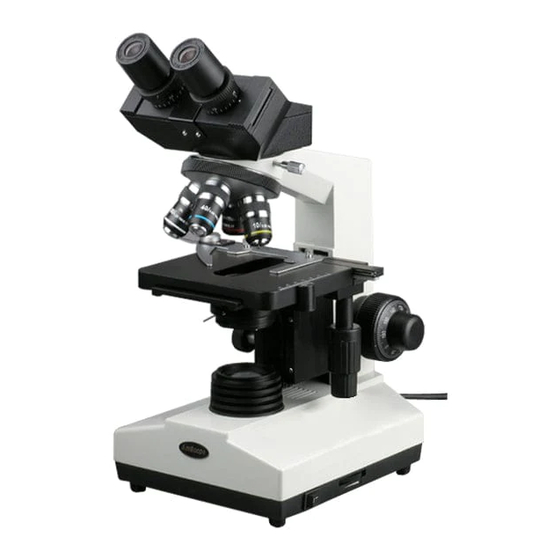
Introduction Congratulations on the purchase of your new AmScope microscope! This manual is designed for the 330 series microscopes (B330 & T330). Though the two models have identical bases, the B330 is equipped with a binocular head (two eyepieces tubes), while the T330 is equipped with a trinocular head (two eyepiece tubes and a third photo port on the top). -
Page 4: Safety Precautions
330 Series Before Use Safety Precautions 1. As the microscope is a precision instrument, always handle it with care, avoiding impact or abrupt movement during transportation. Do not shake the package. 2. Do not place the microscope in direct sunlight or in high heat. Keep it indoors in a dry and clean place with temperatures between 32-100 degrees F (0-40 degrees C), and in maximum relative humidity of 85%. -
Page 5: Parts
330 Series Parts B330 Binocular Head Eyepiece Lock Screw Objectives Stage Clip Coarse Focusing Mechanical Stage Knob Fine Focusing Knob Iris Adjustment Slider Stage Control Base Lens Dimmer Power Switch... -
Page 6: T330
330 Series Parts T330 Trinocular Port Eyepiece Trinocular Head Objectives Stage Clip Mechanical Stage Coarse Focusing Knob Stage Control Fine Focusing Knob Base Lens Condenser Up/Down Knob... -
Page 7: Definition Of Parts
330 Series Parts Definition of Parts Adjustable Trinocular Port Threaded port with adjustable length of attachment of digital or video camera Base Lens Directs the light source towards the slide Coarse Focusing Knob Used to initially bring the slide into the sight and focus Condenser &... -
Page 8: Getting Started
330 Series Getting Started Assembly 1. First, take the styrofoam container out of the cardboard carton and lay it on its side, paying attention to which side is labeled up. Remove the tape and open the container carefully so as to avoid dropping and damaging the optical items. - Page 9 330 Series Getting Started 5. Assembling the Eyepiece 1) Remove the cover of eyepiece tube①. 2) Insert the eyepiece② into the eyepiece tube until touching the bottom. (See Fig. 2) Fig. 2 6. Assembling Objective 1) Rotate the coarse focusing knob to lower the stage.
-
Page 10: Operation
330 Series Operation Setting Up 1. Loosen the head lock screw and adjust the microscope head so that it is in a comfortable position for observation. Lock the head-lock screw. Diopter Adjustment 2. Adjusting the Diopter 1) After the image is clear in the right eyepiece, observe the left eyepiece with the left eye. -
Page 11: Focusing
330 Series Operation 6. To adjust the illumination, slowly turn the dimmer knob on the right side of the body until the desired intensity of light is achieved. You may also adjust the iris on the light source itself by rotating the ring around the base lens or the iris on the condenser, so please make sure all are adjusted to the correct positions. -
Page 12: Adjusting The Condenser & Diaphragm
330 Series Operation Adjusting the Condenser & Diaphragm 1. Using condenser Up/Down adjustment knob, you can change the distance between the light condenser and the stage. This allows you to control the concentration of the light hitting your slide. Condenser Up/Down Fig. -
Page 13: Using The Trinocular Port
You do not need an adapter to attach your AmScope camera to the trinocular port, however you may need one if you have a non-AmScope camera. Our photo port is a 23mm size. -
Page 14: Setting The Stage's Stop-Limit
330 Series Operation Setting the Stage’s Stop-Limit 1. Unlock the stop-limit, which is the switch inside the left hand focusing knob. (Fig. 11 shows unlock position) 2. Adjust the stage to the desired maximum height. 3. Lock the stop-limit. This will allow you to... -
Page 15: Changing The Fuse
330 Series Operation 4. You may now change the bulb by removing and replacing it. Be sure that the bulb is not hot before touching it to avoid burning. Reinstall door and continue use of microscope. Fig. 13 Replace Fuse 1. -
Page 16: Maintenance/Precautions
Doing so will void your warranty unless by advisement of one of our technicians to do so. - After use, cover the microscope with the provided dust cover. - Keep your AmScope microscope in a dry, clean location in order to prevent rust or other damages. -
Page 17: Specifications
330 Series Specifications 330 Series Specifications Parts Specifications B/T330 B/T330A B/T330B B/T330C Extreme WF Eyepiece WF10X/23mm WF10X/23mm w/ Pointer WF10X/23mm w/ Reticle WF16X/23mm WF20X/23mm WF25X/23mm 4X/0.10 DIN Achromatic Objectives 10X/0.25 40X(spring)/0.65 60X(spring)/0.85 100X(spring, oil)/1.25 DIN Plan Objectives 40X(spring) 100X(spring, oil) -
Page 18: Optional Accessories
330 Series Specifications Optional Accessories Parts Description Model # Purpose Eyepieces EP20X30 Obtaining 80x, 200x, 800x, and 2000x magnifica- tion powers EP25X30 For obtaining 250x and 2500x magnification pow- 10x w/ Pointer EP10X30P For easier identifying of objects 10x w/ Reticle... -
Page 19: Objectives
330 Series Specifications Objectives Type Magnification Model Number/ Medium Parfocal Distance (mm) Magnification Marks Numerical Aperture (Color Ring) (N.A.) DIN Achromatic A4X / .10 Objective (195mm) A10X / 0.25 Yellow A40X / 0.65 Light Blue 100X A100X / 1.25 Cedar Oil 45... -
Page 20: Technical Parameters
330 Series Technical Parameters Electrical System The electrical system of this series of microscope is for universal voltage. The light bulb is 6V/20W halogen. 100V~224V power supply 50/ 60Hz Parameters Magnification -A Model: 40x-1600x -B Model: 40x-2000x -C Model: 40x-2500x Field of View Φ0.8mm~Φ4.5mm... -
Page 21: Technical Terms & Concepts
330 Series Technical Parameters Technical Terms & Concepts Total Magnification Total magnification of a microscope is calculated by the magnification of the objective multiplied by the mag- nification of the eyepieces. -Ex: (10x Eyepieces) x (4x Objective) = 40x Total Magnification... -
Page 22: Troubleshooting
330 Series Troubleshooting Common Issues Symptom Cause Remedy OPTICAL ISSUES The nosepiece if misaligned Turn the nosepiece until it clicks into place One side of the field of view is darker Stains or dust has accumulated on the condenser, Clean all lenses with lens cleaner or a lint free non-... - Page 23 330 Series Troubleshooting Common Issues (Continued) Symptom Cause Remedy OPTICAL ISSUES Image color is not correct No filter is used or filter is in use Remove color filter if natural light is desired, or insert desired filter The condenser height is not correct...
Need help?
Do you have a question about the 330 Series and is the answer not in the manual?
Questions and answers