Table of Contents
Advertisement
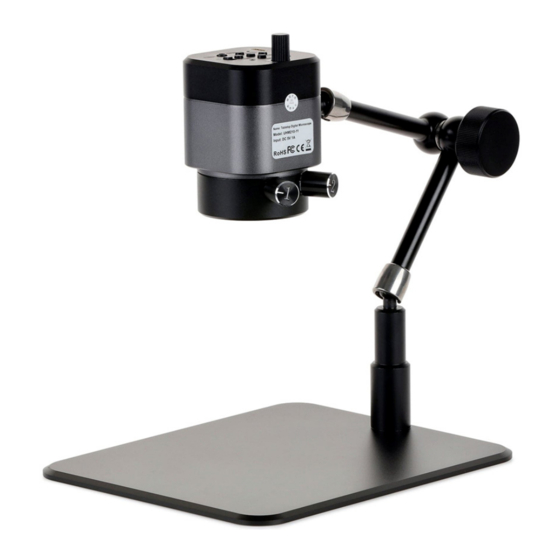
UHM210-11 Digital Microscope
Introduction
This manual applies to the UHM210-11 digital microscope. The information in this manual is provided to help you famil-
iarize yourself with the assembly and use of the products. Please read thoroughly before using the products, and keep
this manual with the product for reference.
v1.0.20220725
Advertisement
Table of Contents

Related Manuals for AmScope UHM210-11


Summary of Contents for AmScope UHM210-11
- Page 1 UHM210-11 Digital Microscope Introduction This manual applies to the UHM210-11 digital microscope. The information in this manual is provided to help you famil- iarize yourself with the assembly and use of the products. Please read thoroughly before using the products, and keep this manual with the product for reference.
- Page 2 Other indicators can be a loud buzzing sound or crackling. Contact AmScope to report such behavior. Do not use around flammable liquids or gases. Electric instruments can ignite flammable substances which could result in an explosion or fire.
-
Page 3: Table Of Contents
Contents Specifications ................................4 What’s In The Box ..............................5 The Control Panel ..............................6 Operation ................................7 Articulating Arm ..............................7 Focus ..................................8 Illumination ................................8 Operating Mode: HDMI ............................9 Recording Media ..............................9 Imaging Modes ..............................10 Photo and Video Modes .............................. - Page 4 U H M2 10 - 11 User G uide amscope.com...
-
Page 5: Specifications
Ring Light 1 18 LED Ring Light 2 13 LED Power Requirements DC 5V 900mA over USB What’s In The Box The UHM210-11 standard outfit includes: • One microscope on articulating stand • One HDMI cable • One USB cable •... -
Page 6: The Control Panel
Zoom In / Up Mode / OK / Reticle HDMI Out MicroSD Slot Direct Illumination Increase Decrease Focal Length Focal Length Menu / Freeze Wired Control Input Cature / Record Di use Illumination Power Switch Zoom Out / Down Power Indicator Light amscope.com... -
Page 7: Operation
Next loosen the locking knob until the arm joints are loose enough to easily move. Position the microscope as desired, then tighten the locking knob. Avoid extending the arm beyond the rear edge of the support plate, as this could lead to the microscope tipping over. amscope.com... -
Page 8: Focus
The knob engraved with the number 2 controls the inner ring light which provides direct illumination which is well-suited for viewing surface details such as scratches and textures. Rotate either knob clockwise to increase brightness, or counter-clockwise to decrease brightness. amscope.com... -
Page 9: Operating Mode: Hdmi
This microscope is compatible with MicroSD cards up to 128GB. In the case that a 64GB or larger card is not recognized by this device, and the formatting function does not work, it is recommended to format the card as FAT32 using a com- puter. amscope.com... -
Page 10: Imaging Modes
When the menu is open, the buttons control the following functions: Press the top button to navigate up. Press the bottom button to navigate down. Press the left button to exit the current setting or menu. Press the right button to select a menu or option. amscope.com... -
Page 11: Photo And Video Settings Menus
(red, green, blue) independently using values from 1 to 128. HDR (High Dynamic Range) compresses exposure values across the im- age to limit excess highlights and shadows. This setting can be toggled on or off. amscope.com... -
Page 12: Photo Settings Menu
This is useful to avoid camera shake, or when manipulation of the subject is needed which would require the use of your hands. Quick Review sets the amount of time an image will remain on-screen after it is captured. amscope.com... -
Page 13: Video Settings Menu
Loop Recording can be used to limit the maximum recording time to either 3, 5, or 10 minutes. After the set amount of time has lapsed during recording, video will continue to be recorded, but overwriting the previously recorded video. amscope.com... -
Page 14: Photo And Video Settings Menus
Frequency sets the capture frequency. This can be set to 50Hz or 60Hz, and should correspond to your power system’s frequency to avoid flicker. Auto Power Off can be used to automatically disable the video output after a period of inactivity. The enabled options include 30 minutes or 60 minutes. amscope.com... -
Page 15: Photo And Video Settings Menus
Format can be used to format a MicroSD card. This is necessary if the card is not already formatted, or is using an incompatible format. When this function is used, all data on the card will be deleted. amscope.com... -
Page 16: Photo And Video Settings Menus
Photo and Video Settings Menus Page 5/5 The fifth page in Photo and Video modes includes Display Time and Version. Display Time determines whether the time will be displayed on-screen. This can be toggled between on and off. Version displays the current firmware version. amscope.com... -
Page 17: Playback Mode
When the menu is open, the buttons control the following functions: Press the top button to navigate up. Press the bottom button to navigate down. Press the left button to exit the current setting or menu. Press the right button to select a menu or option. amscope.com... -
Page 18: Playback Menu
For video files, the first frame will be displayed. Select an interval op- tion (2 seconds, 5 seconds, or 8 seconds), then press the OK button to begin the slide show. The images will continue to display in a loop until the Menu button is pressed. amscope.com... -
Page 19: Operating Mode: Pc
When connected to a PC, the microscope will function as a UVC (USB Video Class) camera. It can be used by compatible Windows software such as the Camera app, or with KoPaCapture software which is available on the AmScope website on the software downloads page.
Need help?
Do you have a question about the UHM210-11 and is the answer not in the manual?
Questions and answers