
Subscribe to Our Youtube Channel
Related Manuals for AmScope T680A Series


Summary of Contents for AmScope T680A Series
- Page 1 T680A SERIES OPERATOR MANUAL (Please Read This Manual Before Using the Microscope) T680A Series Compound Microscope...
- Page 2 AmScope, and is protected by laws pertaining to such materials. This document, the information in this document and all rights thereto are the sole and exclusive property of AmScope and are not to be copied, used or disclosed to anyone, in whole or in part, without the express written permission of AmScope.
-
Page 3: Table Of Contents
T680A Series Microscope Contents BEFORE USE................................4 1. M ...............................5 ICROSCOPE ARTS 1.1 Parts Diagram..............................5 1.2 Features .................................6 2. O ................................7 PERATION 2.1 Unpacking ..............................7 2.2 Assembly ................................8 2.3 Adjusting the View ............................11 2.4 Specimen Set Up............................12 2.5 Focusing...............................13 2.6 Using the Trinocular Port ..........................14 2.7 Attaching a Camera............................14... -
Page 4: Before Use
Congratulations on the purchase of your new AmScope Microscope! This manual is designed for T680A series microscopes. Though the microscope’s camera resolution may vary depending on your series model number, the T680A series functions remain the same Please take a few minutes to familiarize yourself with the features and functions of your new microscope. -
Page 5: Microscope Parts
T680A Series Microscope 1. Microscope Parts 1.1 Parts Diagram AmScope Proprietary Page 5 of 63... -
Page 6: Features
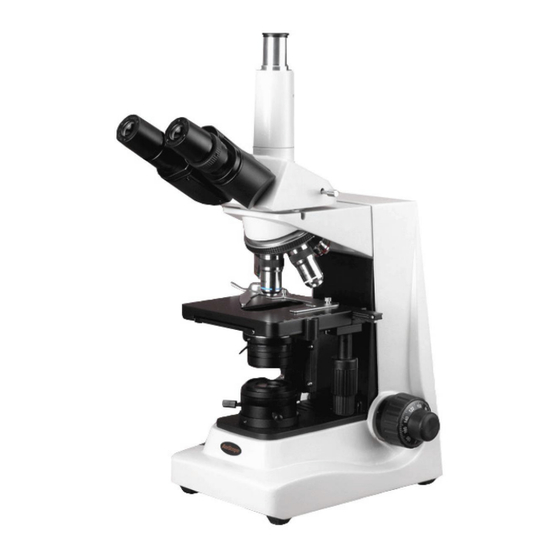
T680A Series Microscope 1.2 Features This is a brand new professional trinocular compound microscope that offers research grade performance and advanced features. It comes with five high quality objectives (4X, 10X, 20X, 40X, 100X), a Koehler illumination system, a 30 degree inclined 360 degree rotatable compensation-free trinocular head, and 3-D mechanical stage. -
Page 7: Operation
T680A Series Microscope 2. Operation 2.1 Unpacking 2.1.1 Unpack the Box 1. Very carefully slide the Styrofoam container out of the cardboard carton. 2. Lay the Styrofoam container on its side. Make sure the side labeled up is up. 3. Remove the tape. -
Page 8: Assembly
T680A Series Microscope 2.2 Assembly 2.2.1 Carefully Remove Microscope from Box Remove the microscope body from the box and remove the plastic protective covering. The body of the microscope is composed of the base, the stage, the arm, and the nosepiece. - Page 9 T680A Series Microscope 2.2.3 Install the Trinocular Port and C-Mount Unscrew and remove the photo port cap from the top side of the microscope head. Screw in the Trinocular port. If your camera has a c-mount, insert the c-mount adapter onto the Trinocular port.
- Page 10 T680A Series Microscope 2.2.5 Insert Objective Lenses Unpack the objective lenses. Screw the objectives into the microscope nosepiece. Start with the lowest magnification, and in order of magnification, insert each lens, without touching the glass. 2.2.6 Plug it in, turn it on, and adjust the dimmer if more light is needed.
-
Page 11: Adjusting The View
T680A Series Microscope 2.3 Adjusting the View 2.3.1 Choose forward or reverse viewing The microscope head rotates to allow for forward or reverse viewing. There is no difference as far as the optics; it depends on what’s comfortable. In forward position you are looking over the stage, in reverse position you are looking at the stage. -
Page 12: Specimen Set Up
T680A Series Microscope 2.4 Specimen Set Up 2.4.1 Prepare the Specimen Place the specimen to be studied on a glass slide (or use a prepared slide, purchase separately). Using a cover slip is highly recommended. 2.4.2 Secure the Slide Place the slide on the stage, holding it snugly in place with the metal slide holders (clips) of the mechanical stage. -
Page 13: Focusing
T680A Series Microscope 2.5 Focusing 2.5.1 Choose an Objective Lens Turn the nosepiece to choose an objective. It is easiest to use the lowest magnification first (4X objective) to locate and focus on the specimen. As you move up in magnification you will need to refocus the image a little each time. -
Page 14: Using The Trinocular Port
C-mount focus adjustment. You do not need an adapter to attach your AmScope camera to the Trinocular port; however you may need one if you have a non- AmScope camera. -
Page 15: Setting The Stage's Stop-Limit
T680A Series Microscope 2.8 Setting the Stage’s Stop-Limit 1. Unlock the stop-limit on the stage. 2. Adjust the stage to the desired maximum height. 3. Lock the stop-limit. This allows you to limit the movement of the stage from the bottom of the range up to the point it is set at. -
Page 16: Adjusting The Iris
T680A Series Microscope 2.11 Adjusting the Iris By changing the aperture (hole size) of the iris/diaphragm of the condenser, you can adjust the background brightness. Adjust the aperture of the iris diaphragm using the iris adjustment slider located directly under the stage. -
Page 17: Using Oil Immersion
T680A Series Microscope 2.14 Using Oil Immersion When using the 100X objective, a drop of immersion oil should be placed between the cover slip and the objective to minimize distortion caused by air. 1. Place the slide on the stage and center the specimen. - Page 18 T680A Series Microscope 6. Adjust the focusing knob, watch for the field of view to come into focus. This is best seen when the iris of the condenser is smaller than the field of the objective. Use the fine focusing knob to make adjustments.
-
Page 19: Using Darkfield Condenser Lenses (Optional Accessories)
T680A Series Microscope 2.15 Using Darkfield Condenser Lenses (Optional Accessories) Darkfield Illumination is a lighting method for increasing contrast. A darkfield condenser lens produces bright images against a dark background for low contrast biological specimens. The dry darkfield condenser is for low power magnifications, such as with the 4X, 10X or 40X objective lenses, with numeric apertures of .65 or less. -
Page 20: Using A Dry Darkfield Condenser Lens (Optional Accessory)
T680A Series Microscope 2.16 Using a Dry Darkfield Condenser Lens (Optional Accessory) 2.16.1 Using the Dry Darkfield Condenser 1. The first step is centering the condenser. Move the 10X objective lens into the light path. 2. Remove an eyepiece and look through the empty eye tube, to see the condenser’s... -
Page 21: Using Oil Darkfield Condenser Lens (Optional Accessory)
T680A Series Microscope 2.17 Using Oil Darkfield Condenser Lens (Optional Accessory) The condenser works with 100X oil objective and low power objectives (4X, 10X, etc) as well. Immersion oil is needed on top of the condenser lens for darkfield observation. - Page 22 T680A Series Microscope 2.17.2 Using Oil Immersion 1. Before you install the oil darkfield condenser lens, apply a drop of immersion oil on the top lens of condenser. If you’ve already installed it, remove the condenser to apply the drop of oil to the lens, and re-install it.
- Page 23 T680A Series Microscope 2.17.3 Cleaning the Oil Darkfield Condenser 1. When using oil immersion, once you have finished using the oil darkfield lens, you will need to clean the lens and specimen of the oil before it dries. 2. You can wipe the lens with a soft nonabrasive cloth to remove the oil. If you want to use a cleaner, you can use cigarette lighter fluid to safely remove the oil, as it will break it down.
-
Page 24: Using A Phase Contrast Kit (Optional Accessory)
T680A Series Microscope 2.18 Using a Phase Contrast Kit (Optional Accessory) Brightfield Phase Contrast Some specimens may offer little in the way of color-variance or opacity and can appear essentially invisible when using basic, transmitted light. Phase-contrast is a technique used in microscopy to enhance the contrast of an image, when observing a specimen which offers little contrast in normal bright-field conditions. - Page 25 T680A Series Microscope As waves of light move through space, if their cycles move in a perfect parallel and are at the same point in their cycles, they are in- phase. If some of the light waves hit an obstacle and the phases...
- Page 26 T680A Series Microscope A phase contrast system incorporates two components to segregate light, so out-of- phase waves can be realigned. The two components are the annulus in the condenser and the phase ring in the objective lens. The condenser’s annulus separates light into surround light and diffracted light.
- Page 27 AmScope’s PCT Turret Phase Contrast Kit includes four phase-contrast objective lenses, a condenser turret, and a centering telescope. The turret has built-in annuli, designed to work with each of the lenses, as well as a brightfield iris.
-
Page 28: Using A Simple Phase Contrast Kit (Optional Accessory)
T680A Series Microscope 2.19 Using a Simple Phase Contrast Kit (Optional Accessory) 2.19.1 Unpacking the Simple Phase Contrast Kit 1. Take the aluminum case containing your kit out of the cardboard carton. Remove the tape and open the container carefully so as to avoid dropping and damaging the optical items. - Page 29 T680A Series Microscope 2.19.2 Focus the Specimen 1. Once you have installed the phase contrast kit, you will need to calibrate and center the light perfectly for optimal results. You will initially calibrate with the Abbe brightfield condenser. 2. Place a slide on the microscope stage.
- Page 30 T680A Series Microscope 4. Change the objective lens to the 10X phase contrast lens. Objective lenses designed for phase contrast will be marked “Ph”, this denotes the objective lens has a built-in phase ring. Note: there are 3 phase contrast objectives: 10X, 40X and 100X, and there are 3 condenser ring plates: 10X, 40X and 100X.
- Page 31 T680A Series Microscope 4. If the bright ring is still obscure, raise or lower the condenser by adjusting the condenser focusing knob (or the microscope focusing knob if necessary) until the bright ring is in focus and the dark ring is visible.
- Page 32 T680A Series Microscope 2.19.5 Perform the Phase Contrast Observation After you center the condenser, you can perform the phase contrast observation the same way as a normal brightfield microscope. Note: When changing to another phase contrast objective and corresponding condenser ring plate, the focusing and centering of bright ring and dark ring should be repeated following the procedures above.
-
Page 33: Using A Turret Phase Contrast Kit (Optional Accessory)
T680A Series Microscope 2.20 Using a Turret Phase Contrast Kit (Optional Accessory) 2.20.1 Unpacking the Turret Phase Contrast Kit 1. Take the aluminum case containing your kit out of the cardboard carton. Remove the tape and open the container carefully so as to avoid dropping and damaging the optical items. - Page 34 T680A Series Microscope 2.20.2 Installing the Turret Phase Contrast Kit 1. Loosen the lock screws and remove the Abbe brightfield condenser from the holder. 2. Insert the phase contrast condenser turret into the condenser holder and tighten the lock screw with the screw driver. Due to the weight of the turret, it’s best to use the screw driver to securely fasten the turret to the condenser...
- Page 35 T680A Series Microscope 2. Place a slide on the microscope stage. Make sure the specimen is covered with a cover slip (a good example for a phase contrast specimen is human saliva). Clean any excess material from the slide. 3. Turn the phase contrast condenser’s turret to the B setting. Focus the specimen.
- Page 36 T680A Series Microscope 3. While looking through the telescope lens, extend the eyepiece by rotating the top counter clockwise. 4. Keep rotating the telescope lens until an image of the objective’s phase ring and the condenser’s annulus are clearly in focus.
- Page 37 T680A Series Microscope 2.20.5 Perform the Phase Contrast Observation After you center the ring plate, you can perform the phase contrast observation the same way as a normal brightfield microscope. Note: When changing to another phase contrast objective and corresponding condenser ring plate, the focusing and centering of bright ring and dark ring should be repeated following the procedures above.
-
Page 38: Microscope Maintenance
T680A Series Microscope 2.21 Microscope Maintenance 2.21.1 Handle with Care As the microscope and all accessories are precision instruments, always handle them with care, avoiding impact or abrupt movement during transportation. Do not shake the package. 2.21.2 No Sun/Heat Do not place the microscope and accessories in direct sunlight or in high heat. -
Page 39: Darkfield Condenser Kit & Phase Contrast Kit Maintenance
T680A Series Microscope 2.21.8 Do not take apart the microscope. Do not assemble or disassemble the microscope’s electrical components yourself. 2.22 Darkfield Condenser Kit & Phase Contrast Kit Maintenance 2.22.1 Secure Setting Ensure that the microscope is located on a smooth, level and firm surface. -
Page 40: General Specifications
T680A Series Microscope 3. General Specifications 3.1 Features FEATURE SPECIFICATION Optical System Infinity corrected Nosepiece Reversed, ball bearing quintuple Head Anti-mould trinocular head, 30-degree inclined Eyepiece WF10X & P16X Achromatic Objectives 4X, 10X, 20X, 40X (spring), 100X (spring, oil) Focusing... -
Page 41: Eyepieces
T680A Series Microscope 3.3 Eyepieces Eyepieces Magnification Field of View Φ18 Φ18 Φ13 Φ15 Φ11 Φ9 3.4 Cameras MODEL T680A-3M T680A-5M T680A-9M Aptina MT9T001 Aptina MT9P001 Sensor CMOS (color) CMOS (color) Aptina Special 1/2“ (6.55mm(H) x 1/2.5" (5.70mm(H) x 1/2.4" (5.825mm(H) x 4.92mm(V), diagonal... -
Page 42: Darkfield Condensers
T680A Series Microscope 3.5 Darkfield Condensers Darkfield Darkfield SPECIFICATIONS Condenser Condenser Model DK-DRY100 DK-OIL100 Numerical Aperture (N.A.) Rating 0.7 – 0.9 1.36 – 1.25 Mounting Size (Diameter) 37mm 37mm 3.6 Phase Contrast Kits Simple Phase Contrast Turret Phase Contrast SPECIFICATIONS Model Achromatic 10X/0.25, 160/0.17... -
Page 43: Parameters
T680A Series Microscope 4. Parameters 4.1 Electrical System 110V/220V, CE certified 4.2 Microscope Parameters Magnification 10x-2500x Field of View Φ0.8mm~Φ4.5mm Mechanical Tube Length 160mm Object to Primary Image Distance 195mm Fine Focusing Sensitivity 0.002mm 4.3 Camera Parameters Ø Operating System: Windows XP/Vista/7/8 (32 & 64 bit), Mac OS X, Linux Ø... -
Page 44: Recommended Accessories
T680A Series Microscope 5. Recommended Accessories (Purchase separately. Please visit www.amscope.com and search with SKU #, for more information.) 5.1 Eyepieces 5X Eyepieces 20X Eyepieces 25X Eyepieces SKU: EP5X23 SKU: EP20X23 SKU: EP25X23 10X w/ Pointer 10X w/ Reticle SKU: EP10X23P SKU: EP10X23R 5.2 Darkfield Condensers... -
Page 45: Objective Lenses
T680A Series Microscope 5.3 Objective Lenses Achromatic SKU: A2X SKU: A5X SKU: A20X SKU: A60X Plan Achromatic Plan 4X Plan 10X Plan 40X Plan 100X SKU: PA4X SKU: PA10X SKU: PA40X SKU: PA100X 5.4 Phase Contrast Kits Simple Turret SKU: PCS... -
Page 46: Cameras And Accessories
T680A Series Microscope 5.5 Cameras and Accessories Cameras To capture images, video, or view live display on a computer (PC/Mac OS X). Real- Time Live Video Microscope Digital Camera, Reduction Lens, High Sensitivity Sensor and Deluxe Calibration Kit. 350K 1.3 Mega... -
Page 47: Fuses
T680A Series Microscope 5.6 Fuses Fuses For Microscopes SKU: FS-M T1AL 220V 5.7 Slides Prepared 25 Slides 50 Slides 100 Slides 200 Slides SKU: PS25W SKU: PS50 SKU: PS100A SKU: PS200 Blank 50 Blank Slides 100 Blank Slides 144 Blank Slides... -
Page 48: Troubleshooting
T680A Series Microscope 6. Troubleshooting 6.1 Optical Issues SYMPTOM SYMPTOM CAUSE REMEDY OPTICAL ISSUES Turn the nosepiece until it clicks into The nosepiece is misaligned. place. One side of the field of view is Stains, dust, or dirt has darker... -
Page 49: Mechanical Issues
T680A Series Microscope SYMPTOM CAUSE REMEDY OPTICAL ISSUES Secure the slide to the stage with One side of the field of The specimen slide is not fixed. clips. view is dark or the image The nosepiece is not in the right... -
Page 50: Electrical Issues
T680A Series Microscope 6.3 Electrical Issues SYMPTOM CAUSE REMEDY ELECTRICAL ISSUES Replace the bulb. This unit uses our BH- The bulb/light source The bulb is close to 6V20W with our 20w unit or our BH- flickers. burning out. 6V30W for the 30W unit. -
Page 51: General Microscopy Guide
7. General Microscopy Guide Microscopes come in a wide variety of types with many different features. Each AmScope model is designed for specific uses and specific users. This glossary will help illustrate what the variations mean and why they are useful. - Page 52 T680A Series Microscope Base Lens Base lenses direct the light source towards the specimen. Binocular Head-Rotating A rotating binocular head is designed for maximum flexibility in viewing options. Binocular microscope heads allow for the easy adjustment of the interpupillary distance (the distance between the eyes), by moving the eyepieces toward or away from each other.
- Page 53 T680A Series Microscope Condenser Lens Adjustment Knob The Condenser Lens Adjustment Knob changes the distance between the light condenser and the base lens. This allows you to control the concentration of the light hitting your slide. Darkfield Condenser Lens A darkfield condenser lens produces bright images against a dark background for low contrast biological specimens.
- Page 54 T680A Series Microscope Diopter Small ring on the eyetube, used to focus ocular lenses (eyepieces). Eye Guards Eye Guards fit over the eyepieces, they are for comfort and to protect the glass in the eyepiece. Eyepieces Eyepieces are also called ocular lenses. Eyepieces come in many magnifications and you replace them by swapping them out of the eyetubes.
- Page 55 T680A Series Microscope Field of View and Working Distance Field of view is how much of the specimen you can see through the eyepiece. The linear field of view of the eyepiece is divided by the magnification of the objective.
- Page 56 T680A Series Microscope Head Types Monocular Monocular microscope heads have one eyepiece. Binocular Binocular microscope heads have two eyepieces. Trinocular Trinocular microscope heads have two eyepieces and a photo port for a camera. This allows you to look at a specimen with a camera without removing an eyepiece.
- Page 57 Interpupillary Distance Interpupillary Distance is the distance between your eyes. AmScope uses 2 types of systems to change interpupillary distance. Siedentopf heads adjust the interpupillary distance by rotating the eyetubes around a central axis.
- Page 58 When changing light bulbs cover skin with cloth or paper to handle the bulb. This will protect both you and the bulb. 3. Hot bulbs will not damage the microscope. AmScope’s microscopes are designed specifically to handle the heat output of the model’s bulb.
- Page 59 T680A Series Microscope Limit Stop Knob The limit stop is designed to prevent impact between objective and slide. You may loosen the limit-stop knob in order to give yourself the full range of motion for fine tuning the focus when using the 40X and 100X objective lenses.
- Page 60 T680A Series Microscope Nosepiece This circular structure is where the different objective lenses are screwed in. To change the magnification power, rotate the turret. Numerical Aperture (N.A.) N.A. is a rating for the resolution of the objective lens. The N.A. rating ranks the objective lens’...
- Page 61 T680A Series Microscope Phase Contrast Many biological specimens are virtually transparent when viewed with a typical compound microscope. Phase contrast microscopy is a method that collects light from specific incidents (phases) of light only to allow better contrast in viewing transparent specimens.
- Page 62 T680A Series Microscope Phase Contrast Objective A specific objective with a ring printed on it that is used for phase contrast. The objective is the bottom lens that determines the resolution of the image in the microscope, and is one of the two lenses that compound to make total magnification.
- Page 63 T680A Series Microscope Tension Knob The large, innermost ring on the focusing knob. Adjusts the tension of the focusing knobs. Trinocular Port A trinocular microscope has three viewing ports. There are two eyepieces and a third port for photography and video.
Need help?
Do you have a question about the T680A Series and is the answer not in the manual?
Questions and answers