Subscribe to Our Youtube Channel
Summary of Contents for Torklift D2140
- Page 1 IMPORTANT OWNER-OPERATOR INSTALLATION INSTRUCTIONS D2140 - Front Tie Down Kit Version Number: 4, Date: 5/12/2021 By: CW TECH SUPPORT (800) 246-8132 pg. 1 COPYRIGHT© 2021, By Torklift International, Inc. All rights reserved.
- Page 2 Warnings Truck Bed and Camper Protection Torklift does not recommend installing your camper on top of a plastic bed liner (or other compressible material such as foam). These materials can act as a spring, causing increased vertical truck camper movement independent of the vehicle.
-
Page 3: Parts Inventory
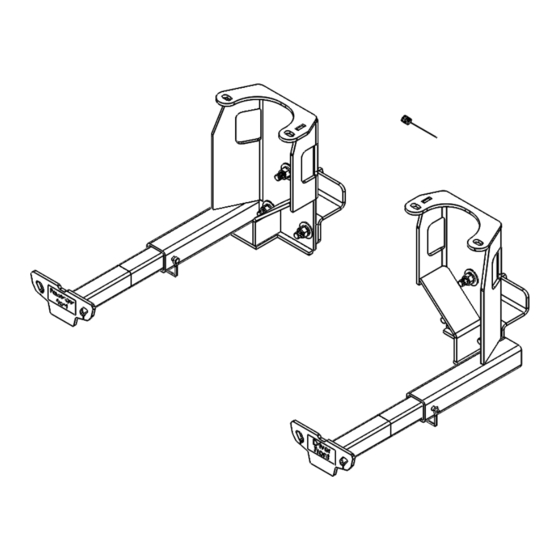
Part # Driver Side Tie Down D2140-W1-D Receiver Passenger Side Tie Down D2140-W1-P Receiver TD-INS-MS- Tie Down Insert D2140-W2 D2140-W2 Tie Down Snapper Pin 1452 ½” Bolt Fisher 3818 pg. 3 COPYRIGHT© 2021, By Torklift International, Inc. All rights reserved. - Page 4 1/2" - USS - Flat Washer 6039 1/2" - Split Lock Washer 9302 1/2"-13 - Hex Nut - Grade 8 1751 Sticker - Driver Front 3844 Sticker - Driver Passenger 3845 pg. 4 COPYRIGHT© 2021, By Torklift International, Inc. All rights reserved.
- Page 5 See Figure 2.1 & 2.2. Remove the cable from the coupler shown in Figure 2.3. To release the cable, push forward and remove from bracket. See figure 2.3 pg. 5 COPYRIGHT© 2021, By Torklift International, Inc. All rights reserved.
- Page 6 Figure 2.1 Figure 2.2 Loosen Nut Figure 2.3 Push Cable Forward to Release Figure 2.4 Pinch Both Tabs to Release Cabe from Bracket pg. 6 COPYRIGHT© 2021, By Torklift International, Inc. All rights reserved.
- Page 7 See figure 2.4 & 2.5 & 2.6. Figure 2.5 Shown in Figure 2.6 Pinch Both Tabs to Release Cabe from Bracket Figure 2.6 Pry One Tab Open pg. 7 COPYRIGHT© 2021, By Torklift International, Inc. All rights reserved.
- Page 8 Align the two holes on the tie down with studs in frame. Reinstall the factory nuts removed on Step 1: Torque to 25ft-lbs See Figure 4.1 & 4.2. pg. 8 COPYRIGHT© 2021, By Torklift International, Inc. All rights reserved.
- Page 9 Figure 4.1 Figure 4.2 pg. 9 COPYRIGHT© 2021, By Torklift International, Inc. All rights reserved.
- Page 10 1/2” x 1-3/4” bolts, flat washers through the clamp with the bolts facing outward. Secure the clamp using a flat washer, lock washer and a nut. Torque all 1/2” hardware to 75ft-lbs. See Figure 6.1 & 6.2. pg. 10 COPYRIGHT© 2021, By Torklift International, Inc. All rights reserved.
- Page 11 Figure 6.1 Figure 6.2 pg. 11 COPYRIGHT© 2021, By Torklift International, Inc. All rights reserved.
- Page 12 Refer to previous steps. Install the parking brake tensioner nut in approximately where it was before removal. Test Emergency brake for proper operation, adjust the nut if necessary. Repeat steps 1,3,5 & 6 on the passenger side. pg. 12 COPYRIGHT© 2021, By Torklift International, Inc. All rights reserved.
- Page 13 This is to account for road debris, as well as aid in installation and removal. Some rattle may be expected if the inserts are left installed while not under load from the camper. Installation is complete. pg. 13 COPYRIGHT© 2021, By Torklift International, Inc. All rights reserved.
- Page 14 Some states do not allow the exclusion or limitation of incidental or consequential damages, so the above limitation or exclusion may not apply to you. Any damage to Torklift products as a result of misuse, abuse, neglect, accident, improper installation or any use violation of instructions furnished by Torklift or WHEN USED IN ANY COMMERCIAL APPLICATION WILL VOID THE WARRANTY.
- Page 15 To Fax: Send copies of the questionnaire, warranty card and receipt to 253-854-8003 To E-mail: Send copies of the questionnaire, warranty card and receipt to warranty@torklift.com To Mail: Send to Torklift International 322 Railroad Ave North, Kent, WA 98032 pg. 15 COPYRIGHT© 2021, By Torklift International, Inc. All rights reserved.
- Page 16 OFFICIAL WARRANTY REGISTATION CARD 322 Railroad Ave North, Kent, Wa 98032 Please fill out this form completely and return to Torklift within 30 days of purchase accompanied by a copy of your original receipt pg. 16 COPYRIGHT© 2021, By Torklift International, Inc. All rights reserved.


Need help?
Do you have a question about the D2140 and is the answer not in the manual?
Questions and answers