Table of Contents
Advertisement
Quick Links
Doc. 10.182.00
2023 RAV4/HV
TOUCH KEYPAD (TKP)
Year & Model:
Part Number:
Accessory Code:
PIO / DIO:
Business Partner:
Conflicts
Note: Japan CBU (4530, 4450) & All Plug-In Hybrid Rav4
Prime Models
General Applicability
Fits Models:
1.
All Models
2.
3.
Additional Items Required For
Installation
Item #
Description:
1
(62217-24050) (2) A-Pillar Clips Needed
2
Sequence of Application
Item #
Accessory:
1
N/A
2
SPECIAL NOTE: Installation Sequences
After TMS & Safety mandated preparatory steps have
been taken, the installation sequence is the suggested
method for completing the accessory installation. In some
instances the suggested sequence is written for one
associate to install & in others the sequence is given as
part of a team accessory installation. Unless otherwise
stated in the document, the associates may perform the
installation steps in any order to make the installation as
efficient as possible while maintaining consistent quality.
Southeast Toyota Distributors, LLC
2023 RAV4/HV
00016-00506, 00016-00606
KP1000, KP2000,
PIO & DIO
J56
Ver. 1
Southeast Toyota Distributors, LLC
Accessory Installation Instructions
Recommended Tools
Safety Items
Safety Glasses
Special Tools
Backhousing Alignment Tool
Temperature probe /Heat Gun
Installation Tools
Heat Source
Moulding Remover
Ratchet/Driver
Socket (10mm)
Masking Tape
Roller
Padded Work Surface
Special Chemicals
VPC Approved Cleaner
Note: Japan CBU (4530, 4450) & All Plug-In HV Rav4 Prime Models.
Legend
Page 1 of 52
11/30/2022
Safety Gloves
Windshield QC Scale
For Temperatures under 50°F
Pliers
Side Cutters
Torque Wrench (48 in*lbs)
Small Flat Head (Taped)
Felt Block
Protective Blanket
Advertisement
Table of Contents

Related Manuals for Toyota KP1000


Summary of Contents for Toyota KP1000
-
Page 1: Preparation
Doc. 10.182.00 Ver. 1 11/30/2022 Southeast Toyota Distributors, LLC Accessory Installation Instructions 2023 RAV4/HV TOUCH KEYPAD (TKP) Recommended Tools Safety Items Year & Model: 2023 RAV4/HV Safety Gloves Safety Glasses Part Number: 00016-00506, 00016-00606 Accessory Code: Special Tools KP1000, KP2000, PIO / DIO: PIO &... -
Page 2: History Of Revisions
TOYOTA RAV4 TOUCH KEYPAD Document History Revisions Version Date Description of Changes Made Document Published as 2023 11/30/2022 Southeast Toyota Distributors, LLC Page 2 of 52... -
Page 3: Table Of Contents
TOYOTA RAV4 TOUCH KEYPAD Table of Contents Preparation…………..…………………………..............1-6 History of Revisions........................2 b. Table of Contents…………..…………………………............3 c. Kit/Hardware & Wire Harness Bag Contents…………………………………………..…..4 d. Parts for Installation………………………………………………………………………. 5 e. Service & Warranty Information …………………………………………………………. .6 Procedures a. Battery Removal……………………………………………………………….....…7-9 b. Vehicle Disassembly – Installation Process…………………………………………….10-43 b. -
Page 4: Kit/Hardware & Wire Harness Bag Contents
Installation Tool Kit 00016-00606-DK 00016-00506-DL DIO - Touch Key Pad Kit 00016-00606-DL 00016-00506-BS DIO-X10 Stickers 00016-00605-BP Description Item 1. Installation Tool Kit DIO-Touch Key Pad Kit DIO-X10 Stickers Item 3. Item 2. Southeast Toyota Distributors, LLC. Page 4 of 42... -
Page 5: Parts For Installation
TOYOTA RAV4 TOUCH KEYPAD Parts for Installation: Care must be taken when installing this accessory to ensure damage does not occur to the vehicle. The installation of this accessory should follow approved guidelines to ensure a quality installation. These guidelines can be found in the “Accessory Installation Practices” document. -
Page 6: Service & Warranty Information
Service & Warranty Information: If you are a dealer located outside of the Southeast Region, please contact the SET Accessory Warranty Department at (888) 851-2722 or email Accessory.Warranty@SEToyota.com for claim payment instructions. Image: Southeast Toyota Distributors, LLC Page 6 of... -
Page 7: Battery Removal
TOYOTA RAV4 TOUCH KEYPAD 1. DISCONNECT BATTERY GAS VEHICLES Prepare for the Installation: (a) The engine components and coolant may be hot. (b) Check the kit for contents and any damage. (c) Protect the fender. Note: For Gas vehicles, the battery is in the engine compartment. - Page 8 TOYOTA RAV4 TOUCH KEYPAD 2. DISCONNECT BATTERY HYBRID VEHICLES After turning the power switch off, waiting time may be required before disconnecting the cable from the negative (-) auxiliary battery terminal. Wait at least 90 seconds after disconnecting the cable from the negative (-) battery terminal to disable the SRS system.
- Page 9 TOYOTA RAV4 TOUCH KEYPAD (c) Detach the 12 claws and remove the battery hole cover. Figure 4. Figure 4 Use 10mm socket. (c) Loosen the 10mm nut and disconnect the cable from the negative (-) auxiliary battery terminal. Figure 5.
-
Page 10: Vehicle Disassembly- Installation Process
TOYOTA RAV4 TOUCH KEYPAD VEHICLE DISASSEMBLY- INSTALLATION PROCESS Place a protective blanket in the front foot-well area. 3. REMOVE FRONT DOOR SCUFF PLATE LH (a) Place your hand at the position shown in the illustration and pull in the removal direction to detach the claw and guide. - Page 11 TOYOTA RAV4 TOUCH KEYPAD 4. REMOVE COWL SIDE TRIM BOARD (a) Remove the cap nut. Figure 8. Figure 8 (b) Detach the clip and guide and remove the cowl side trim board LH. Figure 9. Figure 9 Page 11 of 52...
- Page 12 TOYOTA RAV4 TOUCH KEYPAD 5. REMOVE FRONT DOOR OPENING TRIM WEATHERSTRIP LH (a) Remove the front door opening trim weatherstrip LH along the A-pillar. Figure Figure 10 6. REMOVE FRONT PILLAR GARNISH (a) Place your hand at the position shown in...
- Page 13 TOYOTA RAV4 TOUCH KEYPAD (b) Push in the release lever with your finger and remove the front pillar garnish clip from the vehicle or cut with side cutters. Figure 12. (c) Do not re-use the front pillar garnish clip. Part Number 62217-42050...
- Page 14 TOYOTA RAV4 TOUCH KEYPAD (e) Push in the release lever with your finger and remove the second front pillar garnish clip from the vehicle or cut with side cutters. Figure 14. Do not re-use the front pillar garnish clip Part Number 62217-42050...
- Page 15 TOYOTA RAV4 TOUCH KEYPAD (g) For 9 speakers: (1) Disconnect the connector. Figure 16. Figure 16 7. REMOVE INSTRUMENT SIDE PANEL LH (a) Place your hand at the position shown in the illustration and pull in the direction indicated by the arrow to detach the clip.
- Page 16 TOYOTA RAV4 TOUCH KEYPAD (b) Pull in the direction indicated by the arrow shown in the illustration to detach the guide and remove the instrument side panel LH. Figure 18. Figure 18 Note: Step 8-11 are Optional Steps 8. REMOVE NO. 1 INSTRUMENT...
- Page 17 TOYOTA RAV4 TOUCH KEYPAD (b) Detach the claw and guide and lower the No. 1 instrument panel under cover sub- assembly in the direction of the arrow shown in the illustration. Figure 20. Figure 20 (c) With Footlight: (1) Disconnect the connector and detach the clamp.
- Page 18 TOYOTA RAV4 TOUCH KEYPAD (d) Without the Footlight: (1) Detach the claw and remove the DLC3. Figure 22. HINT: Even if there is no foot light, if there is a connector, disconnect the connector and detach the clamp. Figure 22...
- Page 19 TOYOTA RAV4 TOUCH KEYPAD 9. REMOVE HOOD LOCK CONTROL LEVER SUB-ASSEMBLY (a) Detach the claw in the direction (1) indicated by the arrow shown in the illustration. (b) Detach the guide in the direction (2) indicated by the arrow shown in the illustration and remove the hood lock control lever sub-assembly.
- Page 20 TOYOTA RAV4 TOUCH KEYPAD 11. REMOVE FUSE BOX OPENING COVER (a) Remove Bolt <B>. Figure 26. Figure 26 (b) Pull in the direction indicated by the arrow to detach the clip. Figure 27. Figure 27 Page 20 of 52...
- Page 21 TOYOTA RAV4 TOUCH KEYPAD (c) Disconnect each connector. (d) Detach the clamp and remove the fuse box opening cover. Figure 28. (e) For HV model, disconnect the connector. Figure 28 Page 21 of 52...
- Page 22 TOYOTA RAV4 TOUCH KEYPAD T-TAP INSTALLATION When installing the female T-Tap connectors, be sure the wire is located inside the wire channel of the female T-Tap connector before closing the connector over the wire with pliers. Step 1 Step 2...
- Page 23 TOYOTA RAV4 TOUCH KEYPAD CONNECTOR JN1: Front Door Wire LH and No. 2 Floor Wire (Left Kick Panel) Location: Lower driver’s side kick panel area TKP HARNESS VEHICLE T-TAP Yellow - Ignition Light Green Front Door Wire LH and No. 2 Floor Wire...
- Page 24 TOYOTA RAV4 TOUCH KEYPAD TKP VEHICLE HARNESS CONNECTOR P1 & P2: TKP Vehicle Harness Male Blade Connector P1 RED (5x) VEHICLE WIRE HARNESS COLOR POWER PINK LOCK LIGHT BLUE UNLOCK WHITE YELLOW GROUND BLACK Female Molex 5-pin Connector P2 BLACK...
- Page 25 TOYOTA RAV4 TOUCH KEYPAD 12. LOCATE CONNECTOR JG3 IN THE LOWER DRIVER’S SIDE KICK PANEL AREA (Cowl Side Panel LH) (a) Disconnect connector JG3 (WHITE 18-pin). Figure 29. Figure 29 change to JG3 13. LOCATE LOCK & UNLOCK WIRES IN CONNECTOR JG3 (a) Disconnect the JG3 connector.
- Page 26 TOYOTA RAV4 TOUCH KEYPAD 14. T-TAP LOCK & UNLOCK WIRES IN CONNECTOR JG3 (a) T-Tap the LIGHT GREEN lock wire (Pin #12) with the supplied RED T-tap. (b) T-Tap the GRAY unlock wire (Pin #16) with the supplied RED T-tap. Figure 31.
- Page 27 TOYOTA RAV4 TOUCH KEYPAD 16. LOCATE REMOTE MIRROR WIRE IN CONNECTOR JN1 (a) Pull back the protective tape to expose at least 2” of the wires behind the connector. (b) Separate the REMOTE MIRROR wire (Pin #9 / Color LIGHT GREEN) from the bundle.
- Page 28 TOYOTA RAV4 TOUCH KEYPAD 18. ROUTE TKP VEHICLE HARNESS TO A-PILLAR (a) Hold the TKP Vehicle Harness with the Female Molex 5-pin Connector P2 oriented up towards the A-pillar. (b) From the lower driver’s side kick panel area, route the TKP Vehicle Harness upwards...
- Page 29 TOYOTA RAV4 TOUCH KEYPAD (c) The TKP Vehicle Harness should route up to the A-pillar through the opening at the LH dash upper surface as shown. Figure 36. Figure 36 Page 29 of 52...
- Page 30 TOYOTA RAV4 TOUCH KEYPAD (d) Route the TKP Vehicle Harness downwards behind the metal dash support brace as shown. Figure 37. Figure 37 Page 30 of 52...
- Page 31 TOYOTA RAV4 TOUCH KEYPAD (e) Route the TKP Vehicle Harness downwards to the driver’s side kick panel area behind the metal tubular dash support brace as shown. Figure 38. Figure 38 Use one (1) 8” zip tie. 19. SECURE THE TKP VEHICLE...
- Page 32 TOYOTA RAV4 TOUCH KEYPAD Before connecting, make sure the TKP Vehicle Harness’ male blade connectors P1 are not bent to one side to ensure they insert securely into their corresponding female T- Tap connectors. 20. CONNECT THE LOCK & UNLOCK...
- Page 33 TOYOTA RAV4 TOUCH KEYPAD 21. CONNECT THE REMOTE MIRROR WIRE IN CONNECTOR JN1 TO THE TKP VEHICLE HARNESS MALE BLADE CONNECTOR P1 (a) Connect the male blade connector of the TKP Vehicle Harness’ YELLOW wire to the JN1 connector’s LIGHT GREEN remote mirror wire T-tap (Pin 9).
- Page 34 TOYOTA RAV4 TOUCH KEYPAD Use two (2) 8” zip ties. 24. SECURE THE DLC POWER & GROUND JUMPER WIRES (a) Secure the DLC Power & Ground Jumper wires with two (2) of the supplied 8” zip ties to the factory wire harness as shown.
- Page 35 Contrasting-uniform line the length of the label -/= Ghosting on solid black 2.5mm from the edge of the tape. Out tape Note: Inspection Items 5, 6, and 7 Can Not be combined on the label. Acceptable Examples Southeast Toyota Distributors, LLC. Page 35 of 52...
- Page 36 D: Adhesive Tack Point D: Adhesive Tack Point F: Vertical Backhousing Alignment G: Label Edge Imperfection H: Ghosting/Contrasting- un-uniform line the length of the label -/= 2.5mm from the edge of the tape. Southeast Toyota Distributors, LLC. Page 36 of 52...
- Page 37 TOYOTA RAV4 TOUCH KEYPAD Note: Accessory and vehicle windshield surface must be at least 50°F at time of installation. Use magnetic Windshield QC Scale. Clean the roof panel directly above the windshield to prevent scratches from the magnetic Windshield QC Scale.
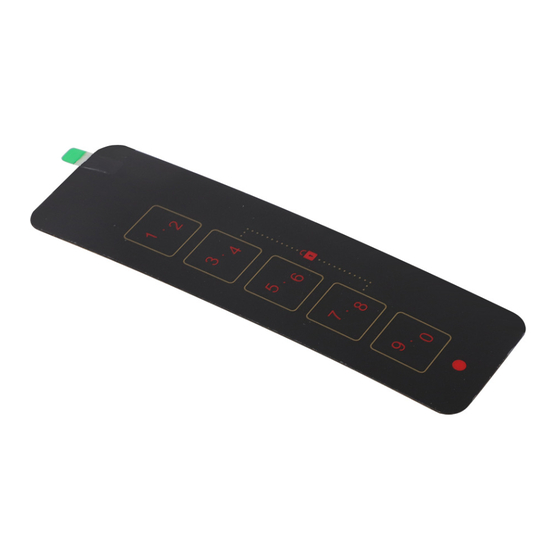
- Page 38 TOYOTA RAV4 TOUCH KEYPAD 26. AFFIX THE KEYPAD BUTTON GRAPHIC STICKER TO THE INSIDE OF THE WINDSHIELD Use Masking Tape. Make sure the inside windshield mounting location for the TKP Back housing is clean. Refer to page 34 and 35 for QA Standards before affixing the Graphic Sticker to the inside of the windshield.
- Page 39 Button Sticker does not meet criteria, remove Button Sticker and re-apply new one that meets specification. (k) Using the bottom BLACK pull tab, remove the protective film from the backside of the Button Sticker. Figure 49 Southeast Toyota Distributors, LLC. Page 39 of 52...
- Page 40 TOYOTA RAV4 TOUCH KEYPAD 27. AFFIX THE TKP BACKHOUSING TO THE KEYPAD BUTTON GRAPHIC STICKER Use the Backhousing Alignment tool. Keep the LED light surface of the TKP Backhousing clean by only handling the sides. (a) Place the TKP Backhousing into the Alignment Tool as shown.
- Page 41 TOYOTA RAV4 TOUCH KEYPAD (c) Place the Alignment Tool & TKP Backhousing assembly against the windshield next to the Button Sticker to the lower RH side as shown. Figure 51. Keep the assembly pressed firmly against the windshield during the following steps.
- Page 42 TOYOTA RAV4 TOUCH KEYPAD (g) Using your thumb, press at three or four points along the Backhousing against the Button Sticker to firmly set it. Do not press the Program Button. Use the Roller. (h) Firmly press the Roller along the...
- Page 43 TOYOTA RAV4 TOUCH KEYPAD 28. SECURE THE TKP VEHICLE HARNESS MOLEX 5-PIN CONNECTORS (a) Route the TKP Molex (male) connector on the Backhousing pigtail around the back of the factory harness and pull the Backhousing pigtail down snugly. (b) Connect the TKP Molex (male)
-
Page 44: Interior Panels And Trim - Installation Process
TOYOTA RAV4 TOUCH KEYPAD Insert the guide in the direction indicated by the arrow shown in the illustration. Push in the direction indicated by the arrow shown in the illustration to attach the clip to install the front pillar garnish LH. See Figure 55. -
Page 45: Re-Install Battery
TOYOTA RAV4 TOUCH KEYPAD RE-INSTALL BATTERY Use 10mm socket & torque wrench. 31. Reconnect the negative battery cable. Figure 56. Torque: 48 in•lbs [5.4 N•m] Caution: DO NOT touch the positive terminal. Figure 56 When disconnecting the cable, some systems need to be initialized after the cable is reconnected. -
Page 46: Function And Quality Checks
TOYOTA RAV4 TOUCH KEYPAD TOUCH KEYPAD FUNCTION AND QUALITY CHECK CHECKLIST - these points MUST be checked to ensure a quality installation. ACCESSORY FUNCTION CHECK: LOOK FOR: TKP FUNCTION CHECK: With Keys out of the vehicle and the 1) First Time Use Driver Side window in the down a. -
Page 47: Warranty Statement
TOYOTA RAV4 TOUCH KEYPAD 4) Unlock Driver’s Door a. Using multiple finger tips, touch any of the digit buttons to wake up the Keypad. b. Enter the 5-digit Access Code 1-3-5-7-9. c. Confirmation LED flashes with each accepted digit entry. -
Page 48: Diagnostic / Block Diagrams & Connector Procedures
TOYOTA RAV4 TOUCH KEYPAD Connects to Connects to Connects to Connects to Connects to DLC Pin 16 JG3 Pin 12 JG3 Pin 16 JN1 Pin 9 DLC Pin 4 POWER ACC/IGN GROUND LOCK UNLOCK Molex 5-pin Connector PN 00016-00506 Touch Keypad... - Page 49 TOYOTA RAV4 TOUCH KEYPAD Connector JG3 Pin 12 LOCK Wire Test Reference Proper Operation Color Pin 12 to Ground 12-14VDC Pin 16 UNLOCK Wire Test Reference Proper Operation Color Pin 16 to Ground 12-14VDC Connector JN1 Pin 9 IGNITION Wire...
- Page 50 TOYOTA RAV4 TOUCH KEYPAD DLC Jumper Pin 4 GROUND Wire Test Reference Proper Operation Color Pin 4 to Ground 0VDC Pin 16 POWER Wire Test Reference Proper Operation Color Approximately 0VDC when IGN is OFF and Pin 16 to Ground...
- Page 51 SOUTHEAST TOYOTA DISTRIBUTORS, LLC (“we,” “our” and “us”) provides the following limited warranty on our accessories, excluding tires, (“Accessories” or “Accessory”) installed on a Toyota. This limited warranty is not provided by and does not bind or provide benefit to the vehicle dealer, the manufacturer, or Toyota Motor Sales, U.S.A., Inc.
- Page 52 For inquiries regarding this limited warranty, we can be the performance of our duties and obligations and assign our rights contacted directly at Customer Assistance Hotline at 1-800-301-6859, or by mail to: Southeast Toyota Distributors, LLC, Attention: Customer Loyalty Department, 100 Jim Moran Boulevard, Deerfield Beach, Florida 33442.
Need help?
Do you have a question about the KP1000 and is the answer not in the manual?
Questions and answers