Table of Contents
Advertisement
Quick Links
Advertisement
Table of Contents

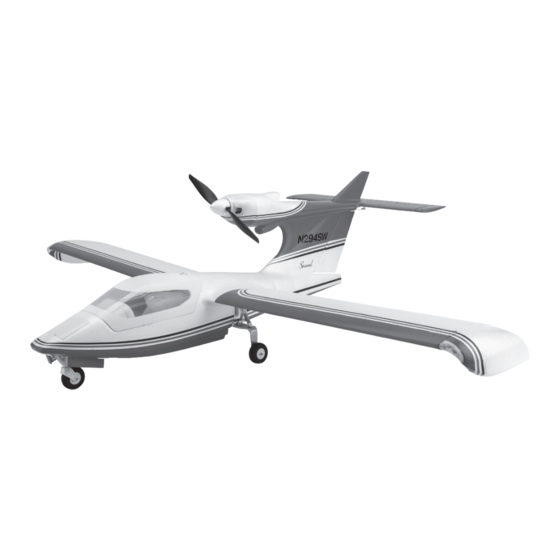
Related Manuals for Horizon Hobby TOWER HOBBIES Seawind


Summary of Contents for Horizon Hobby TOWER HOBBIES Seawind
- Page 1 TOWA1575 ® ® INSTRUCTION MANUAL 725555 Created 06/23...
-
Page 2: Table Of Contents
NOTICE All instructions, warranties and other collateral documents are subject to change at the sole discretion of Horizon Hobby, LLC. For up- to-date product literature, visit horizonhobby.com or towerhobbies.com and click on the support or resources tab for this product. -
Page 3: Images Within The Manual
Before assembly, take an inventory of this kit to make sure it is complete, and inspect the parts to make sure they are of acceptable quality. If any parts are missing or are not of acceptable quality, or if you need assistance with assembly, contact Horizon Hobby product support. -
Page 4: Assembly
Assembly Install the Main Landing Gear Note that the main landing gear has an ‘L’ and an ‘R’ on the left and right gear. Remove the M2.5 x 10mm machine screws. Attach the main landing gear to the aluminum pivot. - Page 5 Connect the arms. Install the main landing gear on the other side. Install the Horizontal Stabilizer Insert the tabs into the fi n. Install the M3 x 16mm machine screw.
- Page 6 Insert the elevator pushrod but do not tighten at this time. Slide the fi n tip in completely. Install the Wing Halves Insert the carbon fi ber wing tube.
- Page 7 Slide one wing panel onto the wing tube. Route the fl ap pushrod and servo leads through the appropriate holes. Rotate the trailing edge of the wing up. Rotate the retainer to lock the wing.
- Page 8 Guide the fl ap pushrod through the screw-lock connector. Install the other wing panel following the same procedure. Install the Receiver Plug the included Y-harnesses into the aileron and fl ap ports on the receiver. Connect the aileron servo leads to the Y-harness on channel 1.
- Page 9 Tighten the screw-lock connector on the elevator pushrod. Move the fl ap switch on the transmitter to the “0” position. Position both fl aps so that they are in the up position, then tighten the screw-lock connector on the fl ap pushrods. 10.
- Page 10 Calibrate the Electronic Speed Control To set the throttle range Move the throttle stick to the highest position. Connect battery to the ESC. The motor will emit one low, long tone to indicate startup, then the respective number of medium-length mid-tones to indicate the battery cell count. The motor sounds 2 long tones (B—B—), which means the highest position of the throttle range is recognized by the ESC.
-
Page 11: Control Throws
Control Throws Confi rm the controls respond in the correct direction according to control inputs from the transmitter. If necessary, use the servo reversing program in your transmitter to change the servo direction of any controls that are moving the wrong way. -
Page 12: Propeller And Spinner Installation
Propeller and Spinner Installation Failure to follow these safety precautions may result in severe injury to yourself and others. • Wear safety glasses whenever in the proximity of a spinning • Always stay behind the arc of the propeller when handling the propeller. - Page 13 Install the motor battery on the battery tray and secure it with the battery strap. Install the two sets of seats. They are held in place with magnets.
-
Page 14: Center Of Gravity (Cg)
Center Of Gravity (CG) • If the model is tail heavy it may be unstable and respond too Install the battery, battery hatch and cabin hatch. At this point quickly to the controls. your model must be in ready-to-fl y condition with everything attached and installed including the fl oats or wheels and •... -
Page 15: Before Every Flight
Before Every Flight To help avoid fl ight accidents, ground inspections should be performed prior to every fl ight. • Ensure all screws are secure, the servo arms and horns are • After the aircraft is powered on, perform a control surface check properly connected and the wing is properly secured. -
Page 16: Repairs
Repairs Parts damaged beyond repair can be purchased separately. Often parts can be repaired and you can get your Seawind back into the air with a little glue and ingenuity. The Seawind is made from injection-molded EPO (expanded polyolefi n) foam which can be glued with just about anything. Most people use regular CA. -
Page 17: Replacement Parts
Replacement Parts Part # Description Part # Description TOWA157501 Fuselage: Seawind 1.4m TOWA157520 Motor Mount: Seawind 1.4m TOWA157502 Wing Set: Seawind 1.4m TOWA157521 Decal Set: Seawind 1.4m TOWA157503 Stabilizer: Seawind 1.4m TOWA157523 17g Nose Gear Servo: Seawind 1.4m TOWA157504 Fin Tip: Seawind 1.4m TOWA157524 36g Main Gear Servo: Seawind 1.4m TOWA157505... -
Page 18: Limited Warranty
What this Warranty Covers questions and service you in the event that you may need any Horizon Hobby, LLC, (Horizon) warrants to the original purchaser assistance. For questions or assistance, please visit our website that the product purchased (the “Product”) will be free from at www.horizonhobby.com, submit a Product Support Inquiry,... -
Page 19: Warranty And Service Contact Information
Horizon Product Support 2904 Research Rd United States of America (Product Technical Assistance) 877-504-0233 Champaign, IL 61822 websales@horizonhobby.com Sales 800-338-4639 Horizon Technischer Service service@horizonhobby.eu Hanskampring 9 European Union D 22885 Barsbüttel, Sales: Horizon Hobby GmbH +49 (0) 4121 2655 100 Germany... - Page 20 ©2023 Horizon Hobby, LLC. Tower Hobbies, the Tower Hobbies logo, and the Horizon Hobby logo are trademarks or registered trademarks of Horizon Hobby, LLC. The Spektrum trademark is used with permission of Bachmann Industries, Inc. All other trademarks, service marks and logos are property of their respective owners. US 8,672,726 US 9,056,667 http://www.horizonhobby.com/...
Need help?
Do you have a question about the TOWER HOBBIES Seawind and is the answer not in the manual?
Questions and answers