Table of Contents
Advertisement
Quick Links
Advertisement
Table of Contents

Related Manuals for Horizon Hobby BLADE TRIO 180 CFX


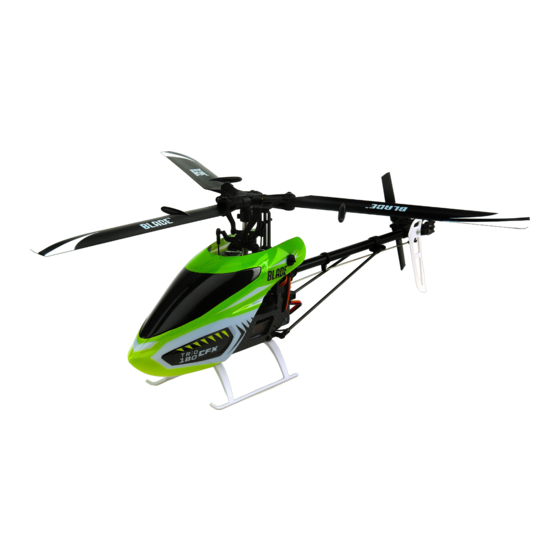
Summary of Contents for Horizon Hobby BLADE TRIO 180 CFX
- Page 1 Instruction Manual Bedienungsanleitung Manuel d’utilisation Manuale di Istruzioni...
-
Page 2: Safety Precautions And Warnings
WARNING AGAINST COUNTERFEIT PRODUCTS: If you ever need to replace a Spektrum component found in a Horizon Hobby product, always purchase from Horizon Hobby, LLC or a Horizon Hobby authorized dealer to ensure authentic high-quality Spektrum product. Horizon Hobby, LLC disclaims all support and warranty with regards, but not limited to, compatibility and performance of counterfeit products or products claiming compatibility with DSM or Spektrum technology. -
Page 3: Table Of Contents
Table of Contents First Flight Preparation ............. 4 Saving the Gain Adjustments ......... 13 Flying Checklist ............... 4 Blade Trio 180 CFX Servo Adjustment ......13 Transmitter Setup ............4 Entering Servo Adjustment Mode ........13 Installing the Flight Battery ..........6 Adjusting the Servo Neutral Position ...... -
Page 4: First Flight Preparation
Main Rotor Installation Install the main rotor blades as shown using 3, 1.5 mm socket head screws provided. Do not overtighten the screws in the blade grips. The screws should be just tight enough so some friction is felt when you move the blades, but still loose enough for the blades to move easily. - Page 5 DX7s, DX8 SYSTEM SETUP FUNCTION LIST Model Type Servo Setup Chan Travel Reverse Chan Travel Reverse HELI 100/110 Normal 100/100 Normal Swash Type 100/100 Normal 100/100 Normal 1 servo Normal 100/100 Normal 100/100 Normal F-Mode Setup 100/100 Normal Flight Mode F Mode D/R &...
-
Page 6: Installing The Flight Battery
Installing the Flight Battery 1. Lower the throttle. CAUTION: Always keep the power lead positioned AWAY from the elevator servo. Failure to do so 2. Power on the transmitter. could cause the lead to get caught and will result in crash 3. -
Page 7: Transmitter And Receiver Binding
Transmitter and Receiver Binding Binding is the process of programming the receiver to Spektrum™ DSM2/DSMX technology equipped aircraft recognize the GUID (Globally Unique Identifi er) code of a transmitter to the receiver for proper operation. single specifi c transmitter. You need to ‘bind’ your chosen Binding Procedure 1. - Page 8 Rudder Collective Pitch Side View Side View Motor Control Test Place the helicopter outdoors on a clean, fl at and level 3. Set the transmitter to normal fl ight mode. Ensure surface (concrete or asphalt) free of obstructions. Always the throttle is lowered completely. Turn throttle hold stay clear of moving rotor blades.
-
Page 9: Blade Trio 180 Cfx Pre-Flight Checklist
Blade Trio 180 CFX Pre-Flight Checklist ❏ Check all screws to ensure that they are tight ❏ Check all wires to ensure that they are not cut, ❏ Check main and tail blades to ensure they are not pinched, or chaffed and are properly secured ❏... -
Page 10: Low Voltage Cutoff (Lvc)
Low Voltage Cutoff (LVC) Once the battery reaches 9V under load, the ESC will Repeatedly fl ying the helicopter until LVC activates will continuously lower power supplied to the motor until damage the helicopter battery. complete shutdown occurs. This helps prevent over- Disconnect and remove the Li-Po battery from the aircraft discharge of the Li-Po battery. -
Page 11: Advanced Settings
Advanced Settings The 180 CFX default settings are appropriate for most users. We recommend fl ying with the default parameters before making any adjustments. WARNING: To ensure your safety, always disconnect the motor wires from the ESC before performing the following steps. -
Page 12: Entering Gain Adjustment Mode
Entering Gain Adjustment Mode DX6, DX6e and DX6i Users: DX7s, DX7 (G2), DX8, DX8 (G2), DX9, DX18 and DX20 Users: 1. Lower the throttle stick to the lowest position. 1. Lower the throttle stick to the lowest position. 2. Power ON the transmitter. 2. -
Page 13: Saving The Gain Adjustments
fl ight. is now ready for fl ight. Blade Trio 180 CFX Servo Adjustment Your Blade 180 CFX was setup at the factory and test fl own. The servo adjustment steps are usually only necessary in special circumstances, such as after a crash or if a servo or linkage is replaced. -
Page 14: Adjusting The Servo Neutral Position
Adjusting the Servo Neutral Position With the model in Servo Adjustment Mode, the control stick Once the servo you wish to adjust is selected, move the and gyro inputs are disabled and the servos are held in the cyclic stick forward or backward to adjust the servo neutral neutral position. -
Page 15: Blade 180 Cfx Troubleshooting Guide
Blade 180 CFX Troubleshooting Guide Problem Possible Cause Solution Low fl ight battery or transmitter bat- Fully charge or replace the fl ight battery and/or transmit- tery voltage ter batteries Make sure the bind plug is connected to the receiver The receiver is not in bind mode bind port extension Helicopter will not bind... -
Page 16: Exploded View
Exploded View... -
Page 17: Replacement Parts
Product, (iv) attempted service by anyone other Horizon’s sole obligation and purchaser’s sole and exclusive than a Horizon Hobby authorized service center, (v) Product not remedy shall be that Horizon will, at its option, either (i) - Page 18 and all Product(s) involved in a warranty claim. Service or withstand the rigors of shipping without additional protection. replacement decisions are at the sole discretion of Horizon. Ship via a carrier that provides tracking and insurance for Proof of purchase is required for all warranty claims. lost or damaged parcels, as Horizon is not responsible for SERVICE OR REPLACEMENT AS PROVIDED UNDER THIS merchandise until it arrives and is accepted at our facility.
-
Page 19: Warranty And Service Contact Information
Compliance Information for the European Union EU Compliance Statement: BLH3750 Horizon Hobby, LLC hereby declares that this product is in compliance with the essential requirements and other relevant provisions of the RED Directive. A copy of the EU Declaration of Conformity is available online at: http://www.horizonhobby.com/content/support-render-compliance. - Page 20 ©2017 Horizon Hobby, LLC. Blade, E-fl ite, Prophet, AS3X, DSM, DSM2, DSMX, AirWare, ModelMatch, BNF, the BNF logo and the Horizon Hobby logo are trademarks or registered trademarks of Horizon Hobby, LLC. The Spektrum trademark is used with permission of Bachmann Industries, Inc.
Need help?
Do you have a question about the BLADE TRIO 180 CFX and is the answer not in the manual?
Questions and answers