
Subscribe to Our Youtube Channel
Related Manuals for Mortara SURVEYOR S12


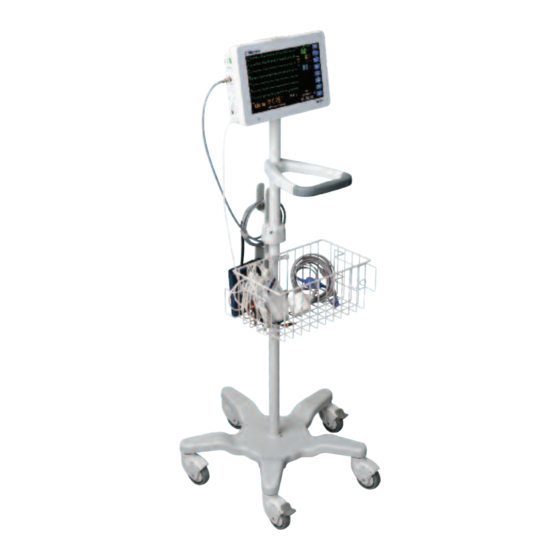
Summary of Contents for Mortara SURVEYOR S12
- Page 1 SURVEYOR S12 & S19 quick reference guide Surveyor S19 wall mount Surveyor S12 on rolling stand...
-
Page 3: Table Of Contents
TABLE OF CONTENTS Quick Reference Guide ECG Preparation ECG Lead Placement Power On/Off Silence Alarm Return to Main Screen Start/Stop NIBP Print Real-Time Standby: Hibernation Mode Standby: Discharge Mode Trends BP Interval HR/PR Source Check Sensor Alarm Settings Patient Information 12-lead ECG Defaults Cleaning the... -
Page 4: Ecg Lead Placement
QUICK REFERENCE GUIDE This document is a guideline only to be used as an aid to comprehensive inservice training. These guidelines are not meant to replace applicable operator’s manuals. Refer to the applicable operators manuals for warnings, cautions, and details. PATIENT ELECTRODE SITE PREPARATION AND PLACEMENT •... - Page 5 QUICK REFERENCE GUIDE ECG LEAD PLACEMENT: 5-wire leadset (as applicable) • Place the RA (white) electrode under the patient’s right clavicle, at the midclavicular line within the rib cage frame. • Place the LA (black) electrode under the patient’s left clavicle, at the midclavicular line within the rib cage frame.
- Page 6 QUICK REFERENCE GUIDE ECG LEAD PLACEMENT: 12-lead patient cable (as applicable) • Place the RA (white) electrode under the patient’s right clavicle, at the midclavicular line within the rib cage frame. • Place the LA (black) electrode under the patient’s left clavicle, at the midclavicular line within the rib cage frame.
-
Page 7: Power On/Off
A proper power up produces audible start-up tones (two tones followed by two higher beeps). • The monitor’s main screen display illuminates and then briefly shows the Mortara logo. • When the patient monitor is initially powered up, the New Patient confirmation message displays on the main screen. -
Page 8: Silence Alarm
QUICK REFERENCE GUIDE SILENCE ALARM • Select the Silence Alarm quick-action key on the right side of the main screen to silence the audio notifications for the current alarm, for the configured time period. • During the alarm audio silenced period, the visual alarm notifications continue to display on the main screen for the duration of the alarm condition. -
Page 9: Print Real-Time
QUICK REFERENCE GUIDE PRINT REAL-TIME WAVEFORMS • Select the Print quick-action key on the right side of the main screen. • The waveforms printed, the strip length, and the print delay are configured in the Setup>Setup Recorder dialogue. • The location of the printout is based on system options and system settings. Consult your system administrator for additional details. - Page 10 QUICK REFERENCE GUIDE • Exiting the Standby hibernation mode by selecting the NO button (is the same patient): – Resumes monitoring of patient parameter monitoring as previously configured. – Resumes capturing of any patient monitoring data. – Resumes alarm surveillance for all arrhythmias and physiological patient parameters as previously configured.
-
Page 11: Standby: Discharge Mode
QUICK REFERENCE GUIDE STANDBY: DISCHARGE MODE To enter the Standby discharge mode: • Select the Standby quick-action key on the right side of the main screen. • The Standby Mode Choice dialogue displays. • Select the Discharge Patient choice. • The Confirm Discharge Patient confirmation message displays. -
Page 12: Trends
QUICK REFERENCE GUIDE VIEW LIST TRENDS • Select the Trends quick-action key on the right side of the main screen. • The Trends dialogue displays. • The Trends dialogue does not “time out” and must be closed to return to main screen display. -
Page 13: Bp Interval
QUICK REFERENCE GUIDE CLEAR TRENDS • Trends clear upon discharge of the monitor. • The Clear button allows the clinician to manually erase the trends stored in the patient monitor without performing a discharge. • Select the Trends quick-action key on the right side of the main screen. •... - Page 14 QUICK REFERENCE GUIDE To stop an automatic NIBP interval: • Select the NIBP numeric parameter tile to display the Setup NIBP dialogue. • Locate the NIBP Interval label. • Select the arrow to display the drop down list box. – Select the OFF NIBP interval choice. •...
- Page 15 QUICK REFERENCE GUIDE ADJUST HR/PR SOURCE AND AUDIO TONE The HR/PR parameter may be sourced based on the following hierarchy: • Heart Rate (HR): Green when the source is ECG. • Pulse Rate (PR): Cyan when the source is SpO2. •...
- Page 16 QUICK REFERENCE GUIDE To enable/disable the HR/PR systole audio tone: • The HR/PR Tone feature provides the ability to configure an audio tone for each detected QRS complex or pulse. If the HR/PR Tone feature is enabled, an audio tone is produced for each systole beat detected. •...
- Page 17 QUICK REFERENCE GUIDE PAUSE SpO CHECK SENSOR/SENSOR OFF MESSAGE To acknowledge that the removal of the SpO sensor is intentional and to remove the “SpO Check Sensor” technical alarm: • Select the SpO numeric parameter tile to display the Setup SpO dialogue.
-
Page 18: Alarm Settings
QUICK REFERENCE GUIDE ADJUST PARAMETER ALARM SETTINGS There are two ways to adjust the numeric parameter’s alarm limits at the patient monitor: • Select the numeric parameter tile. – Adjust the Upper alarm limit by selecting the up/down arrows to move the upper alarm limit box until the desired value is reached. -
Page 19: Patient Information
QUICK REFERENCE GUIDE ENTER/EDIT PATIENT INFORMATION • Select the Settings quick-action key. – Select the blue Patient Information button to display the Patient Information dialogue. • OR Select the black patient information area located above the system date/time on the main screen. •... - Page 20 QUICK REFERENCE GUIDE CHANGE PATIENT MODE: Adult and Pediatric • Select the Settings quick-action key. – Select the blue Patient Information button to display the Patient Information dialogue. • OR Select the black patient information area located above the system date/time on the main screen.
- Page 21 QUICK REFERENCE GUIDE SHOW ALL ECG/12-LEAD ECG To enter the All ECG mode when using a 3-wire or 5-wire ECG lead set: • Select the All ECG quick-action key on the main screen. • The All ECG mode is now displayed. •...
- Page 22 QUICK REFERENCE GUIDE GENERATE A RESTING 12-LEAD INTERPRETATION (optional) Best Practice Recommendation: To be truly diagnostic and comparable to standard resting 12-Lead data acquisition devices, it is recommended that the arm and leg electrodes be placed on the patient’s arm and legs as described in the operators' manual prior to acquiring the resting 12-lead ECG.
- Page 23 QUICK REFERENCE GUIDE EDIT/SAVE/RESTORE DEPARTMENT DEFAULTS To edit/save departmental defaults: • Configure the monitor as per the department’s request (Alarm limit settings, etc.). • Once the monitor is configured and ready for saving as the department default. – Select the Settings quick-action key on the right side of the display. –...
- Page 24 QUICK REFERENCE GUIDE ADJUST DATE/TIME • Select the Settings quick-action key on the right side of the display. • Select Administration. • Select System. • Enter the Passcode (Contact system administrator for further assistance). • Select Set Date and Time. –...
-
Page 25: Cleaning The Touchscreen Display
QUICK REFERENCE GUIDE CLEAN THE TOUCHSCREEN DISPLAY • The touchscreen display may be cleaned with a soft, lint-free cloth and a non-abrasive, gentle cleaner such as plain soap and water. • Avoid spraying cleaning agents directly onto the monitor’s display. •... - Page 26 MORTARA INSTRUMENT, INC. 7865 North 86th Street Milwaukee, WI 53224 U.S.A. Tel: 414.354.1600 Tel: 800.231.7437 Service: 888.MORTARA Fax: 414.354.4760 ® Mortara and Surveyor™ are trademarks or registered trademarks of Mortara Instrument, Inc. 9513-183-06-ENG Rev 2 www.mortara.com...
Need help?
Do you have a question about the SURVEYOR S12 and is the answer not in the manual?
Questions and answers