Advertisement
Quick Links
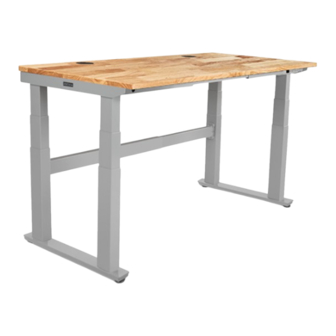
V2 4-Leg Standing Desk
Work Better. Live Healthier
UPL941
Two person
Scan QR code for
assembly
product webpage
For assembly assistance, visit upliftdesk.com/contact, call 800-349-3839, or email support@upliftdesk.com
©2023 UPLIFT Desk®. All Rights Reserved. Patented
Advertisement

Related Manuals for Uplift Desk V2 UPL941


Summary of Contents for Uplift Desk V2 UPL941
- Page 1 V2 4-Leg Standing Desk Work Better. Live Healthier UPL941 Two person Scan QR code for assembly product webpage For assembly assistance, visit upliftdesk.com/contact, call 800-349-3839, or email support@upliftdesk.com ©2023 UPLIFT Desk®. All Rights Reserved. Patented...
- Page 2 WARNING: Never use the desk if the power cord or plug becomes damaged as this can cause a risk of fire and electric shock. Contact UPLIFT Desk for a replacement power cord if it is damaged in any way. WARNING: Risk of serious injury or death.
- Page 3 Desk Spacing and Clearance Distances Desk image is for reference only and may not match your desk model. © UPLIFT Desk • 800-349-3839 • info@upliftdesk.com • upliftdesk.com...
- Page 4 Package Contents Components (packed in multiple boxes) Crossbar End Crossbar Rail Side Bracket Control Box Keypad qty 4 qty 4 qty 4 qty 2 Type varies left right Power Cable Wire Foot Control Extension Cable Management Tray qty 2 Box Bracket qty 4 (2 long &...
- Page 5 Parts Diagram Side Bracket Crossbar Rail Crossbar End M8 x 8 Set Screw Side Bracket M6 x 10 Machine Screw Foot M6 x 14 Machine Screw © UPLIFT Desk • 800-349-3839 • info@upliftdesk.com • upliftdesk.com...
- Page 6 Step 3 - Adhesive Pad Application A. Peel the backing off of four Adhesive pads (H12) place onto one of the Side Brackets (P4) on the side adjacent to the UPLIFT Desk logo plate where shown. B. Repeat for the second Side Bracket.
- Page 7 C. Move the Side Bracket out of the way and drill pilot 0.5” holes at your pencil marks using a 1/8” drill bit. D. Follow the same pre-drilling process with the other Side Bracket at the other end of the desktop. Tape © UPLIFT Desk • 800-349-3839 • info@upliftdesk.com • upliftdesk.com...
- Page 8 Step 5 - Side Bracket Attachment (first side) A. Align the holes in the Side Bracket (P4) with the holes or threaded metal inserts in the desktop. NOTE: Be sure that the tapered end of the Side Bracket is pointing towards the front of the desktop.
- Page 9 1/2” from the tip. Stop drilling just before the tape touches the Crossbar End. C. Drill pilot holes at your pencil marks using a 1/8” drill bit. © UPLIFT Desk • 800-349-3839 • info@upliftdesk.com • upliftdesk.com...
- Page 10 Step 10 - Crossbar End Attachment H4 a A. Using a Phillips Head Screwdriver, loosely insert one #10 x 3/4” Wood Screw (H4a) and one Washer (H5) through each Crossbar End and into the desktop as shown. B. Once all four screws are started, tighten them but be careful to not overtighten to avoid stripping.
- Page 11 Keypad right side C. Using a Phillips Head Screwdriver, attach the Keypad to the desktop with two #10 x 5/8” Wood Screws (H14). Be careful to not overtighten to avoid stripping. © UPLIFT Desk • 800-349-3839 • info@upliftdesk.com • upliftdesk.com...
- Page 12 E. Connect the Keypad cable into the Control Box port labeled “HS”. The Control Box port labeled “F” is used to connect the Bluetooth Adapter (FRM125) for use with the UPLIFT Desk App. The Control Box port labeled “DC” is used to connect low...
- Page 13 4 mm Allen Wrench. We supplied Loctite pre-applied to all screws to keep them tight over time, so if you tighten thoroughly this one time you’re all set. © UPLIFT Desk • 800-349-3839 • info@upliftdesk.com • upliftdesk.com...
- Page 14 Small16mm Plug Hole Plugs (optional) If you prefer to cover the four large holes in the front and back of the upper frame section, use the provided Small Hole Plugs (H17) and Large Hole Plugs (H18). The smaller plugs fit in the holes that are closer to the side of the desk and the frame Side Bracket while the larger plugs fit 6mm Plug in the holes further away from the sides of the desk.
- Page 15 LED indicator is illuminated. E. Perform the desk reset procedure below. Slowly lower and raise the desk while watching all cables and clearances to ensure there are no cable snags or obstacles. © UPLIFT Desk • 800-349-3839 • info@upliftdesk.com • upliftdesk.com...
- Page 16 If you have an Advanced Keypad, see the Programming section below for further information on how to use your Keypad. Programming (Advanced Keypads only) These UPLIFT Desk programming instructions are compatible with all UPLIFT Advanced Keypads except the Advanced Paddle Keypad.
- Page 17 Remove the maximum and minimum height limits: 1. Tap the “M” button once and the display will show “S-.” 2. Hold the “M” button until the display shows “555” and changes to the current numeric height setting. © UPLIFT Desk • 800-349-3839 • info@upliftdesk.com • upliftdesk.com...
- Page 18 Anti-Collision System Sensitivity Adjustment Adjust the sensitivity on your desk’s advanced anti-collision system: 1. Hold the down button until the desk reaches the lowest position. 2. Hold the down button again until the display flashes “ASr.” 3. Hold the UP button until the display shows “10.5,” “10.6,” or “10.7”. This is your current anti-collision sensitivity setting. 10.5 = most sensitive setting (possible false positives) 10.6...
- Page 19 © UPLIFT Desk • 800-349-3839 • info@upliftdesk.com • upliftdesk.com...
- Page 20 Study this manual carefully. If this product is sold, please provide this manual to the buyer, installers, or support personnel operating the product. Copyright Notice: This manual is a component of this UPLIFT Desk product. This manual is a ©...
Need help?
Do you have a question about the V2 UPL941 and is the answer not in the manual?
Questions and answers