Advertisement
Technical Support and E-Warranty Certificate
www.vevor.com/support
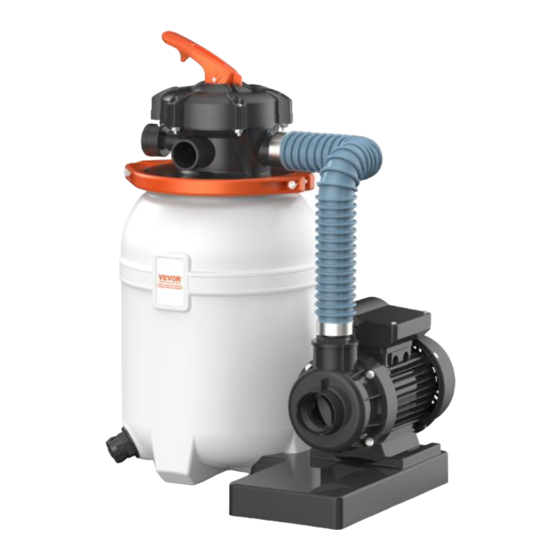
SAND FILTER PUMP
OWNER'S MANUAL
MODEL:HFP250A-10 / HFP250A-12
We continue to be committed to provide you tools with competitive price.
"Save Half", "Half Price" or any other similar expressions used by us only represents an
estimate of savings you might benefit from buying certain tools with us compared to the major
top brands and does not necessarily mean to cover all categories of tools offered by us. You
are kindly reminded to verify carefully when you are placing an order with us if you are
actually saving half in comparison with the top major brands.
Advertisement
Table of Contents

Related Manuals for VEVOR HFP250A-10


Summary of Contents for VEVOR HFP250A-10
- Page 1 SAND FILTER PUMP OWNER'S MANUAL MODEL:HFP250A-10 / HFP250A-12 We continue to be committed to provide you tools with competitive price. "Save Half", "Half Price" or any other similar expressions used by us only represents an estimate of savings you might benefit from buying certain tools with us compared to the major top brands and does not necessarily mean to cover all categories of tools offered by us.
- Page 2 This is the original instruction, please read all manual instructions carefully before operating. VEVOR reserves a clear interpretation of our user manual. The appearance of the product shall be subject to the product you received. Please forgive us that we won't inform you again if there are any technology or software updates on our product.
- Page 3 IMPORTANTWARNING AND SAFETY DANGER SERIOUS BODILY INJURY OR DEATH CAN RESULT IF THIS SAND FILTER IS NOT INSTALLED AND USED CORRECTLY. DANGER INSTALLERS,POOL OPERATORS AND POOL OWNERS MUST READ THESE WARNINGS AND ALL INSTRUCTIONS BEFORE USING THIS SAND FILTER. WARNING This sand filter is intended for use in swimming pool applications.
- Page 4 NOTE: It is important to repeat this operation every time you start the pump after winterizing, maintenance and back washing. CAUTION Components such as the filtration system, pumps and heater must be positioned so as to prevent their being used as means of access to the pool by young children.
-
Page 5: Product Parameter
PRODUCT PARAMETER Model HFP250A-10 HFP250A-12 Input AC115V 60Hz AC115V 60Hz Max Power 0.33 HP... - Page 6 EXPLOSION PLAN AND PARTS LIST HFP250A-10 Ref. Ref. Description Qty. Description Qty. Valve 1-1/2in.5-way Clamp Style Drain Spigot Pressure Gauge 0-ring, plug O-ring, plug Drain Nut Plug, Pressure Gauge 0-ring, plug Valve Assembly Drain Cap O-ring,Valve Drain Kit Flange Clamp...
- Page 7 HFP250A-12 Ref. Ref. Description Qty. Description Qty. Valve 1-1/2in.5-way Clamp Style Drain Spigot Pressure Gauge O-ring, plug O-ring, plug Drain Nut Plug, Pressure Gauge 0-ring, plug Valve Assembly Drain Cap 0-ring,Valve Drain Kit Flange Clamp Pump to Filter Hose Flat Washer Hose Clamp Screw Hose Adaptor...
-
Page 8: Filter Overview
FILTER OVERVIEW Your high rate sand filter is designed to produce clear, sparkling water and operate for years with a minimum of maintenance when installed, operated and maintained in accordance with these instructions. Your filter uses special filter sand to remove dirt particles from pool water Filter sand is loaded into the filter tank and functions as the dirt removing media. - Page 9 WARNING Blockage of suction fittings can cause serious or fatal injury due to drowning. To reduce the risk of injury, do not permit children to use. WARNING Never work on the pump while it is running or power is still connected. High voltage can cause serious or fatal injury.
- Page 10 4. Assemble the filter tank to the system base. 5. Assemble the pump to the system base with mounting screw kit. 6. Place the standpipe and under drain assembly in the center of the tank. Cap standpipe with sand shield to prevent sand from entering it. Fill the tank with about half full water.(Be sure the winter drain cap is securely in place).
- Page 11 10. Wrap some Teflon pipe manufactured for plastic pipe on the 14"NPT male end of gauge. Carefully screw pressure gauge, into 1/4"NPT tapped hole in valve body. Do not over tighten. 11. Screw the hose adaptors into control valve port marked PUMP and pump discharge port.
-
Page 12: Initial Start-Up
INITIAL START-UP 1. (On a new pool, clean the pool before filling the pool with water. Excessive dirt and large particles can cause damage to the pump and filter. 2. Ensure that all pool suction and WASTE lines are open so that water is free to flow from the pool to WASTE line. - Page 13 CLEANING 1. The filter on a new pool should be back washed, and cleaned after approximately 48 hours of operation to clean out plaster dust and/or construction debris. 2. There are three different ways to identify when the filter needs Back washing.
- Page 14 FILTER BACKWASH PROCEDURE 1. Stop the pump. WARNING Always turn pump off before changing valve positions. Changing valve positions while the pump is running can damage the control valve, which may cause serious injury or property damage. 2. Ensure that the suction and WASTE lines are open so that water is free to come from the pool and flow out the WASTE line.
-
Page 15: Troubleshooting
In areas that have freezing winter temperatures, pool equipment must be winterized to protect against damage. 1. Backwash the sand filter. 2. After back washing,shut the pump off and move the handle of valve to WINTER position. WARNING The multi port valve should be left in the “WINTER”position during the shutdown season. - Page 16 Technical Support and E-Warranty Certificate www.vevor.com/support Made In China...
Need help?
Do you have a question about the HFP250A-10 and is the answer not in the manual?
Questions and answers
Where does flat pad fit when using adapter