
Related Manuals for Rittal Blue e+ 3312.820


Summary of Contents for Rittal Blue e+ 3312.820
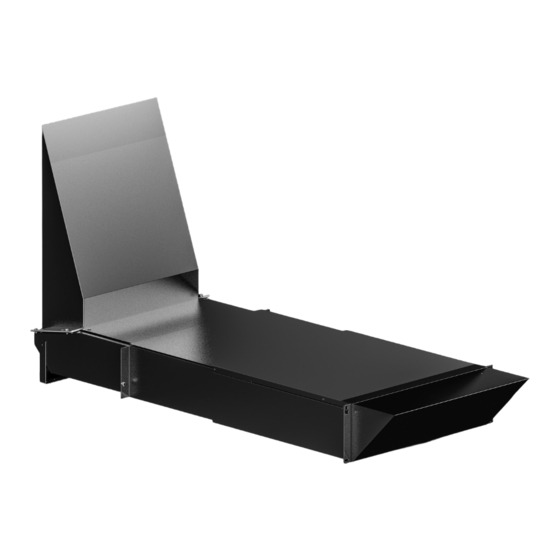
- Page 1 Luftkanal Blue e+ Air duct Blue e+ 3312.820 Montageanleitung Assembly instructions...
-
Page 2: Table Of Contents
Rechtliches zur Betriebsanleitung............3 RoHS Compliance ................3 Aufbewahrung der Unterlagen............. 3 Copyright.................... 3 Sicherheitshinweise ............3 Lieferumfang ..............4 Voraussetzungen .............. 4 Montage des Luftkanals ........... 6 Aufsetzen des Ausblasschutzgitters ........ 13 Technische Daten ............14 Rittal Luftkanal Blue e+... -
Page 3: Hinweise Zur Dokumentation
Dieses Dokument richtet sich an Personen, die mit der Installation von IT-Racks und Rack-Produkten betraut sind. Die Installation darf nur von geschulten Mitar- beitern durchgeführt werden. Rittal setzt voraus, dass Sie über die erforderliche Qualifikation zur Durchführung von Installationen verfügen und sich der Risiken bewusst sind, die beim Umgang mit Racks und Rack-Produkten auftreten kön-... -
Page 4: Lieferumfang
Bauen Sie aufgrund des Türgewichts mit Kühlgerät eine Auflaufrolle ein: – Auflaufrolle TS 4538.000 – Auflaufrolle VX 8618.420 Bauen Sie die 19"-Ebenen mittig im Schrank ein. Dies gilt für alle Schrankvarianten (Breite 600 mm und 800 mm). Rittal Luftkanal Blue e+... - Page 5 Stellen Sie die 19"-Vertikalschienen mit den vorgegebenen Mindestabständen zu Vorder- und Rücktür ein: – Abstand von Vordertür zu vorderen 19"-Vertikalschiene: 150 mm (Abb. 2). Abb. 2: Einstellen vordere 19"-Vertikalschiene – Mindestabstand Rücktür zu hinterer 19"-Vertikalschiene: 250 mm (Abb. 3). Rittal Luftkanal Blue e+...
-
Page 6: Montage Des Luftkanals
Die Schrauben müssen an den vorderen und hinteren 19"-Vertikalschienen auf der linken und rechten Seite gemäß Abb. 5 und Abb. 6 eingeschraubt werden. Hinweis: Die Schrauben dürfen noch nicht vollständig eingeschraubt werden, sondern nur einige Gewindegänge, so dass sie sicher in ihrer Position gehalten werden. Rittal Luftkanal Blue e+... - Page 7 Montieren Sie auf der unteren Querstrebe auf der Rückseite des IT-Racks den hinteren Haltewinkel (Abb. 8). Der Haltewinkel wird hierzu mittig auf der Querstrebe mit vier selbstformenden M5x12 Schrauben (Schraube M5x12 selbstformend NZ/TX30) und einem An- zugsmoment von 5 Nm montiert. Rittal Luftkanal Blue e+...
- Page 8 Ziehen Sie den Luftkanal auf der Rückseite aus, bis die Laschen am mittleren Luftkanalstück durch die hinteren 19"-Vertikalschienen hindurch gezogen sind. Kanten Sie anschließend die Laschen von Hand in einen rechten Winkel um (Abb. 11). Rittal Luftkanal Blue e+...
- Page 9 Hängen Sie den Luftkanal analog wie auf der Rack-Vorderseite über die Schlüssellöcher auf die vorab eingedrehten Schrauben ein (Abb. 12). Abb. 12: Einhängen Luftkanal hinten Ziehen Sie die zuvor nur leicht eingedrehten Schrauben nun mit einem Anzugs- moment von 3 Nm fest (Abb. 13). Rittal Luftkanal Blue e+...
- Page 10 Verbinden Sie den Luftkanal mit vier weiteren Schrauben (Flachkopfschraube I14583/5X16/TX25) und jeweils einer Kunststoffscheibe (Scheibe NZ/5,5) voll- ständig mit den 19"-Vertikalschienen (Abb. 14 und Abb. 15). Alle Schrauben müssen mit einem Anzugsmoment von 3 Nm angezogen wer- den. Abb. 14: Fixierung Luftkanal vorne Rittal Luftkanal Blue e+...
- Page 11 Kontaktscheibe (Kontaktscheibe NZ/5,1 gezahnt) (Abb. 17). Das Anzugsmoment der Muttern beträgt 5 Nm. Abb. 17: Befestigung Luftkanal an Haltewinkel hinten Kleben Sie die Dichtung (B21 x H3 mm) auf die Anlagefläche des Luftkanal- Vertikalteils zum Luftkanal-Horizontalteil (Abb. 18). Rittal Luftkanal Blue e+...
- Page 12 Befestigen Sie den Dichtungsstreifen (B10 x H10 x L372 mm) mittig an der hin- teren Wanne des Luftkanal-Horizontalteils (Abb. 20). Die Oberkante der Dichtung ist bündig mit der oberen Kante des Luftkanal- Endstücks. Abb. 20: Anbringen Dichtungsstreifen an hinterer Wanne des Luftkanals Rittal Luftkanal Blue e+...
-
Page 13: Aufsetzen Des Ausblasschutzgitters
Bringen Sie sie dann an der Kontaktfläche zwischen Schutzgitter und Luftka- nal-Abdeckung vorne an (Abb. 22). Abb. 22: Dichtung Schutzgitter Das Schutzgitter wird zunächst über die vier Ausbrüche am Ausblas in Position gehalten (Abb. 23). Rittal Luftkanal Blue e+... -
Page 14: Technische Daten
Abb. 24: Einsetzen der Spreiznieten Technische Daten Breite [mm] 19" Höhe [mm] 3 HE (Höhe des Luftkanal-Horizontalteils) Tiefe [mm] Minimal 445, ausziehbar auf maximal 845 Farbe RAL 9005 Material Stahlblech lackiert Gewicht [kg] ca. 12 Tab. 2: Technische Daten Rittal Luftkanal Blue e+... - Page 15 Retention of documents..............16 Copyright..................16 Safety notes ..............16 Scope of supply ............. 17 Requirements ..............17 Installing the air duct ............19 Fitting the outlet protection grille ........26 Technical specifications ..........27 Rittal air duct Blue e+...
-
Page 16: Notes On Documentation
Assembly and operating instructions exist as paper documents for the air duct described here and are enclosed with the equipment. Rittal GmbH & Co. KG is not responsible for any damage which may result from failure to comply with these assembly and operating instructions. The same ap- plies to failure to comply with the valid documentation for accessories used. -
Page 17: Scope Of Supply
– Ride-up roller TS 4538.000 – Ride-up roller VX 8618.420 Install the 482.6 mm (19") mounting angles in the centre of the enclosure. This applies to all enclosure variants (width 600 mm and 800 mm). Rittal air duct Blue e+... - Page 18 – Distance from front door to front 482.6 mm (19") mounting angle: 150 mm (fig. 2). Fig. 2: Adjust the front 482.6 mm (19") mounting angle – Minimum distance from rear door to rear 482.6 mm (19") mounting angle: 250 mm (fig. 3). Rittal air duct Blue e+...
-
Page 19: Installing The Air Duct
5 and fig. 6. Note: The screws should only be screwed in partially with a few turns of the thread so that they are held securely in position. Rittal air duct Blue e+... - Page 20 Mount the rear angle bracket on the lower cross strut at the rear of the IT rack (fig. 8). The bracket is mounted centrally on the cross strut with four self-tapping M5x12 screws (M5x12 self-tapping screw NZ/TX30) and a tightening torque of 5 Nm. Rittal air duct Blue e+...
- Page 21 Extend the air duct at the rear until the tabs on the central air duct section have passed the rear 482.6 mm (19") mounting angles. Then fold the tabs over by hand at right angles (fig. 11). Rittal air duct Blue e+...
- Page 22 (fig. 12). Fig. 12: Locate the air duct at the rear Now tighten the loosely inserted screws with a tightening torque of 3 Nm (fig. 13). Rittal air duct Blue e+...
- Page 23 (washer NZ/5.5), fully connect the air duct to the 482.6 mm (19") mounting angles (fig. 14 and fig. 15). All screws should be tightened with a torque of 3 Nm. Fig. 14: Attach the front air duct Rittal air duct Blue e+...
- Page 24 The tightening torque for the nuts is 5 Nm. Fig. 17: Attach the air duct to the rear angle bracket Glue the gasket (W21 x H3 mm) onto the contact surface between the vertical and horizontal air duct parts (fig. 18). Rittal air duct Blue e+...
- Page 25 (fig. 20). The top edge of the seal is flush with the top edge of the air duct end piece. Fig. 20: Attach the sealing strip to the rear air duct tray Rittal air duct Blue e+...
-
Page 26: Fitting The Outlet Protection Grille
Then attach it to the contact surface between the protective grille and the air duct cover at the front (fig. 22). Fig. 22: Protective grille seal Initially, the protective grille is held in place by the four cut-outs on the outlet (fig. 23). Rittal air duct Blue e+... -
Page 27: Technical Specifications
Height [mm] 3 U (height of the horizontal air duct part) Depth [mm] Minimum 445, can be extended to maximum 845 Colour RAL 9005 Material Sheet steel, painted Weight [kg] approx. 12 Tab. 2: Technical specifications Rittal air duct Blue e+... - Page 28 ◾ Climate Control ◾ IT Infrastructure ◾ Software & Services You can find the contact details of all Rittal companies throughout the world here. www.rittal.com/contact RITTAL GmbH & Co. KG Auf dem Stuetzelberg · 35745 Herborn · Germany Phone +49 2772 505-0...
Need help?
Do you have a question about the Blue e+ 3312.820 and is the answer not in the manual?
Questions and answers