Table of Contents
Advertisement
Quick Links
Advertisement
Table of Contents

Subscribe to Our Youtube Channel
Related Manuals for EdgeStar IB121SS


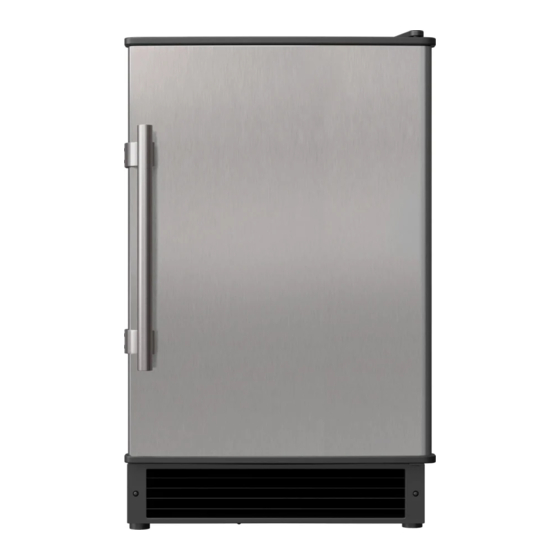
Summary of Contents for EdgeStar IB121SS
- Page 1 Compact Crescent Ice Maker IB121SS Owner’s Manual V1.0 09072023 EDGESTAR.COM...
-
Page 2: Important Safety Information
Important Safety Information DANGER: Risk of fire or explosion Flammable Refrigerant Used Improper handling can cause serious damage or injury. Please read the following safety information in its entirety. Do not use the appliance other than for its intended purpose. Any other use may invalidate the warranty. Please review the rating label located inside of the unit for electrical and other technical data related to this unit. - Page 3 • Children eight (8) years of age and older and people with reduced physical, sensory or mental capabilities or lack of experience and knowledge can use this appliance if they have been given supervision or instruction concerning use of the appliance in a safe way and they understand the hazards involved. •...
-
Page 4: Table Of Contents
Table of Contents Important Safety Information ........................1 Introduction ..............................4 Parts Identification ............................. 5 Accessories ............................... 6 Before Installing the Ice Maker ........................6 Installing the Handle ......................... 6 Reversing the Door Swing ........................ 7 Cutout Dimensions ........................... 8 Installing the Ice Maker.......................... -
Page 5: Introduction
Introduction Thank you for purchasing this EdgeStar Compact Crescent Ice Maker. We hope that this purchase will be the beginning of a lasting and rewarding relationship between you and EdgeStar. We will provide the customer support and exemplary products necessary to nurture that relationship. -
Page 6: Parts Identification
Parts Identification Front View: Ice Module Ice Bucket Power Switch Back View: Quick Fitting (Internal Thread 7/16"-24UNS) Water Supply Hose Power Plug Power Cord... -
Page 7: Accessories
Accessories Ice Scoop Ice Bucket Quick Fitting Handle Tapping Ice Scoop Ice Bucket Quick Fitting Handle Tapping Internal Thread Screw Internal Thread Screw (7/16”-24UNS) 7/16"-24UNS Before Installing the Ice Maker Before using your ice maker, remove the exterior and interior packaging and check to make sure your have the following accessories: •... -
Page 8: Reversing The Door Swing
Reversing the Door Swing The ice maker door can open from either the left or right side. The unit is delivered to you with the door opening from the left side (hinged on the right). CAUTION: Before you begin, make sure the ice maker is unplugged. 1. -
Page 9: Cutout Dimensions
Cutout Dimensions The product is designed and manufactured for seamless integration in the specified cutout opening shown, which requires precise measurements. The opening must be square and plumb front to back. Although not required, you may choose to increase the overall cutout width for ease of installation. It is recommended to leave at least two (2) inches for the back, and 1/4 inch for the top and sides. -
Page 10: Leg Adjustment
Leg Adjustment Level your ice maker by adjusting the legs at the front of the ice maker. • Turn clockwise to raise • Turn counter clockwise to lower. Down Electrical Connection This ice maker should be properly grounded for your safety. The power cord of this ice maker is equipped with a three- prong plug which mates with standard three-prong wall outlets to minimize the possibility of electrical shock. -
Page 11: Operation
Operation 1. Plug the appliance into a 115/120v polarized and grounded wall electrical outlet. 2. Place the on-off switch in the “ ” or "ON" position. 3. Make sure the water supply is on. As soon as the inner mechanism reaches the proper temperature, the ice maker will fill the ice molds with water. -
Page 12: Cleaning
Cleaning Turn the switch control to "off", unplug the ice maker, and remove the bucket. • Wash the inside with a warm water and baking soda solution. The solution should be about two (2) tablespoons of baking soda to a quart of water. Condenser •... -
Page 13: Troubleshooting Guide
Troubleshooting Guide Before Calling for Service: If the unit appears to be malfunctioning, read through the “Operation” section of this manual first. If the issue persists, check the troubleshooting guide below. Some of the problems mentioned in the troubleshooting guide can be solved easily without a service call. - Page 14 SYMPTOMS POSSIBLE CAUSES SOLUTIONS The machine makes ice, but at a The condenser is dirty. Clean the condenser. very slow rate. The air flow to the ice maker is Check the installation to ensure the air obstructed. flow to the ice maker is not blocked. Check the installation to ensure the The ambient temperature is high, or ambient temperature is in the proper...
-
Page 15: Specifications
Specifications Description of product Built-in Ice Maker Model IB121SS Voltage/Frequency AC 115V~60Hz Ice-Making / Ice-Harvest rated 1.2A / 1.5A current Refrigerant R600a, 1.69Oz. Installation Type Free Standing / Built-in Unit Dimension (W×D×H)* 14-15/16'' × 18-1/2'' × 24-7/8'' Working Temperature 50°F -100°F... - Page 16 WHAT IS COVERED: LABOR: For a period of NINETY (90) DAYS from the date of original purchase, labor will be performed free of charge at an authorized EdgeStar repair facility. At its option, EdgeStar will repair the product with new or remanufactured parts, or exchange the defective product with a new, refurbished, or remanufactured product.
Need help?
Do you have a question about the IB121SS and is the answer not in the manual?
Questions and answers