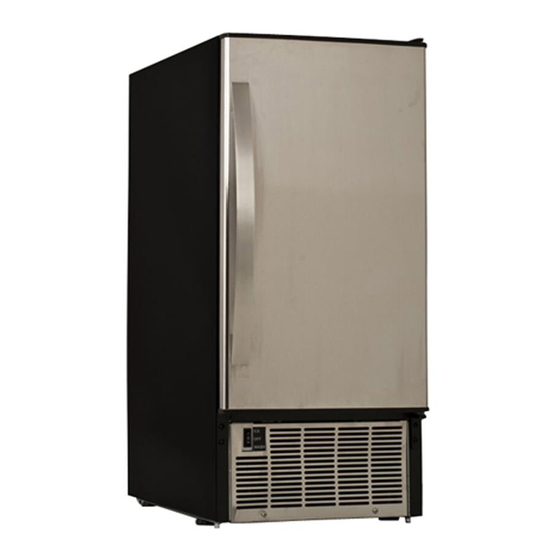
EdgeStar IB450SS Owner's Manual
Clear ice maker
Hide thumbs
Also See for IB450SS:
- Owner's manual (27 pages) ,
- Owner's manual (21 pages) ,
- Owner's manual (23 pages)

Subscribe to Our Youtube Channel
Related Manuals for EdgeStar IB450SS


Summary of Contents for EdgeStar IB450SS
- Page 1 IB450SS Clear Ice Maker Owner’s Manual This owner’s manual provides instructions on safe installation, use, and maintenance.
- Page 2 Clear Ice Maker User’s Manual Be sure to stand the ice maker upright for at least 24 hours prior to plugging it in. Installation only by a licensed plumber.
- Page 3 Thank you for purchasing this EdgeStar product. We are glad you chose us. We believe that your purchase of this product opens a relationship between you and EdgeStar. We will provide the customer support needed to nurture that relationship. This manual contains important information regarding the proper installation, use and maintenance of your product.
-
Page 4: Table Of Contents
Control Panel …………………………………………………………………………22-23 MAJOR FUNCTIONS…………………………………………………………………...23 TROUBLESHOOTING………………………………………………………………23-24 Limited Warranty ….…………………………………………………………………25-26 This owner’s manual is provided for reference only. Specifications may change without prior notice. You can always check the back label of your ice maker for the most updated technical information. -
Page 5: Ice Maker Safety
CAUTION means that failure to heed this safety statement may result in minor or moderate personal injury, property or equipment damage. ·Disconnect power before servicing. · Do not use an adapter. · Use two or more people to move/install the ice maker. -
Page 6: Important Safeguards
All other servicing should be referred to a qualified technician. Use two or more people to move and install ice maker. Failure to do so can result in a back injury or other injury. To ensure proper ventilation for your ice maker, Choose a well-ventilated area with temperatures above 50°F and below 100°F. -
Page 7: Technical Information
Never turn the water supply tap off when the ice maker is working. If the ice maker will not be used for a long time, before the next use it must be thoroughly cleaned. Follow carefully any instructions provided for cleaning or use of sanitizing solution. -
Page 8: Component Locations
This type of icemaker produces crystal-clear, gourmet cube ice. An insulated ice storage bin is built into each the icemaker. The ice bin will fill with ice and the ice maker will automatically shut off. Then the ice in the bin will slowly melt and go out the drain. Once enough of the ice has melted, the ice maker will automatically start making more ice. -
Page 9: Ice Maker Installation
Ice scoop ICE MAKER INSTALLATION Unpacking Use two or more people to move and install icemaker. Failure to do so can result in back or other injury. Remove packaging materials IMPORTANT: Do not remove any permanent instruction labels or the data label on your icemaker. -
Page 10: Location Requirements
The icemaker should not be located next to ovens, grills or other high heat resources. The ice maker requires a continuous water supply with a minimum pressure of 0.05Mpa and a static pressure not to exceed 0.8Mpa. The temperature of the water... -
Page 11: Electrical Requirements
The unit should be located on a firm and level surface. It is important for the ice maker to be level in order to work properly. If needed, you can adjust the height of the ice maker by rotating the feet. See the “Leveling the Ice Maker” section. -
Page 12: Recommended Grounding Method
We recommend using a carpenter’s level to check the machine. 1.Place a carpenter’s level on top of the product to see if the ice maker is level from front to back and side to side . 2.Adjust the height of the feet as follows: Turn the leveling feet to the right to lower that side of the ice maker Turn the leveling feet to the left to raise that side of the ice maker . -
Page 13: Water Supply
The water supply should be ready at the point of installation. The water supply pressure should be a minimum of 15 psig with a static pressure not more than 80 psig. (A wall outlet directly behind the ice maker will make installation easier.) -
Page 14: Water Supply
4.5 feet. 2. Find the drain hose on the back of ice maker, then insert the other side of the hose into the drain line. -
Page 15: Operation
Does the unit have proper drainage? 4. Has the machine been leveled? 5. Is the ice maker in a site where the ambient temperature is between 50º F and 100ºF and the water temperature between 41º F and 90º F all year round? 6. -
Page 16: Operating Method
Operating Method 1. Turn on the water tap, let the water trough fill, then switch the ICE/OFF/WASH switch on the front panel to the ICE position. The ice maker will start working automatically. 2. After three minutes, the machine will automatically go to the ice making stage, and the sound of flowing water will be heard. -
Page 17: How The Machine Uses The Water
The freeze cycle will restart when all the cubes have been harvested. How the machine uses the water The ice maker begins with a fixed charge of water that is contained in the water trough. As the water flows to the freezing evaporator surface, the portion of water that does not contain mineral impurities will freeze and stick to the ice cube molds. -
Page 18: Preparing The Icemaker For Long Storage
During the harvest cycle, you may hear the of ice cubes falling into the ice storing bin. Preparing the Icemaker for Long Storage If the ice maker will not be used for a long time, or is to be moved to another place, it will be necessary to drain the system of water. -
Page 19: Exterior Cleaning
There are 5 things to keep clean: 1. The exterior. 2. The interior. 3. The condenser 4. Water distribution tube 5. The ice-making system Exterior Cleaning The door and cabinet may be cleaned with a mild detergent and warm water solution such as 1 oz of dishwashing liquid mixed with 2 gallons of warm water. -
Page 20: Condenser Cleaning
Have the condenser cleaned at least once every six months. 1. Unplug the ice maker or disconnect power. 2. Remove the 2 screws at the bottom of the front cover and gently pull it off. -
Page 21: Control Panel
“OFF” at the ICE/OFF/WASH selector switch. 2. Remove all ice from the storage bin . 3. Keep the ice maker connected to the water supply , Pour 200g. of Nickel-Safe Ice Maker Cleaner Solution into the water trough. After about 5 minutes, initiate the wash cycle at the ICE/OFF/WASH selector switch by the switch in the “WASH ”position. - Page 22 Descriptions of LEDs and buttons: 1. Ice Full (Red) LED: Ice Full indicator light. When this LED is lit, the ice storage bin is full of ice or there is something obstructing the ice-full probe. The unit will stop working. When ice cubes are taken out of the ice storage bin, clearing the ice-full probe, the red LED will keep flashing for 3 minutes.
-
Page 23: Major Functions
4. The fan motor responds to the ambient temperature. If it is cold, the motor will stop working to keep the cooling system in good working condition. 5. Ice cube size is adjustable. 6. A sensitive probe and accurate timer enhance the performance of the ice maker. 7. Built-in compressor protection system. Before Calling for Service If the unit appears to be malfunctioning, read through the OPERATION section of this manual first. - Page 24 Level and lock the feet. See Leveling the Ice Maker. See “Normal Sounds.” Reconnect the power supply line. Cut off the electricity and let the ice maker stop working until the temperature returns within the stated range. Use the correct plug and outlet.
-
Page 25: Limited Warranty
All defective product components covered by this warranty will be repaired or replaced, at EdgeStar’s option, free of charge on a mail-in basis to EdgeStar’s authorized repair facility during the first 90 days from the date of original purchase. All defective product components covered by this warranty will be repaired or replaced, at EdgeStar’s option, on... - Page 26 Once an EdgeStar authorized representative has confirmed that your product is eligible for warranty service, the product must be returned to our EdgeStar repair facility. The purchaser is solely responsible for prepaying all shipping related costs to and from the repair facility.
- Page 27 For product guides, additional troubleshooting resources, and up to date information, visit us on the web at: http://www.edgestar.com EdgeStar Products Box 81336 Austin, TX 78708-1336 Toll Free: 1-866-319-5473...
Need help?
Do you have a question about the IB450SS and is the answer not in the manual?
Questions and answers