Table of Contents
Advertisement
Advertisement
Table of Contents

Related Manuals for EdgeStar IB250SS


Summary of Contents for EdgeStar IB250SS
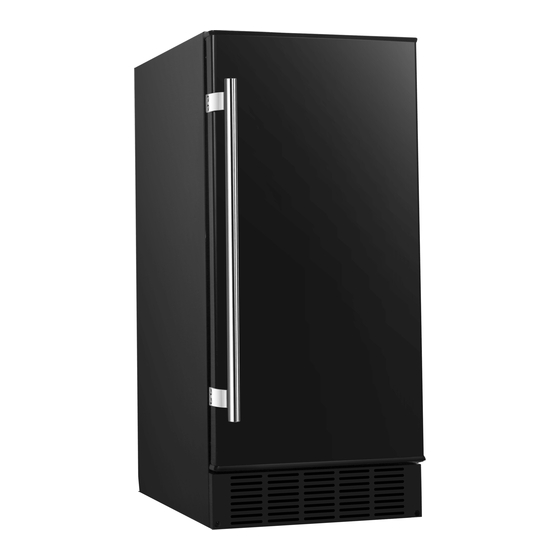
- Page 1 Undercounter Crescent Ice Maker IB250SS / IB250WH IB250BL / IB250SSOD Owner’s Manual For more information on other great EdgeStar products on the web, go to http://www.edgestar.com To use the EdgeStar self-diagnostic tool, go to https://support.edgestar.com V2.10-10162018...
- Page 2 Important Safety Information Improper handling can cause serious damage to the EdgeStar ice maker and / or injury to the user. This ice maker is designed for domestic use only. All units besides the IB250SSOD should only be used indoors. Do not use the unit for industrial or commercial use. Any other use or incorrect installation may invalidate the warranty.
- Page 3 General Safety Never clean ice maker parts with flammable fluids. Do not store or use this appliance near flammable gas or combustibles, such as gasoline, benzene, thinner, etc. The fumes can create a fire hazard or an explosion. This unit must be protected from any type of moisture or precipitation. ...
-
Page 4: Table Of Contents
PERATING ETHOD ………………………………………………………………………………………………………………. 8 ARVEST ONTROL ……………………………………………………………………………………………………………………… 9 RODUCTION CLEANING AND MAINTENANCE………………………………………………………………………………………………... 10 …………………………………………………………………………………………………………………. 10 XTERIOR LEANING …………………………………………………………………………………………………………………... 10 NTERIOR LEANING ………………………………………………………………………………………………………………………….. 11 INTERIZING …………………………………………………………………………………………………………………….11 ECOMMISSIONING Start Up………………………………………………………………………………………………………………………………. 11 Condenser Cleaning………………………………………………………………………………………………………………… 11 TROUBLESHOOTING……………………………………………………………………………………………………………… 12 SPECIFICATIONS………………………………………………………………………………………………………………….. 13 EDGESTAR LIMITED WARRANTY……………………………………………………………………………………………… 14... -
Page 5: Introduction
Introduction Thank you for purchasing this EdgeStar built-in ice maker. We hope that this purchase will be the beginning of a lasting and rewarding relationship between you and EdgeStar. We will provide the customer support and exemplary products necessary to nurture that relationship. -
Page 6: Parts Identification
Parts Identification Front View Back View... -
Page 7: Installing The Ice Maker
Installing the Ice Maker Warning: Use two (2) or more people to move and install the ice maker. Failure to do so can result in back or other injury. The ice maker should be installed by a licensed plumber in accordance with local electrical and plumbing code requirements. -
Page 8: Installation Clearance Requirements
The unit must sit on a secure and level surface. A mounting flange must NOT be used to support the unit’s weight. It is important for the ice maker to be leveled in order to work properly. If needed, you can adjust the height of the ice maker by revolving the rubber leveling feet. -
Page 9: Electrical Requirements
Electrical Requirements Electrical Shock Hazard Plug into a grounded 3-prong outlet. Never remove the grounding prong from the plug. Never use an adapter. Never use an extension cord. Failure to follow these instructions can result in fire, electrical shock, or death. Before you move your ice maker into its final location, it is important to make sure you have the proper electrical connection: a standard electrical supply (115 V, 60Hz.), properly grounded in accordance with the National Electrical Code and local codes and ordinances, is... -
Page 10: Leveling The Ice Maker
Leveling the Ice Maker Important: Once you are ready to install the ice maker in a cabinet or directly on the floor, you must adjust the feet to level the ice maker. If the floor is level, just rotate the two front feet to touch the floor. -
Page 11: Operation
In general, it is always a good idea to filter the water. A water filter can remove taste and odors as well as particles. Where water is very hard, softened water may result in white, mushy cubes that stick together. De-ionized water is not recommended. Operation Final Check List Before Operation 1. -
Page 12: Ice Harvest Control
Ice Harvest Control The ice harvest control adjusts the temperature at which the ice is harvested from the ice maker mold. A colder setting results in harder ice, which is slower to melt, but also increases ice production time. A warmer setting speeds up ice production time. The ice harvest control is preset at the factory and adjustments are not normally needed. -
Page 13: Ice Production
Ice Production When the ice bucket is full, the ice maker mold will shut off. However, the refrigeration system will continue to cool and maintain the ice cube supply. Important: Do not place cans or bottles in the ice compartment because they will freeze. ... -
Page 14: Cleaning And Maintenance
Cleaning and Maintenance Caution: The ice maker must be thoroughly cleaned if it has been left unused for a long time. Carefully follow any instructions provided for cleaning or use of sanitizing solution. Do not leave any solution inside the ice maker after cleaning. Periodic cleaning and proper maintenance will ensure efficiency, top performance, and long life. -
Page 15: Winterizing
Winterizing Warning: Disconnect power at the source before working on the unit. Do not winterize this unit with ANY type of anti-freeze; damage to the ice maker mold coating will occur, invalidating the product’s Limited Warranty and creating a potential health hazard. 1. -
Page 16: Troubleshooting
Troubleshooting Before Calling for Service If the unit appears to be malfunctioning, read through the “Operation” section of this manual first. If the issue persists, check the Troubleshooting Guide below. Some of the problems mentioned in the Troubleshooting Guide can be solved easily without a service call. Problem Possible Cause Probable Correction... -
Page 17: Specifications
Note: Technical data and performance information are provided for reference only and subject to change. Description of Product Undercounter Crescent Ice Maker Model IB250BL, IB250SS, IB250WH, IB250SSOD Voltage/Frequency AC 115V~60Hz Ice-Making / Ice-Harvest rated current 1.8 A / 1.5 A... -
Page 18: Edgestar Limited Warranty
WHAT IS COVERED: For a period of ONE (1) YEAR from the date of original retail purchase, EdgeStar will repair or replace any part free of charge including labor that fails due to a defect in materials or workmanship. Labor will be performed free of charge at an authorized EdgeStar repair facility and EdgeStar will supply new, rebuilt, or refurbished parts free of charge.
Need help?
Do you have a question about the IB250SS and is the answer not in the manual?
Questions and answers