
Related Manuals for EdgeStar IB450SSP


Summary of Contents for EdgeStar IB450SSP
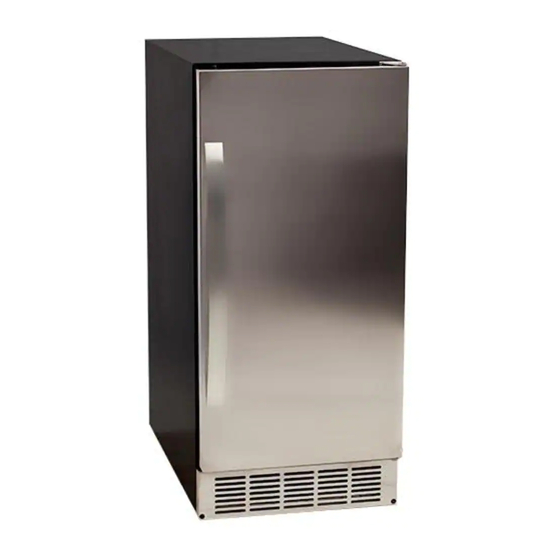
- Page 1 Built-in Ice Maker with Internal Pump IB450SSP Owner’s Manual For more information on other great EdgeStar products on the web, go to http://www.edgestar.com...
-
Page 2: Important Safety Information
Important Safety Information Improper handling can cause serious damage to the EdgeStar ice maker and/or injury to the user. This ice maker is designed for domestic indoor use only. Do not use the unit for industrial or commercial use. Any other use may invalidate the warranty. -
Page 3: Table Of Contents
Installation should only be done by a licensed plumber. This owner’s manual is provided for reference use only. Specifications may change without prior notice. Refer to the product label on the back of your ice maker for the latest technical information. EdgeStar Built-in Ice Maker... -
Page 4: Introduction
Introduction Thank you for purchasing this EdgeStar ice maker. We are glad you chose us. We believe that your purchase of this product opens a relationship between you and EdgeStar. We will provide the customer support needed to nurture that relationship. -
Page 5: Parts Identification
Front View Water distribution Evaporator (ice mold) Door Water trough Float Ice storage bin Control panel Front louver panel Leveling Leg (Kickplate) Back View Ice Scoop Power Cord Water inlet Drain outlet Drain Hose Water Supply Hose EdgeStar Built-in Ice Maker... -
Page 6: Installing The Ice Maker
Installing the Ice Maker WARNING: Use two or The ice maker should be installed by a licensed plumber in accordance with more people to move and local electrical and plumbing code requirements. install the ice maker. Failure to do so can result in back Before you plug the ice maker, be sure to let it stand upright for at least 24 hours or other injury. -
Page 7: Installation Clearance Requirements
• A standard electrical supply (115 VAC only, 60 Hz, 15 A), properly or cabinet. grounded in accordance with National Electrical Code and local codes and ordinances is required. EdgeStar Built-in Ice Maker... -
Page 8: Electrical Requirements
Electrical Requirements Electrical Shock Hazard Plug into a grounded 3-prong outlet. Never remove the grounding prong from the plug. Never use an adapter. Never use an extension cord. Failure to follow these instructions can result in fire, electrical shock, or death Before you move your icemaker into its final location, it is important to make sure you have the proper electrical connection: A standard electrical supply (115 V, 60Hz.), properly grounded in... -
Page 9: Leveling The Ice Maker
3. Install the hinge axis through the bottom supporting hinge. Gently place the door on the supporting hinge. The door should be open approximately 20 degrees. 4. Install the top hinge axis. Tighten firmly. Replace any hinge covers, when applicable. EdgeStar Built-in Ice Maker... -
Page 11: Water Supply Connections
• In general, it is always a good idea to filter the water. A water filter can remove taste and odors as well as particles. Where water is very hard, softened water may result in white, mushy cubes that stick together. Deionized water is not recommended. EdgeStar Built-in Ice Maker... -
Page 12: Operation
Connecting the drain line: There are two choices for drain operation: one that drains by gravity and one that utilizes an internal drain pump. The unit can pump out water up to 5ft vertically or 5ft horizontally. NOTE: There is a drain line on the ice maker. Please drain water through the drain line provided with ice maker. -
Page 13: Operating Method
The circuit board activates the water drain pump for 20 seconds, pumping out most of the water contained in the reservoir. EdgeStar Built-in Ice Maker... -
Page 14: How The Machine Makes Ice
IMPORTANT: • Although the unit has been tested and cleaned at the factory, due to long-term transit and storage, the first batch of cubes must be discarded. • Never turn the water supply tap off when the ice maker is working. -
Page 15: How The Drain Pump Operates
The circuit board activates the buzzer alarm, informing the user that the drain pump, water lever switch or drain tube is malfunctioning. If this happens, power the unit off and back on. If the problem persists, contact customer service. EdgeStar Built-in Ice Maker... - Page 16 VERTICAL The water can be pumped out up to 5ft vertically or 5ft horizontally. NOTE: The outlet of the drain hose must be raised higher than the water surface to prevent the drained water from the flowing back into the reservoir. WARNING! If alarm buzzer sounds, HORIZONTAL...
- Page 17 SCHEMATIC SYSTEM EdgeStar Built-in Ice Maker...
-
Page 18: Normal Sounds
Normal Sounds Your new icemaker may make sounds that are not familiar to you. Most of the new sounds are normal. Hard surfaces like the floor, walls can make the sounds seem louder than they actually are. The following describes the kinds of sounds that might be new to you and what may be making them. -
Page 19: Cleaning And Maintenance
If the door panel is stainless finish, it can discolor when exposed to chlorine gas and moisture. Clean stainless finish with a cloth dampened with a mild detergent and warm water solution. Never use an abrasive cleaning agent. EdgeStar Built-in Ice Maker... -
Page 20: Interior Cleaning
Interior Cleaning The ice storage bin should be sanitized occasionally. Clean the water trough before the ice maker is used for the first time and reused after stopping for an extended period of time. It is usually convenient to sanitize the trough after the ice making system has been cleaned and the ice storage bin is empty. -
Page 21: Water Distribution Tube Cleaning
1. Make sure that all the ice is off of the evaporator. If ice is being made, wait for cycle completion, then press the machine’s ON/OFF switch on the control panel. 2. Remove all ice from the storage bin. EdgeStar Built-in Ice Maker... - Page 22 3. Keep the ice maker connected to the water supply, Pour 200g of Nickel-Safe Ice Maker Cleaner Solution into the water trough. After about 5 minutes, press the ON/OFF button and the CLEAN button, initiating the wash cycle. The machine will run the Automatic Clean Mode.
-
Page 23: Control Panel
LEDs. 5. Adjust button: Mainly for service. When it is pressed over 3 seconds, the unit will enter the Ice Size Adjustment mode. The mode can be judged from the status of the yellow LED. EdgeStar Built-in Ice Maker... -
Page 24: Troubleshooting
TROUBLESHOOTING Before Calling for Service If the unit appears to be malfunctioning, read through the OPERATION section of this manual first. If the issue persists, check the troubleshooting section below. The issue could be solved by following the suggestions in the “Solution” column. Issue Possible Cause Solution... -
Page 25: Specifications
Once enough of the ice has melted, the ice maker will automatically start making more ice. EdgeStar Built-in Ice Maker...
Need help?
Do you have a question about the IB450SSP and is the answer not in the manual?
Questions and answers