Table of Contents
Advertisement
Advertisement
Table of Contents

Subscribe to Our Youtube Channel
Related Manuals for Flo CoRe+ Series


Summary of Contents for Flo CoRe+ Series
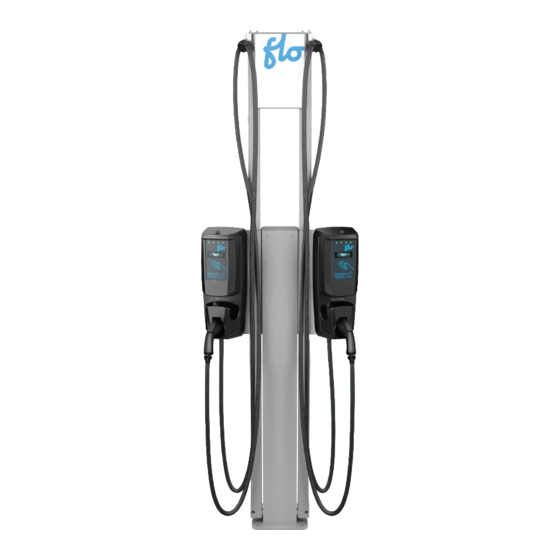
- Page 1 CoRe+ Installation Guide...
- Page 2 IMPORTANT Split Phase 120/240 VAC Supply or 3 phase 120/208 VAC (must be protected by a 40 A fuse or circuit breaker) Both lines must have 120V between ground. Voltage supply must be grounded. Require 2 lines and 1 ground connection. Neutral is not used. (Refer to Figure 1 and Figure 2) Maximum output power: 7.2 kW @ 240 VAC or 6.3 KW @ 208 VAC Built-in protection against overvoltage conditions and leakage current to ground Connect the power supply of the EVSE with caliber 6 to 8 copper conductors...
-
Page 3: Table Of Contents
Table of Contents Introduction ......... 4 Statement . -
Page 4: Introduction
200 mm (7.87'') between itself and a person’s body and must not be colocated or operated with any other antenna in order to comply the conditions of the FCC Grants. Modifications not expressly approved by FLO and AddÉnergie Technologies inc. could void the user’s authority to operate the equipment. -
Page 5: Statement
Specifications Models: CoRe+V2, CoRe+VBV2, CoRe+PSV2 Company Info: FLO (AddEnergie Technologies Inc.) 254081 Specifications: Description of the available models: • CoRe+V2: Level 2 charging station equiped with display and card reader • CoRe+VBV2: Level 2 charging station without display and without card reader •... -
Page 6: Installation And Safety
Installation and Safety INSTRUCTIONS PERTAINING TO A RISK OF FIRE OR ELECTRIC SHOCK IMPORTANT SAFETY INSTRUCTIONS - PLEASE DO NOT DISCARD THESE INSTRUCTIONSWARNING – When using electric products, basic precautions should always be followed, including the following: This manual contains important instructions for Model CoRe+ that must be followed during installation, operation and maintenance of the unit. -
Page 7: Dimensions
Dimensions 7.5’’ 5.5’’ 3.75’’ 190.5 mm 139.7 mm 95.25 mm 13’’ Drilling pattern : 330.2 mm 18.5’’ 469.9 mm 52.5’’ 1333.5 mm 43.125’’ 1095.38 mm GROUND CoRe+ Installation Guide... -
Page 8: Wall Or Post Mounting
Wall or Post Mounting Power Cable Entry under the Station • Avoid installing the EVSE in bad • IMPORTANT: weather conditions. Never remove the protection plate of the key • hole. L1 L2 • Connect two power conductors (L1 and L2) and the •... - Page 9 Wall or Post Mounting Power Cable Entry from the Back • Remove the plate to avoid the splatter of particles in the equipment. • IMPORTANT, never • Punch a hole of the appropriate diameter remove the to install the cable connector. protection plate of •...
- Page 10 Wall or Post Mounting With Electrical Box • IMPORTANT: Never remove the protection plate of the keyhole. • Remove the backplate. • Install the head base in order to align the rectangular opening with the box opening in the wall or the post.
-
Page 11: Closing The Housing Of The Station
Closing the Housing of the Station Output • Data cable • Connect the cables to their connectors. • Ground • O-ring • Install the head to the base, making sure that the seals stay in place, then install the four mounting screws. •... -
Page 12: Preliminary Tests And Commissioning
IMPORTANT: The commissioning might need to be conducted by an authorized Division of Measurement Standards (DMS) agent if this charging station is intended for use in energy billing mode under commercial application in California. Please call FLO Services for more details. Instructions: •... -
Page 13: Powersharing
To resume charging, the user must restart the usage session process from the beginning. The site controller is provided by FLO as part of central management service. The communication between the site controller and the charging station is through a wireless meshed Zigbee network. -
Page 14: Installation For Cascading 40 A
Installation Guide Cascading on a 40 A Circuit STEP 1 Mounting bracket preasseMbly: The preassembly requires the 40 A cascading kit (AddÉnergie part number C+V1-PWCK-40). • Install the DIN rail as well as the provided terminal DIN Rail blocks (2 isolated 2-position terminal blocks for End sections the live conductors, and 1 non-isolated terminal block for the grounding conductor) with the... - Page 15 Installation Guide Cascading on a 40 A Circuit STEP 3 Pedestal and charging station installation: • Slide the pedestal over the assembly, making sure that the terminal blocks are facing the access door at the bottom of the pedestal, then tighten the 4 mounting nuts that secure everything to the anchor.
-
Page 16: Installation For Cascading 150 A
Mounting bracket pre-assembly The pre-assembly requires the 150 A cascading kit (FLO part number C+V1-PWCK-150/ACPE0007) and 1-pole or 40 A double pole circuit breaker (FLO part number breaker-40D/ELBR007) depending on the number of charging stations to be mounted on the pedestal. -
Page 17: Copyright And Liability
Document Name: FLO_CoRe+_Installation Guide_V.21.0.0_2023-10-26_US_EN Document ID: PRFM0033 FLO CA: © 2023 Services FLO Inc., All rights reserved. FLO, the FLO logo, LEAD THE WAY, and TRACEZ LA VOIE are trademarks of Services FLO Inc. ADDÉNERGIE is a trademark of AddÉnergie Technologies Inc. - Page 18 Contact Us Telephone: 1 855 543 8356 Email: Info@flo.com Website: Flo.com Eastern office: 2800, Louis-Lumière Street, office 100, Québec (QC) Canada G1P 0A4 Regional office – Western Canada: #501 – 4190 Lougheed Highway Burnaby (British Columbia), Canada, V5C 6A8 United-States Office: 1270 Pacific Dr, Auburn Hills, MI, United States – 48326...
Need help?
Do you have a question about the CoRe+ Series and is the answer not in the manual?
Questions and answers