Maytronics Dolphin M600 User Instructions
Robotic pool cleaner
Hide thumbs
Also See for Dolphin M600:
- User manual ,
- Disassembly instructions manual (24 pages) ,
- User instructions (15 pages)

Related Manuals for Maytronics Dolphin M600


Summary of Contents for Maytronics Dolphin M600
- Page 1 M600 / ZENIT 60 / ACTIVE X6 / ACTIVE ULTIMATE Maytronics Dolphin robotic pool cleaner User Instructions 8180002...
-
Page 2: Table Of Contents
M600 / ZENIT 60 / ACTIVE X6 / ACTIVE ULTIMATE Robotic Pool Cleaner User Instruc tions Contents INTRODUC TION ..............................2 SPECIFIC ATIONS ..............................2 WARNINGS AND C AUTIONS ..........................2 Water conditions ............................3 Impor tant: Setting up the Wi-Fi® ......................3 ROBOTIC POOL CLEANER PARTS ........................4 USING THE ROBOTIC POOL CLEANER ......................5 Setup ..................................5 Placing the Robotic Pool Cleaner into the pool ................ -
Page 3: Introduction
INTRODUCTION Thank you for purchasing a May tronics Robotic Pool Cleaner. We are sure that your May tronics Robotic Pool Cleaner will provide you with reliable, convenient, and cost-ef fective pool cleaning, to enhance your pool’s hygiene. Robotic Pool Cleaners by May tronics deliver advanced cleaning technologies, exceptional ease of use, long-lasting per formance, and simple maintenance. -
Page 4: Water Conditions
T o reduce the risk of electric shock replace damaged cord immedietely. Do not use extension cord to connect unit to electric supply; provide a properly located outlet. WARNING Please ensure that the following PRECAUTIONS are implemented: Operator should keep hands away from driving belt mechanism. CAUTION Position the Caddy and power supply at least 3.5m/12f t from pool’s edge –... -
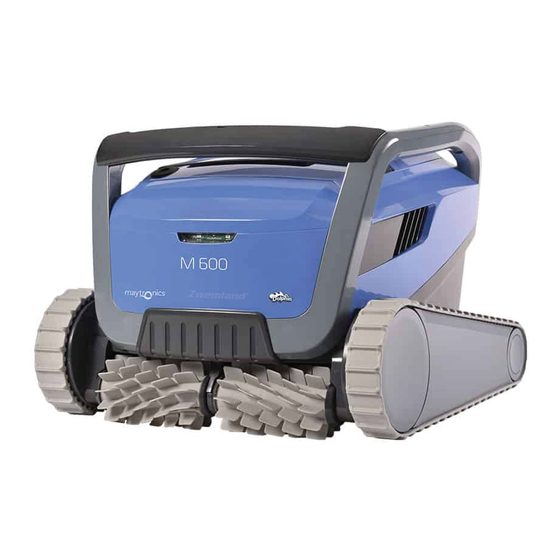
Page 5: Robotic Pool Cleaner Parts
ROBOTIC POOL CLEANER PARTS Robotic Pool Cleaner Power supply Filtration Start the season with the net filters for large debris then use ultra-fine filters for daily use. * The net filters are assembled in the filter basket. Caddy kit M600 / ZENIT 60 / ACTIVE X6 / ACTIVE ULTIMATE Robotic Pool Cleaner User Instruc tions... -
Page 6: Using The Robotic Pool Cleaner
USING THE ROBOTIC POOL CLEANER Setup Before using the Robotic Pool Cleaner for the first time, per form the following steps: 5.1 .1 5.1 . 2 Position the power supply Unwind the cable and stretch it out completely so that it at approximately the middle of the has no kinks. -
Page 7: Placing The Robotic Pool Cleaner Into The Pool
Placing the Robotic Pool Cleaner into the pool 5. 2 .1 Place the Robotic Pool Cleaner in the pool. Release it and let it sink to the floor of the pool. Make sure that the floating cable is free of any obstacles. Connecting the robot to your smart device (Phone or tablet) Please follow these simple steps: Download the MyDolphin™... -
Page 8: Operating The Robotic Pool Cleaner Without Using Your Smart Device
Operating the Robotic Pool Cleaner without using your smart device Press the power but ton to turn the robot ON. The Robotic Pool Cleaner will now operate until it has reached the end of the cleaning cycle. Using the power supply Your power supply is designed to provide you with the most advanced features to improve your experience. -
Page 9: Removing The Robotic Pool Cleaner From The Pool
Removing the Robotic Pool Cleaner from the pool T urn OFF and unplug the power supply. WARNING 5.7.1 5.7. 2 Use the floating cable to pull the Robotic Pool Cleaner to the side of the pool. Use the handle to remove the robot from the pool. DO NOT PULL THE POOL CLEANER FROM THE POOL USING THE C ABLE. -
Page 10: C Are And Maintenance
C ARE AND MAINTENANCE Make sure the power supply is switched o and unplugged. WARNING We highly recommend cleaning the filter basket after each cleaning cycle. Note: Do not let the filter panels dry out before cleaning. Cleaning after use - Removing and cleaning the dual filter basket click! 6 .1 . -
Page 11: Periodic Filter Cleaning - Recommended At Least Once A Month
Periodic filter cleaning - Recommended at least once a month Dismantle the 4 ultra-fine filter panels of the outer basket, according to the following steps: 6 . 2 . 2 6 . 2 . 3 6 . 2 .1 Hold down the Dismantle the Continue to dismantle the panels in order: 2 —... -
Page 12: Cleaning The Impeller
Cleaning the impeller If you notice debris trapped in the impeller: Make sure the power supply is switched off and unplugged. WARNING Clean the debris trapped in the impeller opening, according to the following steps: 6 . 3.1 6 . 3. 2 6 . -
Page 13: Periodic General Maintenance - Recommended At Least Once A Week
Assemble the impeller compar tment according to the next steps: 6 . 3.6 6 . 3. 5 Periodic general maintenance - Recommended at least once a week • When the cable is wet, spread it flat and straight in the yard, and allow it to dr y for at least five hours to avoid twisting of the cable. -
Page 14: Troubleshooting
TROUBLESHOOTING If the suggested solutions do not solve the problem, please contact your dealer or Ser vice Center. Symptom Possible reason Corrective action The power supply • No voltage in the power socket in the wall. • Check that there is voltage in the power socket in the wall. or its switch LED •... - Page 15 Symptom Possible reason Corrective action Can not connect • The power supply is too far from the router • Please reset the power supply (disconnect the power cord), to your Wi-Fi®, and (weak signal) or your router is not working and wait 1 min.
Need help?
Do you have a question about the Dolphin M600 and is the answer not in the manual?
Questions and answers