Table of Contents
Advertisement
Available languages
Available languages
1
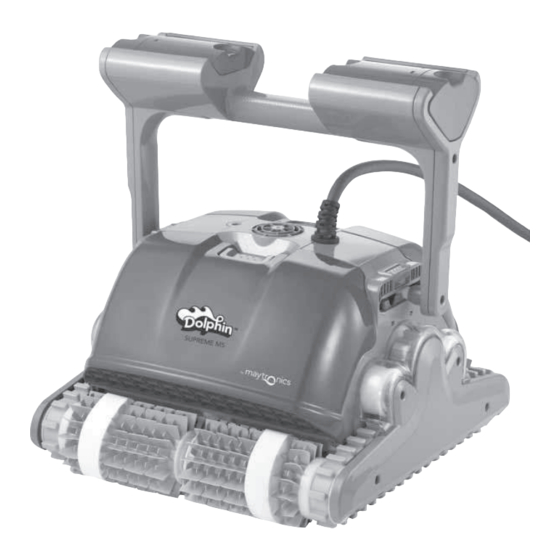
DOLPHIN SUPREME M5
EN
User Instructions
This model includes a Remote Control Unit.
You will find the User Instructions in a separate document.
FR
Guide d'utilisation
Ce modèle comprend une télécommande.
Sa notice d'emploi fait l'objet d'un document séparé.
IT
Istruzioni per l'uso
Questo modello è dotato di telecomando.
Le istruzioni per l'uso si trovano in un documento separato.
SP
Instrucciones para el Usuario
Este modelo incluye una Unidad de Control Remoto.
Las Instrucciones para el Usuario están en un documento separado.
DEU
Bedienungsanweisungen
Dieses Modell verfügt über eine Fernbedienung.
Die Bedienungsanweisungen für die Fernbedienung können Sie in einem anderen
Dokument finden.
by
English
Advertisement
Table of Contents

Related Manuals for Maytronics Dolphin SUPREME M5


Summary of Contents for Maytronics Dolphin SUPREME M5
- Page 1 English DOLPHIN SUPREME M5 User Instructions This model includes a Remote Control Unit. You will find the User Instructions in a separate document. Guide d’utilisation Ce modèle comprend une télécommande. Sa notice d’emploi fait l’objet d’un document séparé. Istruzioni per l’uso Questo modello è...
-
Page 3: Section 1 - Description Of Main Components
English What You’ll Find Inside the Box Part Comment Base frame for filter elements Filter and cartridges Ultra-fine filter 4 filters Bag for filters storage Spring net filter 4 filters “S” clip Power supply unit Dolphin pool cleaner Dolphin pool cleaner Caddy kit Remote control unit Optional components available on request from your Dolphin distributor... -
Page 4: Power Supply Unit
English 3. Power supply unit Full Filter Delay Bag Indicator Indicator Digital, “Switch-Mode” power supply: Input - 100-250 AC Volts On/Off 50-60 Hertz switch 180 Watt Output - 30 VDC IP 54 Reset button Section 2 – Dolphin Operation Part 1 – Preparing the Dolphin pool cleaner for use A. - Page 5 English C. Laying out the cable Unwind minimal required cable to cover the entire pool size, straight the cable along the pool side. Make sure there are no twists or kinks. 3 Meters 10 feet Swivel Use only the original supplied power supply unit. The power supply unit is splash proof –...
- Page 6 English Turning the Dolphin ON Floating cable 1. Plug the floating cable from the Dolphin into the power supply unit. 2. Plug the electrical cable from the power supply unit into the mains. 3. Press on the ON/OFF switch. 4. The Dolphin will now start to work. On/Off switch Note: If your model includes the remote control unit, please refer to the included instruction leaflet.
-
Page 7: Section 3 - Routine Maintenance
English Section 3 - Routine Maintenance Part 1 - Extracting and cleaning the filter elements Unplug power supply before any servicing activity. Reassembling the filter elements Insert the locating tabs at the bottom of the filter element into their groves on the base frame, then close the “S” clip. Locating tab Locating tab groove... -
Page 8: Part 2 - Dismantling And Cleaning The Impeller
English Reinstall the filters according to the diagram DO NOT FORCE THE FILTERS INTO PLACE. Grooved end fitting Octagonal end fitting Important: Where applicable, you must reset the full filter bag indicator on the power supply unit. Recommendation: Rinse all brushes with clean water after each cleaning cycle. Part 2 - Dismantling and cleaning the impeller Unplug power supply before any servicing activity. -
Page 9: Troubleshooting Guide
Motor is not working Check if the impeller is blocked Check if the drive system is blocked Electrical problem (power supply), check power source. If power source is in order, please contact your Dolphin distributor Additional troubleshooting is available at our Website: www.maytronics.com... - Page 10 French Liste des pièces fournies dans l’emballage Pièces Remarque Châssis des composants du filtre Filtre et cartouches Filtre ultrafin 4 filtres Poche de rangement des sacs filtres Filtre pour nettoyage de printemps 4 filtres Crochet en “S” Bloc d’alimentation Robot nettoyeur de Robot nettoyeur de piscine Dolphin piscine Dolphin Kit Caddy...
- Page 11 French 3. Bloc d’alimentation électrique Indicateur de sac Indicateur de filtre plein Alimentation numérique avec temporisation « Mode Interrupteur » (Switch mode): Entrée - 100-250 AC Volts Marche/Arrêt 50-60 Hertz 180 Watt Sortie - 30 VDC Bouton de IP 54 remise à...
- Page 12 French C. Disposition du câble Déroulez le minimum nécessaire de câble pour assurer la couverture de toute la piscine. Veillez à le poser bien droit le long de la paroi et vérifiez qu’il ne présente ni nœuds ni torsades. 3 mètres 10 ft.
- Page 13 French Mise sous tension du Dolphin Câble flotteur 1. Reliez le câble flotteur du Dolphin au bloc d’alimentation. 2. Reliez le câble électrique du bloc d’alimentation au secteur. 3. Appuyez sur l’interrupteur de marche/arrêt (ON/OFF). 4. Le Dolphin va maintenant entamer son cycle de nettoyage.
-
Page 14: Chapitre 3 - Maintenance De Routine
French Chapitre 3 – Maintenance de routine ère partie – Extraction et nettoyage des composants du filtre Débranchez l’alimentation avant d’entreprendre toute activité d’entretien. Remontage Insérez les attaches de fixation au bas du filtre dans les rainures prévues à cet effet sur le châssis, ensuite fermez le crochet en «... - Page 15 French Réinstallez les filtres suivant le schéma NE PAS FORCER SUR LES FILTRES POUR LES METTRE EN PLACE. Embout à rainure Embout octogonal Important! Le cas échéant, remettez l’indicateur de sac filtre à zéro sur le bloc d’alimentation. Recommendation: Rincez toutes les brosses à l’eau claire après chaque cycle de nettoyage. ère partie –...
-
Page 16: Localisation Des Pannes
Vérifiez si le système d’entraînement est bloqué Vérifiez s’il existe un problème électrique (alimentation) en contrôlant l’arrivée du secteur. Si l’arrivée du courant est correcte, veuillez contacter votre distributeur Dolphin D’autres cas de panne sont consultables sur notre site Internet: www.maytronics.com... - Page 17 Italiano Cosa trovate nella scatola Parti commenti Telaio base per elementi filtro Filtro ultra fine 4 filtri Filtro e cartuccia Sacchetto per la conservazione dei filtri Filtro per la primavera 4 filtri Fermagli a “S” Alimentatore elettrico Robot per la pulizia della piscine Robot Dolphin per la Dolphin pulizia della piscina...
- Page 18 Italiano 3. Alimentatore elettrico Indicatore di sacchetto Indicatore di filtro pieno ritardo Alimentatore digitale switching Ingresso - 100-250 Volt CA 50-60 Hertz Interruttore 180 Watt On/Off Uscita - 30 VCC IP 54 Pulsante Reset Sezione 2 – Funzionamento di Dolphin Parte 1 –...
- Page 19 Italiano C. Posa del cavo Svolgere la lunghezza di cavo minima per la copertura di tutti i punti della piscina, stendendo il cavo lungo il bordo della piscina. Assicurare che non ci siano aggrovigliamenti e piegature. 3 Metri Mulinello Usare solo l’alimentatore elettrico fornito in dotazione. L’alimentatore è...
- Page 20 Italiano Avviare Dolphin Cavo galleggiante 1. Collegare il cavo galleggiante di Dolphin all’alimentatore elettrico. 2. Collegare il cavo elettrico dell’alimentatore elettrico alla presa di rete. 3. Premere l’interruttore ON/OFF. 4. Dolphin inizierà così a funzionare. Interruttore ON/OFF Nota: Se il modello è dotato di telecomando, fare riferimento all’accluso foglietto d’istruzioni. Importante: NON entrare nella piscina quando il pulitore é...
-
Page 21: Sezione 3 - Manutenzione Di Routine
Italiano Sezione 3 – Manutenzione di routine Parte 1 – Estrazione degli elementi filtro e loro pulizia Staccare l’alimentatore elettrico dalla rete prima di ogni attività di servizio. Rimontaggio Inserire le alette di posizione del fondo del filtro nelle loro scanalature del telaio di base, poi chiudere i fermagli a “S”. Alette di posizione Scanalatura per le alette di posizione... - Page 22 Italiano Re-installare i filtri secondo il diagramma NON FORZARE I FILTRI IN POSIZIONE. Raccordo finale scanalato Raccordo finale ottagonale Importante: Se applicabile, bisogna azzerare l’indicatore di sacchetto filtro pieno sull’alimentatore. Consiglio: Sciacquare tutte le spazzole con acqua pura dopo ogni ciclo di pulizia. Parte 2 –...
- Page 23 Verificare se la girante è bloccata Verificare se il sistema di trazione è bloccato Problema elettrico (alimentatore), verificare l’alimentatore. Se l’alimentatore è funzionante, contattare il distributore Dolphin Un’ulteriore guida per la riparazione dei guasti è ottenibile sul sito web: www.maytronics.com...
- Page 24 Spanish Dentro de la Caja Usted encontrará Parte Observaciones Armazón para los Elementos del Filtro Filtros y Cartuchos Filtro Ultra-Fino 4 filtros Bolsa para almacenamiento de filtros Filtro de Resorte 4 filtros Clip “S” Unidad de la Fuente de Alimentación Limpiador de Piscina Dolphin Limpiador de Piscina Dolphin...
- Page 25 Spanish 3. Unidad de la Fuente Filtro Lleno Indicador de Indicador de la Bolsa de Alimentación Demora Fuente de alimentación Digital, “Switch-Mode”: Interruptor de Entrada - 100-250 AC Voltios Encendido/ 50-60 Hertz Apagado 180 Watt Botón de Salida – 30 VDC Reencendido IP 54 Sección 2 –...
- Page 26 Spanish C. Colocar el Cable Desenrolle el mínimo cable requerido para cubrir todo el tamaño de la piscina, enderece el cable a lo largo del lado de la piscina. Cerciórese de que no haya torceduras o vueltas. 3 Metros 10 pies Eslabón Giratorio Use solamente la unidad de la fuente de alimentación original suministrada.
- Page 27 Spanish Activar el Dolphin Cable flotador 1. Enchufe el cable flotador del Dolphin en la unidad de la fuente de alimentación. 2. Enchufe el cable eléctrico de la unidad de la fuente de alimentación en la red eléctrica. 3. Presione el interruptor de Encendido/Apagado. 4.
-
Page 28: Sección 3 - Mantenimiento General
Spanish Sección 3 – Mantenimiento General Parte 1 – Remover y limpiar los Elementos del Filtro Desconecte la fuente de alimentación antes de cualquier actividad de mantenimiento. Reensamblar Inserte las lengüetas de localización en la parte inferior del elemento del filtro en sus ranuras en el bastidor base, después cierre el clip “S”. Lengüeta de localización Ranura de la lengüeta de localización... - Page 29 Spanish Re-instale los filtros según el diagrama NO FUERCE LOS FILTROS EN EL LUGAR. Pieza de extremidad con ranuras Pieza de extremidad octagonal Importante: Cuando pertinente, usted debe reajustar el indicador de bolsa de filtro llena en la unidad de la fuente de alimentación. Recomendación: Lave todos los cepillos con agua limpia después de cada ciclo de limpieza.
-
Page 30: Guía De Localización De Averías
Verifique si el sistema de Impulsión está bloqueado Problema eléctrico (fuente de alimentación). Verifique la fuente de energí. Si la fuente de energía está en orden, entre en contacto con su distribuidor Dolphin Soluciones adicionales de problemas están disponibles en nuestro sitio Web: www.maytronics.com... -
Page 31: Abschnitt 1 - Beschreibung Der Hauptkomponenten
German Was Sie in der Box finden sollten Teil Bemerkung Grundrahmen für Filterelemente Ultrafeiner Filter 4 filter Filter und Kartuschen Beutel zur Aufbewahrung der Filter Frühlingsfilter 4 filter S-Klips Stromversorgungs-Einheit Dolphin-Schwimmbadreiniger Dolphin Schwimmbad- Caddy Kit Reiniger Fernbedienungseinheit Optionale Komponenten sind auf Anfrage bei Ihrem Dolphin-Händler erhältlich. - Page 32 German 3. Stromversorgungseinheit Anzeige des vollen Verzögerungs- Filterbeutels Anzeige Digitale Stromversorgungseinheit mit Schalter: An-/Aus-schalter Eingangsstrom - 100-250 AC Volts 50-60 Hertz 180 Watt Ausgangsstrom - 30 VDC Rücksetztaste IP 54 Abschnitt 2 – Betrieb des Dolphins Teil 1 – Vorbereitung des Dolphin-Schwimmbadreinigungs-Roboters A.
- Page 33 German C. Auslegen des Kabels Rollen Sie soviel Kabel ab wie Sie benötigen, um das gesamte Becken zu erreichen und legen es entlang der Schwimmbadseite aus. Vergewissern Sie sich, dass das Kabel keine Verdrehungen oder Knoten aufweist. 3 Meter Drehgelenk Benutzen Sie nur die vom Hersteller gelieferte Original-Stromversorgungseinheit.
- Page 34 German Anschalten des Dolphin-Roboters Schwimm - kabel 1. Verbinden Sie das Schwimmkabel des Dolphin-Roboters mit der Stromversorgungseinheit. 2. Verbinden Sie das Stromkabel der Stromversorgungseinheit mit dem Stromnetz. 3. Betätigen Sie den AN-/AUS-Schalter. 4. Daraufhin beginnt der Dolphin-Roboter mit der Arbeit. An/Aus- Schalter Hinweis: Wenn Ihr Modell über eine Fernbedienung verfügt, beachten Sie bitte die beiliegende Gebrauchsanweisung.
- Page 35 German Abschnitt 3 – Routinemässige Wartung Teil 1 – Herausnahme und Reinigung der Filterelemente Trennen Sie die Stromversorgungseinheit vom Stromnetz ab, bevor Sie irgendwelche Wartungsarbeiten ausführen. Wiedereinbau Schieben sie die Fixierlaschen an der Unterseite des Filterelements in die entsprechenden Rillen im Basisrahmen und schliessen dann den S-Klips. Fixierlasche Rille für die Fixierlasche...
- Page 36 German Setzen Sie die Filter gemäss des Diagramms wieder ein. DRÜCKEN SIE DIE FILTER NICHT MIT GEWALT AN IHREN PLATZ. Geriffeltes Endstück Achteckiges Eckstück Wichtig: Gegebenenfalls müssen Sie die Anzeige des vollen Filterbeutels auf der Stromversorgungseinheit zurücksetzen. Empfehlung: Spülen Sie alle Bürsten nach jedem Reinigungszyklus mit sauberem Wasser ab. Teil 2 –...
-
Page 37: Anleitung Zur Fehlerbehebung
Überprüfen Sie, ob das Antriebssystem blockiert wird Elektrisches Problem (Stromzufuhr), überprüfen Sie die Stromquelle Wenn die Stromquelle in Ordnung ist, wenden Sie sich bitte an Ihren Dolphin - Fachhändler Weitere Hinweise zur Fehlerbehebung finden Sie auf unserer Webseite unter: www.maytronics.com... - Page 40 English DOLPHIN SUPREME M5 www.maytronics.com...
Need help?
Do you have a question about the Dolphin SUPREME M5 and is the answer not in the manual?
Questions and answers