Maytronics M600 Disassembly Instructions Manual
Hide thumbs
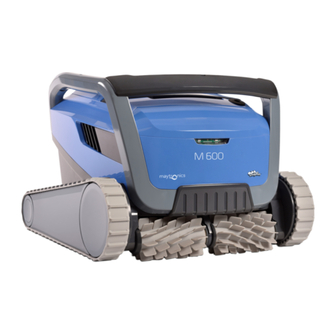
Also See for M600:
- User manual ,
- User instructions (15 pages) ,
- User instructions (12 pages)
Table of Contents
Advertisement
Advertisement
Table of Contents

Related Manuals for Maytronics M600


Summary of Contents for Maytronics M600
- Page 1 M600 Disassembly Instructions February 2019 Release History Date Revision History Issued by Approved by Oct 18 2018 First draft AmirL Dec 16 2018 Second draft AmirL Dec 24 2018 Third draft AmirL Feb 4 2018 Fourth draft - AmirL Release Candidate...
-
Page 2: Table Of Contents
M600 Disassembly Instructions List of Figures Figure 1: Opening the filter cover and removing the filter Figure 2: Removing the filter cover Figure 3: Detaching the top cover (step a) Figure 4: Detaching the top cover (step b and c) - Page 3 M600 Disassembly Instructions Figure 38: Detaching the bypasses Figure 39: Removing the vacuum strip (step a) Figure 40: Removing the vacuum strip (step b) Figure 41: Removing the non-return flap Figure 42: Fully disassembled M600 frame...
-
Page 4: Figure 1: Opening The Filter Cover And Removing The Filter
M600 Disassembly Instructions Disassembling the M600 The following steps describe how to disassemble the M600. Open the filter cover, grasp the filter handle, and pull the filter upward to remove it. Note: The filter handle springs up when you open the filter cover. -
Page 5: Figure 3: Detaching The Top Cover (Step A)
M600 Disassembly Instructions Detach the top cover as follows: Unfasten the two screws that hold the top cover in place. Figure 3: Detaching the top cover (step a) Remove both grommet locker screw. * Note – one screw instead of two Figure 4: Detaching the top cover (step b and c) Remove the grommet and the cable from the grommet locker as shown above. -
Page 6: Figure 5: Detaching The Top Cover (Step D)
M600 Disassembly Instructions Remove the water manifold. Figure 5: Detaching the top cover (step d) Remove the front panel as follows: Push up the front panel (from inside to outside) by unsnapping taps on the cover. As shown in figure A, B and C... -
Page 7: Figure 7: Removing The Front Cover
M600 Disassembly Instructions Remove the float from its position. Figure 7: Removing the front cover Dismantle the top body as follows: Remove the four screws that hold the top body in place. Figure 8: Dismantling the top body... -
Page 8: Figure 9: Dismantling The Top Body (Step B)
M600 Disassembly Instructions Disconnect the top body from the frame but DO NOT pull it all the way out. Note: The LEDs Unit (LU) retrofit cable is still plugged into the MU socket! Figure 9: Dismantling the top body (step b) Dismantle the LU as follows: Remove the nut by hand or using the appropriate tool. -
Page 9: Figure 11: Dismantling The Lu (Step B And C)
M600 Disassembly Instructions Unplug the cable. Figure 11: Dismantling the LU (step b and c) Remove six screws (indicated below), and disconnect the frame of the LU from the robot top body. Figure 12: Dismantling the LU (step a and b) -
Page 10: Figure 13: Dismantling The Lu (Step D)
M600 Disassembly Instructions Remove six screws (indicated below) and disconnect the LU from the LU frame. Figure 13: Dismantling the LU (step d) Dismantle the Electronic Card (PCB with LEDs) inside the LU as follows: Remove the plastic holder at the rear by hand as shown below... -
Page 11: Figure 15: Dismantle The Electronic Card (Step C)
M600 Disassembly Instructions Figure 15: Dismantle the Electronic Card (step c) Dismantle and remove the cables as follows: Remove the two screws of the yellow omega clip that holds the cable Unscrew the cable from the motor unit, by hand or using an appropriate tool... -
Page 12: Figure 17: Disconnecting The Cables (Step C)
M600 Disassembly Instructions Unplug the cable. Figure 17: Disconnecting the cables (step c) Removing the side covers - a) Remove the screw from inside to loosen the side cover – one screw b) Press the two inner snaps that hold the side cover in place and remove the side cover from both sides of the robot. -
Page 13: Figure 19: Removing The Tracks (Steps A And B)
M600 Disassembly Instructions Remove the tracks from both sides of the robot: Figure 19: Removing the tracks (steps a and b) Dismantle the driving system as follows: Using a flat screwdriver, gently press on the clip and pull the wheel cover off at the same time, from both sides of the robot, as shown below. -
Page 14: Figure 21: Dismantling The Drive System (Step B And C)
M600 Disassembly Instructions Unfasten and remove the wheel washer screws from each side of the robot. Remove the wheel’s holder Figure 21: Dismantling the drive system (step b and c) Remove the wheels. Figure 22: Dismantling the drive system (step f) -
Page 15: Figure 23: Dismantling The Drive Part System
M600 Disassembly Instructions Dismantling the drive part system Figure 23: Dismantling the drive part system Remove the side motor unit locking clips on both sides of motor unit (Right & Left) Figure 24: Remove the plastic locker... -
Page 16: Figure 25: Dismantling The Floats (Step A)
M600 Disassembly Instructions Dismantle the floats as follows: Unfasten one screw connecting the float to the frame, from both sides. Figure 25: Dismantling the floats (step a) Remove the floats gently in a circular way Figure 26: Dismantling the floats (step b) -
Page 17: Figure 27: Dismantling The Motor (Step A)
M600 Disassembly Instructions Dismantle the motor unit as follows: Unfasten the two screws that secure the motor unit to the frame. Figure 27: Dismantling the motor (step a) Pull up and remove the motor unit. Figure 28: Dismantling the motor (step b) -
Page 18: Figure 29: Dismantling The Rear Brush (Step A)
M600 Disassembly Instructions Dismantle the Rear Brush as follows: Remove the main body with two hands, one each side, push out the rear brush. Figure 29: Dismantling the rear brush (step a) Dismantle the rear brush parts according to the numbered steps indicated below. -
Page 19: Figure 31: The Rear Brush Dissembled - Top & Side View
M600 Disassembly Instructions Figure 31: The rear brush dissembled – Top & Side view Dismantle the Front Active Brush as follows: Remove the four screws holding the active brush in place from both sides. Figure 32: Dismantling the front active brush (step a) -
Page 20: Figure 33: Dismantling The Front Active Brush (Step B)
M600 Disassembly Instructions Remove the screw holding the active brush in the middle Figure 33: Dismantling the front active brush (step b) Remove the active brush. Figure 34: Dismantling the front active brush (step c) Disassembling the M600... -
Page 21: Figure 35: Dismantling The Front Active Brush (Step D)
M600 Disassembly Instructions Dismantle the front active brush parts according to the numbered steps indicated below. Figure 35: Dismantling the front active brush (step d) Figure 36: The front active brush dissembled – Top & Side view... -
Page 22: Figure 37: Removing The Outer Casing
M600 Disassembly Instructions Remove the four screws and remove the skirt (outer casing). Figure 37: Removing the outer casing Remove the four screws that hold the bypass in place on both sides of the robot and remove the bypass. Figure 38: Detaching the bypasses... - Page 23 M600 Disassembly Instructions Using pliers, hold and gently push out each clip and remove the vacuum strips. Figure 39: Removing the vacuum strip (step a) Figure 40: Removing the vacuum strip (step b)
- Page 24 M600 Disassembly Instructions Remove the non-return flap. Figure 41: Removing the non-return flap That’s it … the M600 robot is now fully disassembled! Figure 42: Fully disassembled M600 frame Disassembling the M600...
Need help?
Do you have a question about the M600 and is the answer not in the manual?
Questions and answers