TSC TDM-20 Series User Manual
Mobile barcode printer
Hide thumbs
Also See for TDM-20 Series:
- User manual (64 pages) ,
- Service manual (20 pages) ,
- Programming manual (434 pages)

Related Manuals for TSC TDM-20 Series


Summary of Contents for TSC TDM-20 Series
- Page 1 Mobile Barcode Printer TDM-20/30 Series Direct Thermal Series Models TDM-20 / TDM-30 User Manual www.tscprinters.com...
- Page 2 All other trademarks are the property of their respective owners. Information in this document is subject to change without notice and does not represent a commitment on the part of TSC Auto ID Technology Co. No part of this manual may be reproduced or transmitted in any form or by any means, for any purpose other than the purchaser’s personal use, without the expressed written...
-
Page 3: Table Of Contents
Contents Introduction ..............................3 Specifications ................................... 4 Unpacking and Inspecting ..........................7 Getting to Know Your Printer ........................8 Front View ..................................8 Inner View ..................................9 Rear View ..................................10 Setting up the Printer ..........................11 Installing the Battery ............................... 11 Charging the Battery / Smart Battery .......................... - Page 4 Power-on Utilities ................................35 TSC Console ..............................36 Launching TSC Console..............................36 Adding Wi-Fi Interface ..............................38 Setting up Bluetooth ............................... 46 Initializing Printer’s Wi-Fi Settings ..........................48 TPH Care ..................................49 Printer’s Main Functions ..............................51 Configuring Optional Kits ..............................52 Troubleshooting ............................
-
Page 5: Introduction
1 Introduction TSC’s new mobile barcode printer line, the TDM Series, is intelligently designed for on-the-go printing. Mobile printing is an excellent solution for any business that needs to print on demand. The TDM Series is equipped to operate across different platforms with multiple connectivity options. -
Page 6: Specifications
1.1 Specifications Model TDM-30 TDM-20 Resolution 8 dots/mm (203 dpi) Printing Method Direct Thermal Max. Print Speed Up to 102 mm (4")/second Max. Print Width 72 mm (2.83") 48 mm (1.89") Max. Print Length 2,794 mm (110") Enclosure Plastic 105.0 mm (W) x 116.0 mm (H) x 49.5 mm (D) 79.0 mm (W) x 116.0 mm (H) x 36.5 mm (D) Physical Dimension 4.13"... - Page 7 Model TDM-30 TDM-20 ▪ Head open sensor ▪ Head open sensor Sensors ▪ Reflective sensor mode ▪ Reflective sensor ▪ Transmissive sensor mode (factory option) ▪ 8 alpha-numeric bitmap fonts Internal Font ▪ One Monotype Imaging® CG Triumvirate Bold Condensed scalable font ▪...
- Page 8 Model TDM-30 TDM-20 ▪ 802.11 a/b/g/n with Bluetooth 5.0 ▪ 802.11 a/b/g/n with Bluetooth 5.0 ▪ Vehicle mount adaptor ▪ Vehicle mount adaptor Factory Options ▪ Printer ready for docking cradle ▪ Printer ready for docking cradle ▪ Linerless kit ▪...
-
Page 9: Unpacking And Inspecting
2 Unpacking and Inspecting The printer has been specially packaged to withstand damage during shipment. Retaining the packaging materials is recommended in case you need to ship the printer. When unpacking, ensure that you have received all the following items: ▪... -
Page 10: Getting To Know Your Printer
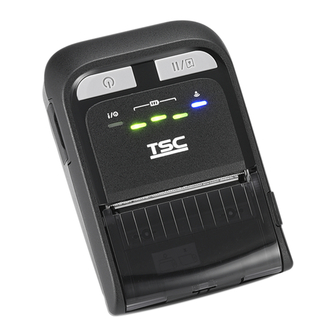
3 Getting to Know Your Printer 3.1 Front View TDM-20 TDM-30 TDM-30 (LCD) Feed/stop button Feed/stop button Feed/stop button Power on/off button Power on/off button Power on/off button LED indicators LED indicators LED indicators & LCD screen Media cover Media cover Media cover Media view window Media view window... -
Page 11: Inner View
3.2 Inner View TDM-20 TDM-30 Platen roller Platen roller Tear edge Tear edge Print head Printhead Black mark sensor Black mark sensor... -
Page 12: Rear View
3.3 Rear View TDM-20 TDM-30 Li-ion battery Li-ion battery Battery open clasp Battery open clasp Interface cover Interface cover Power jack socket Power jack socket USB interface USB interface... -
Page 13: Setting Up The Printer
4 Setting up the Printer The images used below show a TDM-20 printer. The same procedures are also applicable to the TDM-30 printer. 4.1 Installing the Battery Install the battery into its compartment as indicated. Push down the battery and then pull the battery latch to lock the battery in place as indicated. -
Page 14: Charging The Battery / Smart Battery
4.2 Charging the Battery / Smart Battery Charging Temperature The battery’s normal working temperature is from 0°C to 40°C (32°F to 104°F). The device and battery charger are designed to charge battery in a safe and optimized manner. If charging the battery at high temperatures, e.g. approximately 40°C (104°F), or charging the battery with printer being turned on, the printer or battery charger may stop charging for a period of time to maintain the battery at acceptable temperatures. - Page 15 4.2.1 Battery Installed in the Printer Open the interface cover and then insert the supplied power connector into the power jack socket. Insert the power plug into the power outlet socket.
- Page 16 4.2.2 Battery Installed on the 4-Bay Charger Station (optional) Insert the power plug into the power outlet socket and insert the other end of the cable into the power jack socket on the 4-bay charger station. Tilt to install the battery onto the charger station as indicated. Perpendicularly press down the battery to secure it in place.
-
Page 17: Loading The Media
4.3 Loading the Media Press the media cover release button to open the media cover. Load the media as illustrated and then pull out the media until the media extends out of the tear edge. Press to close the media cover ensuring that the cover is firmly secured in place. -
Page 18: Setting Up The Connection
4.4 Setting up the Connection 4.4.1 Wired Connection Open the printer’s interface cover. Insert the USB cable to the printer. Insert the other end of the USB cable to your computer. 4.4.2 Connection via Bluetooth (optional) Default Refer to the section “Setting up Bluetooth” to configure Bluetooth Name RF-BHS for the printer. -
Page 19: Using Accessories
5 Using Accessories The images used below show a TDM-20 printer. The same procedures are also applicable to the TDM-30 printer. 5.1 Installing the Belt Clip Align the ball on the belt clip with its corresponding hole on the rear side of the printer and then press the ball into the hole to lock the belt clip in place. -
Page 20: Installing The Media Spacer Kit (Optional)
5.2 Installing the Media Spacer Kit (optional) Press the media cover release button to open the media cover. Install the media spacers onto the printer as indicated. Slot NOTE: The media spacers enable you to quickly change among the 1”, 1.5”, or 2” wide labels. You need to install the same number of 1”... -
Page 21: Using The Ip54 Case With Shoulder Strap (Optional)
5.3 Using the IP54 Case with Shoulder Strap (optional) Slide the zipper to open the case. Put the printer in the case ensuring that the print side of the label faces the transparent cover as demonstrated. Flip over the transparent cover and then attach the cover on the case as demonstrated. -
Page 22: Installing The Shoulder Strap Kit (Optional)
5.4 Installing the Shoulder Strap Kit (optional) Remove the battery from the printer and then slide the shoulder strap to lock the strap in place inside the battery compartment. Re-install the battery. -
Page 23: Installing The Vehicle Holder Adapter For Ram Mount (Optional)
5.5 Installing the Vehicle Holder Adapter for RAM Mount (optional) Align the vehicle holder adapter with the rear side of the printer and then install the two screws to secure the Install the two screws to adapter in place. secure the adapter on the NOTE: The vehicle holder RAM diamond ball base. -
Page 24: Charging The Battery With The 1-Bay Printer Charger Station
5.6 Charging the Battery with the 1-Bay Printer Charger Station Insert the printer with the battery installed into the 1-bay printer charger station. Insert the supplied power cable into the power jack socket on the charger station. Insert the power plug into the power outlet socket. -
Page 25: Charging The Battery With The 4-Bay Printer Charger Station
5.7 Charging the Battery with the 4-Bay Printer Charger Station Insert the printer with the battery installed into the 4-bay printer charger station. Insert the supplied power cable into the power jack socket on the charger station. Insert the power plug into the power outlet socket. - Page 26 Turn on the power switch to charge the battery. The LED on the charger station indicates that the station is supplying the power. NOTE: When the battery is fully charged, the LED on the printer will illuminate solid green.
-
Page 27: Operator Interface
6 Operator Interface 6.1 TDM-20 Name & Icon Status Description The printer is communicating with an external device via the wireless Wi-Fi / Bluetooth Status LED Blue (blinking) network or Bluetooth. Blue (solid) The Wi-Fi / Bluetooth device is ready. Feed / Pause Button ... - Page 28 You are allowed to seconds) revise the command in order to change the interval time. Please refer to TSPL/TSPL2 Programming Manual on TSC’s official website.) Red (solid) The media cover is opened.
-
Page 29: Tdm-30 (Led Control Panel)
6.2 TDM-30 (LED Control Panel) Name & Icon Status Description The printer is communicating with an external device via the wireless Wi-Fi / Bluetooth Status LED Blue (blinking) network or Bluetooth. Blue (solid) The Wi-Fi / Bluetooth device is ready. Feed / Pause Button ... - Page 30 You are allowed to seconds) revise the command in order to change the interval time. Please refer to TSPL/TSPL2 Programming Manual on TSC’s official website.) Red (solid) The media cover is opened.
-
Page 31: Tdm-30 (Lcd Control Panel)
6.3 TDM-30 (LCD Control Panel) Name & Icon Status Description Media Type Bluetooth & Battery Status LCD Monitor Bluetooth MAC Address / Firmware Version Wi-Fi IP address Feed / Pause Button When the printer is ready, press to feed one label. ... - Page 32 You are allowed to seconds) revise the command in order to change the interval time. Please refer to TSPL/TSPL2 Programming Manual on TSC’s official website.) Red (solid) The media cover is opened.
-
Page 33: Battery Charging Cycle
6.4 Battery Charging Cycle TDM-20 Charging the battery when the printer is turned on: Printer will be turned off Charging automatically when the Mode battery is fully charged. Power Saving Mode Behavior LED Status Description Charging level: 0 - 30% Charging level: 30 - 60% Charge the battery with the printer turned on... - Page 34 NOTE: 1. Printer status LED blinks amber when charging the battery. 2. Press power button when charging the battery, the LED lights will show the charging status. 3. When the battery is fully charged and there is no print activities in proceed, the printer will be automatically turned off. ...
- Page 35 TDM-30 Charging the battery when the printer is turned on: Printer will be turned off Charging automatically when the Mode battery is fully charged. Power Saving Mode Behavior LED Control Panel LCD Display 1 block blinking Charging level: 0 - 30% Charging level: 0 - 25% 2 blocks blinking Charging level: 30 - 60%...
- Page 36 NOTE: 1. Printer status LED blinks amber when charging the battery. 2. Press power button when charging the battery, the LED lights / LCD display will show the charging status. 3. When the battery is fully charged and there is no print activities in proceed, the printer will be automatically turned off. ...
-
Page 37: Power-On Utilities
6.5 Power-on Utilities The printer features a set of utilities which provides quick access to the printer’s mostly used functions. Follow the procedures below to launch the power-on utilities and select the function you need. 1. Turn off the printer. 2. -
Page 38: Tsc Console
7.1 Launching TSC Console Follow the steps below to launch TSC Console: 1. Double click the TSC Console icon on the desktop of your computer to launch TSC Console. After launching TSC Console, the following screen will appear. 2. Select Printers > Add Printers to add the new printer to the TSC Console main page. - Page 39 3. Select the connection based on how the printer is connected to your computer and then select OK to add the printer. NOTE: The image below shows that the printer is connected to a computer via the USB cable. 4. Select and start configuring the printer. NOTE: You may refer to TSC Console Programming Manual for further information.
-
Page 40: Adding Wi-Fi Interface
7.2 Adding Wi-Fi Interface It allows users to add Wi-Fi interface to the TSC Console main page and enables users to control the printer through a wireless network. Follow the steps below to add Wi-Fi interface to the TSC Console main page: Add the printer to the TSC Console main page via the USB port or COM port. - Page 41 When using the WPA-Personal encryption: (1) Enter the network name in the SSID field. (2) Select WPA-Personal in the WLAN Encryption field. (3) Enter the Wi-Fi network password in the Key field. (4) Set DHCP to ON. If DHCP is set to OFF, you need to specify information for the IP Address, Subnet Mask, and Gateway fields.
- Page 42 Follow the steps below to configure Bluetooth for your printer: Add the printer to the TSC Console main page via the USB port or COM port. For how to add the printer to the TSC Console main page, please refer to Launching TSC Console.
- Page 43 Enter the new Bluetooth local name or Bluetooth PIN code in the field. The field will be marked in yellow when the value is revised. Press the Set button to set the new Bluetooth name or Bluetooth PIN code. Press the Get button to confirm that the new settings have been correctly written into the printer.
- Page 45 Initializing Printer’s Wi-Fi Settings to restore the Wi-Fi settings to factory default values and then re-configure the Wi-Fi connection. Remove the interface cable.
- Page 46 Go to the TSC Console main page, select Printers > Add Printers and then select Network to add the printer.
- Page 47 Go to the TSC Console main page. Select Functions > Print Test Page to check if you can control the printer via the Wi-Fi connection.
-
Page 48: Setting Up Bluetooth
Follow the steps below to configure Bluetooth for your printer: Add the printer to the TSC Console main page via the USB port or COM port. For how to add the printer to the TSC Console main page, please refer to Launching TSC Console. - Page 49 Enter the new Bluetooth local name or Bluetooth PIN code in the field. The field will be marked in yellow when the value is revised. 10. Press the Set button to set the new Bluetooth name or Bluetooth PIN code. Press the Get button to confirm that the new settings have been correctly written into the printer.
-
Page 50: Initializing Printer's Wi-Fi Settings
7.4 Initializing Printer’s Wi-Fi Settings Go to the TSC Console main page. Select the Functions tab. Select Wi-Fi Default to restore the Wi-Fi settings to factory default values. -
Page 51: Tph Care
Allows users to check if there are defective dots on the printhead. Enables/Disables TPH Care Auto Protection. Follow the steps below to open the TPH Care page: Double click the printer you want to configure on the TSC Console main page to open the Printer Configuration menu. - Page 52 Select the TPH Care tab to enter the TPH Care page. Enable the TPH Care Auto Protection function (Default: OFF). Select Get TPH Care Profile to check the health status of the printhead. If the pattern extends flat roughly, it means the status of the printhead is good. Alternatively, you can check the Unhealthy TPH dot number field.
-
Page 53: Printer's Main Functions
7.6 Printer’s Main Functions The function buttons are located on the left side of the Printer Configuration page. You can use the function buttons to manage and configure the printer. Item Description Calibration Detects the media type and label size. RTC Setup Synchronizes the printer with the real time clock on the computer. -
Page 54: Configuring Optional Kits
To configure the kit: Add the printer to the TSC Console main page via the USB port or COM port. For how to add the printer to the TSC Console main page, please refer to 7.1 Launching TSC Console. -
Page 55: Troubleshooting
8 Troubleshooting Problem Possible Cause Recovery Procedure ▪ The battery is not properly installed. ▪ Re-install the battery. Power indicator or display does not ▪ No power. ▪ Recharge or replace battery as necessary. illuminate. “Carriage Open” appears on the display. The media cover is open. - Page 56 Problem Possible Cause Recovery Procedure Turn off and on the printer to skip the dump The printer is in Hex Dump mode. Irregular printing mode.
-
Page 57: Maintenance
9 Maintenance This section provides cleaning and maintenance procedures. Cleaning: Depending on the media used, the printer may accumulate residues (media dust, adhesives, etc.) as a by-product of normal printing. To maintain the best printing quality, you should remove these residues by cleaning the printer periodically. Regularly clean the print head and supply sensors once change a new media to keep the printer at the optimized performance and extend printer life. -
Page 58: Cleaning Supplies
9.1 Cleaning Supplies The following supplies are recommended for cleaning the printer: Cotton swab Lint-free cloth Brush with soft and non-metallic bristles Vacuum cleaner 75% Ethanol used for disinfection 99% Isopropyl alcohol used for cleaning the printhead and platen roller ... -
Page 59: Cleaning Procedures
9.2 Cleaning Procedures Component Method Recommended Cleaning Schedule Power off the printer before cleaning the printhead. Leave the printhead to cool down for at least one minute. Clean the printhead when you load new Printhead Wet a cotton swab with the 99% Isopropyl alcohol and then wipe across the media. -
Page 60: Agency Compliance And Approvals
10 Agency Compliance and Approvals 2014/30/EU(EMC), 2014/35/EU(LVD), 2011/65/EU(RoHS 2.0) EN 55032 Class B EN 55024 EN61000-3-2:2014 EN61000-3-3:2013 EN 60950-1 FCC part 15B, Class B This equipment has been tested and found to comply with the limits for a Class B digital device, pursuant to part 15 of the FCC Rules. - Page 61 AS/NZS CISPR 22 Class B AS/NZS CISPR 32 Class B NOM-019-SCFI-1998 10 C.F.R. Section 430.23(aa) (Appendix Y to Subpart B of part 430) TP TC 004/2011 TP TC 020/2011 LP0002 備註:不同型號可能會有不同認證,一切以產品上的認證標籤為準。 Important safety instructions: 1. Read all of these instructions and keep them for later use. 2.
- Page 62 重要安全說明: 1. 閱讀所有這些說明,並保留以備未來使用。 2. 按照產品上的所有警告和說明進行操作。 3. 在清潔前或發生故障時,拔除電源插頭與交流電源插座的連接。不要使用液體或噴霧清潔劑。建議使用濕布清潔。 4. 電源插座應安裝在設備附近及方便使用處。 5. 本機器必須防止潮濕。 6. 確保安裝設備時的穩定性,翻倒或跌落可能會導致設備損壞。 7. 確保按照製造商提供的標籤上標明之正確的額定功率和電源類型進行設定。 8. 請參考使用手冊以確認環境溫度的最大值。 WARNING: Hazardous moving parts, keep fingers and other body parts away. CAUTION: (For equipment with RTC (CR2032) battery or rechargeable battery pack) Risk of explosion if battery is replaced by an incorrect type. Dispose of used batteries according to the Instructions as below.
- Page 63 警告: (對於帶有 RTC(CR2032)電池或可充電電池組的設備) 如果更換不正確的電池類型,會有爆炸的危險。 請按照以下說明處理廢電池: 1. 請勿將電池投入火中。 2. 請勿使觸點短路。 3. 請勿拆卸電池。 4. 請勿將電池丟入都市廢棄物。 5. 垃圾桶畫叉圖案表示電池不應放置在都市廢棄物中。 Caution: The printhead may be hot and could cause severe burns. Allow the printhead to cool. CAUTION: Any changes or modifications not expressly approved by the grantee of this device could void the user's authority to operate the equipment. CE Statement: This equipment complies with EU radiation exposure limits set forth for an uncontrolled environment.
- Page 64 RF exposure warning (For Bluetooth) The equipment complies with FCC RF exposure limits set forth for an uncontrolled environment. The equipment must not be co-located or operating in conjunction with any other antenna or transmitter. Canada, Industry Canada (IC) Notices This Class B digital apparatus complies with Canadian ICES-003 and RSS-210.
- Page 65 Informations concernant l'exposition aux fréquences radio (RF) La puissance de sortie émise par l’appareil sans fil est inférieure à la limite d'exposition aux fréquences radio de l'Industry Canada (IC). Utilisez l’appareil sans fil de façon à minimiser les contacts humains lors du fonctionnement normal. Ce périphérique a également été...
- Page 66 MFi for Bluetooth Use of the Made for Apple badge means that an accessory has been designed to connect specifically to the Apple product(s) identified in the badge, and has been certified by the developer to meet Apple performance standards. Apple is not responsible for the operation of this device or its compliance with safety and regulatory standards.
- Page 67 iPad, iPad Air, iPad Pro, iPhone are trademarks of Apple Inc., registered in the U.S. and other countries. For JP Model Made for iPhone XS Max, iPhone XS, iPhone XR, iPhone X, iPhone 8, iPhone 8 Plus, iPhone 7, iPhone 7 Plus, iPhone SE, iPhone 6s, iPhone 6s Plus, iPhone 6, iPhone 6 Plus, iPhone 5s, iPad Pro 12.9-inch (2nd generation), iPad Pro 10.5-inch, iPad (6th generation), iPad (5th generation), iPad Pro 9.7-inch, iPad Pro 12.9-inch (1st generation), iPad Air 2, iPad mini 4, iPad mini 3, iPad Air, iPad mini 2, iPod touch (6th generation) iPad, iPad Air, iPad Pro, iPhone are trademarks of Apple Inc., registered in the U.S.
- Page 68 限用物質及其化學符號 Restricted substances and its chemical symbols 六價鉻 多溴聯苯 多溴二苯醚 單元Unit 鉛Lead 汞Mercury 鎘Cadmium Hexavalent Polybrominated Polybrominated chromium biphenyls diphenyl ethers (Pb) (Hg) (Cd) (PBDE) (PBB) 內外塑膠件 ○ ○ ○ ○ ○ ○ 內外鐵件 ○ ○ ○ ○ ○ 滾輪 ○...
-
Page 69: Revision History
Revision History Date Description Technical Writer Peter Yao 2023/11/15 Official release. ▪ Revised format and layout, Peter Yao 2024/01/18 ▪ Updated the specifications from page 5 to 7. - Page 70 www.tscprinters.com...
Need help?
Do you have a question about the TDM-20 Series and is the answer not in the manual?
Questions and answers