TSC TTP-384M Service Manual
Thermal transfer / direct thermal bar code printer
Hide thumbs
Also See for TTP-384M:
- User manual (59 pages) ,
- Programming manual (252 pages) ,
- Programming manual (434 pages)
Table of Contents
Advertisement
Advertisement
Table of Contents

Related Manuals for TSC TTP-384M


Summary of Contents for TSC TTP-384M
- Page 1 TTP-384M THERMAL TRANSFER / DIRECT THERMAL BAR CODE PRINTER SERVICE MANUAL...
-
Page 2: Table Of Contents
TTP-384M Bar Code Printer Service Manua TABLE OF CONTENT 1. FUNDAMENTAL OF THE SYSTEM ................1 1.1. Overview ......................... 1 2. ELECTRONICS ......................5 2.1 Summary of Board Connectors ................5 2.2 Pin Configuration ....................8 3. MECHANISM ......................11 3.1 Remove Covers ..................... -
Page 3: Bar Code Printer Service Manua L
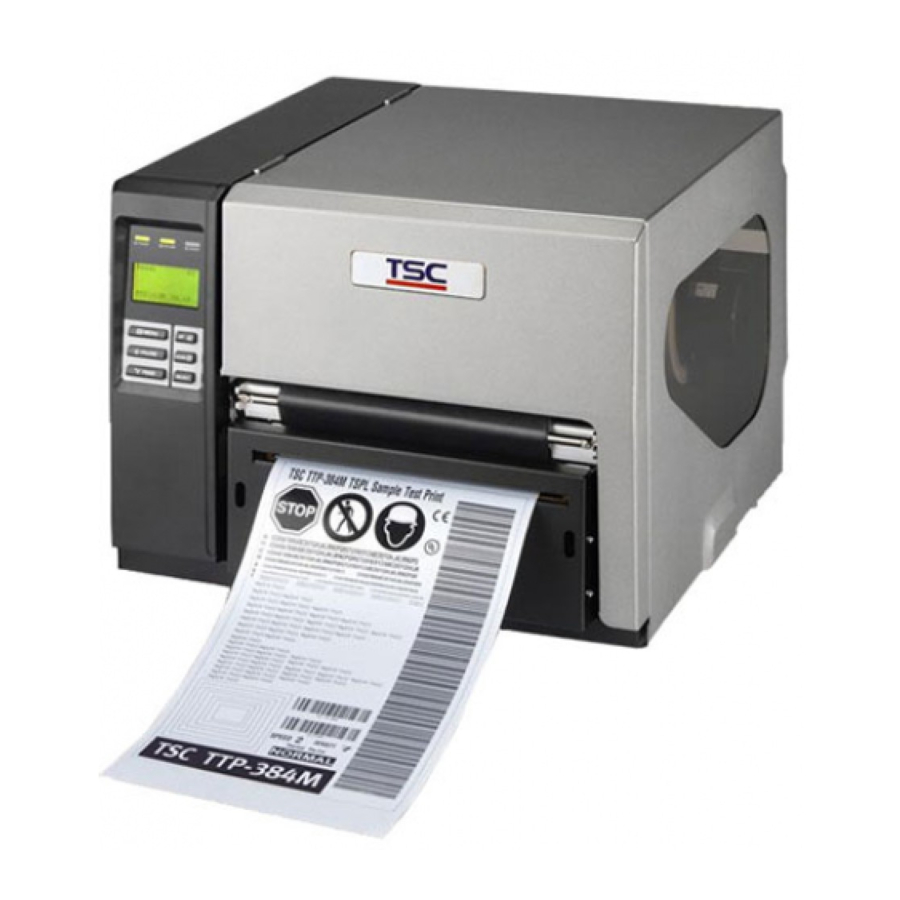
TTP-384M Bar Code Printer Service Manua 1. FUNDAMENTAL OF THE SYSTEM 1.1. Overview Front View 1. LED indicators 2. LCD display 3. Front panel buttons 4. Paper exit chute 5. Printer cover 6. Cutter module (Optional) - Page 4 TTP-384M Bar Code Printer Service Manua Interior View 1. Ribbon rewind spindle 2. Print head pressure adjustment knobs 3. Printhead 4. Ribbon sensor 5. Media sensor 6. Platen roller 7. Printhead release lever 8. Ribbon supply spindle 9. Label supply spindle 10.
-
Page 5: Rear View
TTP-384M Bar Code Printer Service Manua Rear View 1. Fan-fold paper entrance chute 2. Centronics interface 3. USB interface 4. RS-232C interface 5. Power jack socket *6. SD card slot 7. Ethernet interface 8. PS/2 interface 9. Power switch * Recommended SD card specification. - Page 6 TTP-384M Bar Code Printer Service Manua V1.0, V1.1 microSD 256 MB Transcend, Panasonic V1.0, V1.1 microSD 512 MB Panasonic V1.0, V1.1 microSD 1 GB Transcend, Panasonic V2.0 SDHC CLASS 4 microSD 4 GB Panasonic V2.0 SDHC CLASS 6 microSD 4 GB Transcend V1.0, V1.1...
-
Page 7: Electronics
TTP-384M Bar Code Printer Service Manua 2. ELECTRONICS 2.1 Summary of Board Connectors Main board Connector Description Remark Centronics port connector USB connector RS-232C connector Head open sensor connector TPH-OP LCD panel connector LCD-PANEL Multi-interface board connector Micro processor... - Page 8 TTP-384M Bar Code Printer Service Manua Gap sensor connector GAP/BM,BM1 Ribbon sensor connector RIBBON Cutter/peel-off sensor connector CUT&PEEL RFID module connector EX_SIO Stepping motor connector JP14 Ribbon encoder sensor connector JP3,JP5 Power supply output (24V DC) connector Power (24V DC) connector...
- Page 9 TTP-384M Bar Code Printer Service Manua GPIO with multi-interface board (Optional) Connector Description Remark GPIO connector Main board connector SD card slot Ethernet RJ-45 connector PS/2 connector GPIO power connector...
-
Page 10: Pin Configuration
TTP-384M Bar Code Printer Service Manua 2.2 Pin Configuration RS-232C CONFIGURATION +5 V CONFIGURATION Centronics SPP Mode Nibble In/Out Function A low on this line indicates that there are valid data at the host. When this pin is de-asserted, the +ve... - Page 11 TTP-384M Bar Code Printer Service Manua while a low indicates a command cycle. In forward direction, it functions as PtrBusy. Paper Out / When low, device acknowledges reverse request. Select Extensibility flag Ground No Defined 16-17 Ground Ground No Defined...
- Page 12 TTP-384M Bar Code Printer Service Manua GPIO...
-
Page 13: Mechanism
TTP-384M Bar Code Printer Service Manua 3. MECHANISM 3.1 Remove Covers 1. Remove 4 screws from printer. Screws Electronics cover 2. Open printer right side cover and remove 2 screws then close the cover. Screws 3. Remove the electronics cover. - Page 14 TTP-384M Bar Code Printer Service Manua 5. Reassemble the parts in the reverse procedures.
-
Page 15: Replacing The Lcd Panel Module
TTP-384M Bar Code Printer Service Manua 3.2 Replacing the LCD Panel Module 1. Refer to section 3.1 to remove the electronics cover. 2. Disconnect harness from the LCD panel module. 3. Push two tabs to remove/replace the LCD panel module. -
Page 16: Replacing The Power Supply Unit
TTP-384M Bar Code Printer Service Manua 3.3 Replacing the Power Supply Unit 1. Refer to section 3.1 to remove the electronics cover. 2. Disconnect 2 connectors and remove 2 screws on the power supply unit. ---- Screw ---- Connector 3. Replace the power supply unit. -
Page 17: Replacing Multi-Interface Board
TTP-384M Bar Code Printer Service Manua 3.4 Replacing Multi-interface Board 1. Refer to section 3.1 to remove the electronics cover. 2. Remove 4 screws then take off the interface plate. Screws Interface plate 3. Remove 2 screws. Screws 4. Replace the multi-interface board. -
Page 18: Replacing The Main Board
TTP-384M Bar Code Printer Service Manua 3.5 Replacing the Main Board 1. Refer to section 3.1 and 3.4 to remove electronics cover and multi-interface board. 2. Disconnect all connectors from the main board. 3. Remove 2 copper pillars and 3 screws. -
Page 19: Replacing The Platen Roller Assembly
TTP-384M Bar Code Printer Service Manua 3.6 Replacing the Platen Roller Assembly 1. Open printer right side cover. 2. Disengage print head lift lever. 3. Remove the cutter module or lower front panel. 4. Remove 4 screws from the platen holder. -
Page 20: Replacing The Stepping Motor
TTP-384M Bar Code Printer Service Manua 3.7 Replacing the Stepping Motor 1. Refer to section 3.1 to remove the electronics cover. 2. Disconnect the stepping motor connector from the main board. Stepping motor connector 3. Remove 3 screws on the stepping motor. -
Page 21: Replacing The Printhead Ass'y
TTP-384M Bar Code Printer Service Manua 3.8 Replacing the Printhead ASS'Y 1. Open the printer right side cover. 2. Disengage printhead release lever. 3. Remove 2 screws from the mechanism. Screws 4. Carefully disconnect 3 connectors from the printhead ASS'Y. - Page 22 TTP-384M Bar Code Printer Service Manua Printhead ASS'Y 6. Connect the printhead cable and carefully slide assembly into the print mechanism. The holes of printhead assembly must align and then insert the tenons of print mechanism. Tenons Printhead ASS'Y Print mechanism...
-
Page 23: Replacing The Gap And Black-Mark Sensor Module
TTP-384M Bar Code Printer Service Manua 3.9 Replacing the Gap and Black-mark Sensor Module 1. Open the printer right side cover. 2. Disengage printhead release lever. 3. Refer to section 3.1 and 3.4 to remove electronics cover and multi-interface board. - Page 24 TTP-384M Bar Code Printer Service Manua 6. Replace the sensor module. 7. Reassemble the parts in the reverse procedures.
-
Page 25: Replacing The Dc Motor
TTP-384M Bar Code Printer Service Manua 3.10 Replacing the DC Motor 1. Refer to section 3.1 to remove the electronics cover. 2. Disconnect the DC motor connectors from the main board. DC motor connectors 3. Remove 3 screws at the DC motor fixing plate. -
Page 27: Troubleshooting
TTP-384M Bar Code Printer Service Manua 4. TROUBLESHOOTING 4.1 Common Problems The following guide lists the most common problems that might be encountered when operating this bar code printer. If the printer still does not function after all suggested solutions have been invoked, please contact the Customer Service Department of your purchased reseller or distributor for assistance. - Page 28 TTP-384M Bar Code Printer Service Manua * Re-connect cable to interface. * If using serial cable, - Please replace the cable with pin to pin connected. - Check the baud rate setting. The default baud rate setting of printer is 9600,n,8,1.
- Page 29 TTP-384M Bar Code Printer Service Manua * Reload the supply. * Clean the printhead. * Clean the platen roller. * Adjust the print density and print speed. * Run printer self-test and check the printhead test pattern if there is dot missing in the pattern.
- Page 30 TTP-384M Bar Code Printer Service Manua * Set the correct label size. * Wrong label size setup. The left side printout * Press [MENU] [SELECT] x 3 [DOWN] x 5 * The parameter Shift X in LCD menu is ...
-
Page 31: Maintenance
TTP-384M Bar Code Printer Service Manua 5. MAINTENANCE This session presents the clean tools and methods to maintain your printer. 1. Please use one of following material to clean the printer. Cotton swab (Head cleaner pen) Lint-free cloth ... - Page 32 TTP-384M Bar Code Printer Service Manua Wipe it with water-dampened As needed Exterior cloth Interior Brush or vacuum As needed Note: Do not touch printer head by hand. If you touch it careless, please use ethanol to clean ...
-
Page 33: Update History
Modify section 3.8 (Replacing the printhead assembly) Camille 2009/2/20 Modify section 3.8 (Replacing the printhead assembly) Camille Modify section 1.1 (Recommended SD card specification) Camille 2009/3/16 2011/1/25 Modify TSC address Camille 2011/4/8 Modify section 2.2 Camille Add section 3.10 (Replacing the DC motor) Camille 2011/5/10... - Page 35 9F., No.95, Minquan Rd., Xindian Dist., No.35, Sec. 2, Ligong 1st Rd., Wujie Township, New Taipei City 23141, Taiwan (R.O.C.) Yilan County 26841, Taiwan (R.O.C.) TEL: +886-2-2218-6789 TEL: +886-3-990-6677 FAX: +886-2-2218-5678 FAX: +886-3-990-5577 Web site: www.tscprinters.com E-mail: printer_sales@tscprinters.com TSC Auto ID Technology Co., Ltd. tech_support@tscprinters.com...
Need help?
Do you have a question about the TTP-384M and is the answer not in the manual?
Questions and answers