Advertisement
Quick Links
Manufacturer:
Dunster House Ltd.
Caxton Road
Bedford
Bedfordshire
England
MK41 0LF
Installation Manual
HELENA
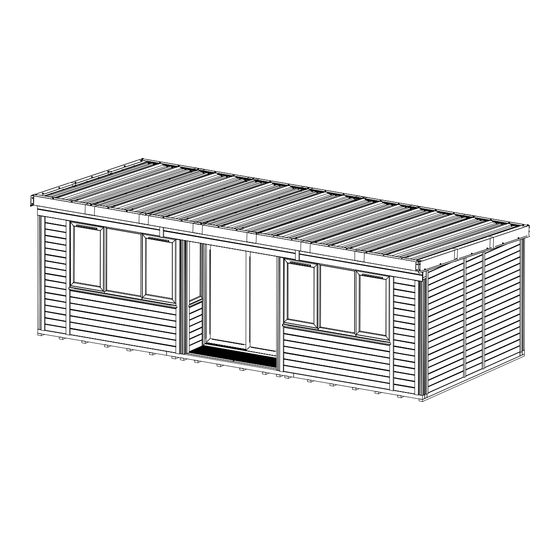
Garden Office 7.6m x 3.3m
P6-7633H
Unique Product Reference Number
________________________________
Customer Service Department:
cs@dunsterhouse.co.uk
www.dunsterhouse.co.uk
Advertisement

Related Manuals for Dunster House HELENA P6-7633H


Summary of Contents for Dunster House HELENA P6-7633H
- Page 1 Installation Manual HELENA Garden Office 7.6m x 3.3m P6-7633H Unique Product Reference Number Manufacturer: ________________________________ Dunster House Ltd. Caxton Road Bedford Bedfordshire Customer Service Department: England cs@dunsterhouse.co.uk MK41 0LF www.dunsterhouse.co.uk...
- Page 2 IMPORTANT INFORMATION Your new Garden Office has been designed with self build in mind. However, it is important that the assembly instructions are followed carefully. Precautions: * Assembly must only be carried out in dry and calm weather. * Always use working gloves. * All holes need to be pre-drilled using a drill bit to avoid timber splitting.
-
Page 3: You Will Need
YOU WILL NEED (3-4) & Sealant & Decorators Caulk INFORMATION All dimensions shown in this manual are in millimetres (mm) P6-7633H... -
Page 4: Pack Contents
PACK CONTENTS - PAGE 1 OF 7 Floor Panel- 2400x1200 Floor Panel- 2400x600 Floor Panel- 2400x740 Floor Panel- 1315x600 Right Panel- 2220x1200 Left Panel- 2220x1200 Left Panel- 2105x1200 Right Panel- 2105x1200 Left Panel- 2145x595 Right Panel- 2145x595 P6-7633H... - Page 5 PACK CONTENTS - PAGE 2 OF 7 Rear Panel- 2025x1200 Front Panel- 2020x450 Front Panel- 800x2140 Front Panel- 800x470 Inner Panel Right- 2215x1200 Inner Panel Left- 2215x1200 Inner Panel Left- 2100x1200 Inner Panel Right- 2100x1200 Inner Panel Left- 2140x595 Inner Panel Right- 2140x595 P6-7633H...
- Page 6 PACK CONTENTS - PAGE 3 OF 7 Inner Panel Rear- 2025x1200 Inner Panel Front- 2020x450 Inner Panel Left- 193x625 Inner Panel Front- 800x470 Inner Panel Front- 800x2140 Inner Panel Front- 1000x193 Inner Panel Front- 2140x148 Inner Panel Right- 193x625 Inner Panel Front- 1600x193 Lintel- 2070mm Lintel- 2680mm Lintel- 2460mm...
- Page 7 PACK CONTENTS - PAGE 4 OF 7 Roof Panel 3.5m Roof Panel 3.5m (Side) Shiplap.2680 (Pressure Treated) 2680 Shiplap.2680x115.BOTTOM (Pressure Treated) 2680 Shiplap.2460 (Pressure Treated) 2460 Shiplap.2460x115.BOTTOM (Pressure Treated) 2460 Shiplap.450 Shiplap.1830 (Pressure Treated) (Pressure Treated) 1830 Shiplap.1830x65.BOTTOM (Pressure Treated) Shiplap.450 L.(4 deg @ 64) (Pressure Treated) 1830...
- Page 8 PACK CONTENTS - PAGE 5 OF 7 Deck.95x20x1805 15x15x800 (Pressure Treated) (Pressure Treated) 1805 Deck.95X20x1805.(H1-30) (Pressure Treated) 15x15x1185 (Pressure Treated) 1805 1185 19x19x1830 19x19x480 (Pressure Treated) (Pressure Treated) 1830 19x19x1205 19x19x1965 (Pressure Treated) (Pressure Treated) 1205 1965 19x19x2150 19x70x230 (Pressure Treated) (Pressure Treated) 2150 19x70x1995...
- Page 9 PACK CONTENTS - PAGE 6 OF 7 45x20x3275 (86 deg.86 deg) (Pressure Treated) 3275 45x20x2065 (86 deg) 45x20x1990 (86 deg) (Pressure Treated) (Pressure Treated) 1990 2065 45x20x2105 (86 deg) (Pressure Treated) 2105 45x20x2180 (86 deg) (Pressure Treated) 2180 70x19x1995.N(20.30@800) (Pressure Treated) 1995 70x19x2025.Double Notches (Pressure Treated)
- Page 10 PACK CONTENTS - PAGE 7 OF 7 Ob-13 Flashing (Gutter Downside Flashing) Ob-08 Flashing (Gutter Flashing) Ob-34 Flashing (Eaves Masking Strip) Ob-30 Flashing (Side) Ob-31 Flashing (Front) Foam Fillers Ob-12 Flashing (Small Outer Corner) L-trim (45mm- Wide) 480mm WPC.70x50x5 FIXINGS INCLUDED 2 required 150 included 40mm Panel Pin...
-
Page 11: Assembly Steps
ASSEMBLY STEPS Pre-drill parts before fixing with screws. Step 1: Bearer Item: 1a - 18x 35x70x3255 Concrete 7600 Note: Layout of bearers on a typical concrete base. P6-7633H... - Page 12 Pre-drill parts before fixing with screws. Step 2: Floor Base Item: 2a - 4x 70x70x2545 2b - 2x 70x70x2510 2c - 10x 70x70x1900 2x 100mm x 6mm Csk 2d - 4x 35x70x2545 2e - 2x 35x70x2230 2f - 4x 70x70x2975 Repeat on 2g - 1x 70x70x1830 2h - 2x 70x70x1760...
- Page 13 Pre-drill parts before fixing with screws. Continuation of Floor Base Repeat on all 4 corners REAR 2x 100mm x 6mm Csk FRONT 5x 100mm x 6mm Csk (On both sides) (On both sides) REAR 4x 2l 2x 100mm x 6mm Csk (On both sides) FRONT Repeat on...
- Page 14 Pre-drill parts before fixing with screws. Continuation of Floor Base REAR FRONT 4x 100mm x 6mm Csk FRONT 4x 2l REAR 7x 2m P6-7633H...
- Page 15 Pre-drill parts before fixing with screws. Step 3: Floor Joists For every row of three 35x70 timbers, use: Item: 2x L-Bracket 60x60x60 (3d) & 3a - 8x 35x70x2545 3b - 4x 35x70x2230 5x L-Bracket 65x65x12 (3e) 3c - 6x 35x50x460 (2x 70mm x 4mm Csk) 3d - 8x L-Bracket 60x60x60 (6x 35mm x 4mm Csk)
- Page 16 Pre-drill parts before fixing with screws. Step 4: Wall Posts Item: 4a - 9x 120x120x2025 4b - 2x 35x120x2025 4c - 2x L-Bracket 80x80x40 (8x 35mm x 4mm Csk) 4d - 18x L-Bracket 65x65x12 (6x 35mm x 4mm Csk) 124x 35mm x 4mm Csk Screw Repeat this for other 3 corner...
- Page 17 Pre-drill parts before fixing with screws. Step 5: Lintels 70mm x 4mm Csk Item: (Fix at angle and repeat on other 5a - 1x Lintel- 2680mm 5b - 2x Lintel- 2460mm middle post) 5c - 1x Lintel- 2070mm 5d - 2x Lintel- 480mm 5e - 4x 35x125x500 5f - 4x 35x120x125 70mm x 4mm Csk...
- Page 18 Pre-drill parts before fixing with screws. Continuation of Lintel 4x 70mm x 4mm Csk 4x 70mm x 4mm Csk Flush Flush FRONT REAR Step 6: Left Panel-2105x1200 & Rear Panel-2025x1200 CORNER TOP VIEW Item: Flush 6a - 1x Left Panel- 2105x1200 6b - 1x Rear Panel- 2025x1200 6c - 10x WPC70x50x5 (5 per Panel)
- Page 19 Pre-drill parts before fixing with screws. Step 7: Rear Panel Complete Item: Follow Step 6 to fix the panels. 7a - 5x Rear Panel- 2025x1200 Use following number of screws: 7b - 35x WPC70x50x5 (5 per vertical side) 4x on base 55x 70mm x 4mm Csk Screw 5x on vertical sides 70mm x 4mm Csk...
- Page 20 Pre-drill parts before fixing with screws. Step 8: Back Wall Brace Item: 8a - 3x 35x70x3000 12x 70mm x 4mm Csk Screw Note: Do not screw The Back Wall into this post Brace is temporary. Step 9: Right Panel-2105x1200 & Right Panel-2180x1200 Item: 9a - 1x Right Panel-2220x1200 9b - 1x Right Panel-2105x1200...
- Page 21 Pre-drill parts before fixing with screws. Step 10: Left Panels Item: 10a - 1x Left Panel- 2220x1200 10b - 1x Left Panel- 2145x595 10c - 15x WPC70x50x5 (5 per vertical side) 21x 70mm x 4mm Csk Screw Use following number of screws: 4x on 1200mm Panel bases 2x on 595mm Panel base 5x on vertical sides...
- Page 22 Pre-drill parts before fixing with screws. Step 12: Roof Item: 12a - 1x Roof Panel 3.5m (Side) 12b - 6x Roof Panel 3.5m 47x 200mm x 4mm Self Drill Screw & 19mm Saddle Washer (Front, side and rear walls) 30x 20mm x 3.5mm Self Drill Screw & 14mm Saddle Washer (Overlapping Joint between roof panels) Sealant Place the Side Roof Panel as shown below, ensuring that it is spaced 15mm from the edge of the wall.
-
Page 23: Front View
Pre-drill parts before fixing with screws. Continuation of Roof i. Use the overlapping crest on the 2nd roof panel to hook onto the 1st one, as shown, and lower it gently to close the gap. Ensure that the roof panels are flush Overlapping crest with each other at the front and rear. - Page 24 Pre-drill parts before fixing with screws. Continuation of Roof iv. Use 5x 20mm screws to join each panel together. Fix them along the length of the overlapping crest joint, aligning with the screws alongside the bent edge. Please ensure that only 1 person is on the roof at any time. 20mm Self Drill Screw &...
- Page 25 Windows Fix the Sill to the bottom part of the Window Frames using 50mm screws. WINDOW FRAME SILL 50mm Screws WINDOW FRAME WINDOW FRAME SILL SILL 50mm Screw 50mm Screws P6-7633H...
- Page 26 Door External Side end of the manual for the windows and doors installation instructions. Dunster House recommends installing the glass at the end of the build. Once installed, apply a bead of sealant on both the internal and external side of the uPVC frames to make it watertight.
- Page 27 OPTION - Single Door with Side Glass Panel 1. Fix the Sill to the bottom part of the Door Frame using 50mm screws. DOOR SILL DOOR 50mm Screws SILL 50mm Screws 2. Position the 15mm Frame widener. 15mm Frame Widener NOTE: COVER TRIMS ON BOTH SIDES OF THE DOOR HAS TO BE CUT AROUND THE SILL P6-4333H-L...
- Page 28 OPTION - Single Door with Side Glass Panel - Frame Fixing Pre-drill parts before fixing with screws. Fig.1a Fig.1b 1. First, fix the fixed pane/sash side with the screws labeled Fig.1a & Fig.1b Ensuring the front of the frame is flush with the front of the post, then continue to the top and bottom of the frame.
- Page 29 Pre-drill parts before fixing with screws. SIDE VIEW Step 14: Cladding and Trims Item: Roof 14a - 2x Shiplap.2460 14g - 2x Shiplap.1830 14b - 2x Shiplap.2460x115.BOTTOM 14h - 1x Shiplap.450 L.(4 deg @ 64) 14c - 1x Shiplap.2680 14i - 1x Shiplap.450 R.(4 deg @ 64) 14d - 1x Shiplap.2680x115.BOTTOM 14j - 2x Shiplap.450 14e - 1x Shiplap.1830x95.BOTTOM...
- Page 30 Pre-drill parts before fixing with screws. Step 15: Inner Walls Item: 15a - 6x Inner Panel Rear- 2025x1200 (15x Screw) 15b - 1x Inner Panel Left- 2215x1200 (15x Screw) 15c - 1x Inner Panel Left- 2140x595 (10x Screw) 15d - 1x Inner Panel Left- 2100x1200 (15x Screw) 15e - 1x Inner Panel Right- 2215x1200 (15x Screw)
- Page 31 Pre-drill parts before fixing with screws. Continuation of Inner walls FRONT REAR Once the front panels are fixed, apply some sealant and place trims at the positions shown. Also, cover the gaps with sealant. Continued on next page P6-7633H...
- Page 32 Pre-drill parts before fixing with screws. Continuation of Inner walls 15k (7th) For the top front Inner Panels, fix them in the order shown 15j (6th) below. Also ensure they 15n (2nd) are flush with the lintels at the bases. 15l (3rd) Flush FRONT...
- Page 33 Pre-drill parts before fixing with screws. Step 16: Floor Item: Lay the floor panels as shown below. 17a - 1x Floor Panel- 2400x1200 (22x Screws) Use packers around the perimeter to 17b - 1x Floor Panel- 2400x740 (14x Screws) centralise the floor assembly. 17c - 4x Floor Panel- 2400x600 (14x Screws) 17d - 1x Floor Panel- 1315x600...
- Page 34 Pre-drill parts before fixing with screws. Step 18: Decking and Trims Item: 18a - 4x Deck.95x20x1805 (12x Screw) 18b - 1x Deck.95x20x1805.(H1-30) (6x Screw) 18c - 2x 70x19x2025.Double Notches (5x Screw) 18d - 4x 70x19x1995.N(20.30@800) (5x Screw) 18e - 2x 19x70x1995 (5x Screw) 18f - 2x 19x70x230 (4x Screw)
- Page 35 Pre-drill parts before fixing with screws. Continuation of Decking and Trims Fix the 15x15 trims (18g and 18h) outside on both the left and right edge, adjacent to the small window frames, as shown. The nails should be fixed at an angle into the trims. Fill corner gaps with decorators caulk Step 19: 25mm T-bead Item:...
- Page 36 Pre-drill parts before fixing with screws. Step 20: Roof Flashing- Rear Item: 20a - 7x OB-13 Flashing (Gutter Downside Flashing) 20b - 7x OB-08 Flashing (Gutter Flashing) 20c - 7x OB-34 Flashing (Eaves Masking Strip) 70x 20mm x 3.5mm Self Drill Screw &14mm Saddle Washer Sealant Slot the rear flashing 20a into the FRONT...
- Page 37 Pre-drill parts before fixing with screws. Continuation of Rear Flashing Once the two layers of flashings are in position, fix them using 2 screws per trough with about 100mm spacing from the trough edges. FRONT Apply a layer of sealant along the edge to seal REAR any gaps...
- Page 38 Pre-drill parts before fixing with screws. Step 21: Roof Flashing- Side Item: 21a - 2x 45x20x3275 (86 deg.86 deg) (10x Screw) 20x 35mm x 4 mm Csk Screw Fix 20a into position using 10x screws. Ensure it is flush to the top of the wall panels. Repeat this step on the other side as shown below.
- Page 39 Pre-drill parts before fixing with screws. Continuation of Side Flashing Ensure the overlappings for the middle Item: flashings are even on both ends. 21b - 6x OB-30 Flashing (Side) Fix the flashings with 8 screws. Ensure the 30x 20mm x 3.5mm Self Drill Screw & 14mm Saddle Washer screws in the overlappings are evenly 7x 200mm x 4mm Self Drill Screw &...
- Page 40 Pre-drill parts before fixing with screws. Step 22: Roof Flashing- Front Place the foam fillers 50mm from the roof Item: front edge. Position the flashings as shown 22a - 7x Foam Fillers and fix them with screws at each crest. 22b - 7x OB-31 Flashing (Front) Ensure the screws go through the centre of 22c - 2x OB-12 Flashing (Small outer Corner)
- Page 41 Pre-drill parts before fixing with screws. Continuation of Front Flashing Next, put the following screws at 20mm Self Drill Screw & 14mm Saddle Washer the positions shown: 3 screws on the front right corner 2 screws on the remaining corners FRONT REAR Affix the corner flashings on the front...
- Page 42 Pre-drill parts before fixing with screws. Step 23: Outer Wall Trims Item: 23a - 8x 20x45x2025 (10x Screw) 23b - 2x 45x20x1990 (86 deg) (10x Screw) 23c - 2x 45x20x2065 (86 deg) (10x Screw) 23d - 2x 45x20x2105 (86 deg) (10x Screw) 23e - 2x 45x20x2180 (86 deg) (10x Screw) 160x 35mm x 4mm Csk Screw Sealant...
- Page 43 Glazing Windows and Doors Sealed units are approximately 10mm smaller in length and width than the aperture. This difference in size will be packed using bridge packers (4mm), black shims (2mm), and green shims (1mm). Bridge packers must be used only against the frame, while shims only are to be used next to sealed units.
- Page 44 Glazing Windows and Doors 5. After packing the sealed units correctly, refit the beads in the same position as you removed them; start with the smallest lengths first before inserting the longer lengths. Carefully use a nylon or non-marking rubber mallet to help tap the beads into position, starting at the ends.
Need help?
Do you have a question about the HELENA P6-7633H and is the answer not in the manual?
Questions and answers