Advertisement
Quick Links
All dimensions are approximate and subject to the limitations of the materials used and the methods of
Manufacturer:
Dunster House Ltd.
Caxton Road
Bedford
Bedfordshire
England
MK41 0LF
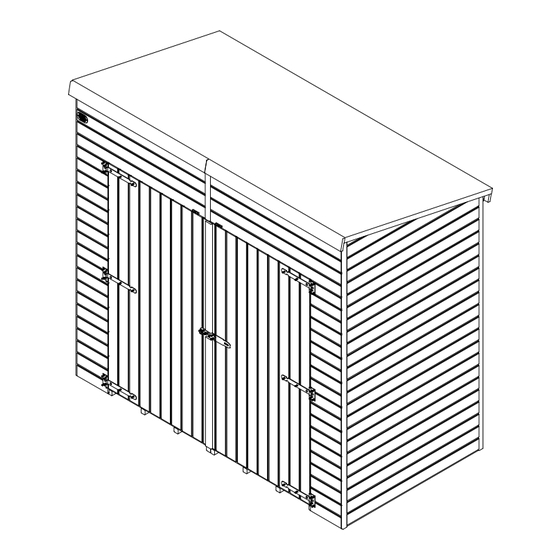
SENSOVDOOM 2.4m x 1.4m
DHCBSHED2414
INSTALLATION MANUAL
manufacture
Unique Shed Reference Number
_____________________________
Important!
Customer Service:
cs@dunsterhouse.co.uk
www.dunsterhouse.co.uk
Advertisement

Related Manuals for Dunster House SENSOVDOOM DHCBSHED2414


Summary of Contents for Dunster House SENSOVDOOM DHCBSHED2414
- Page 1 SENSOVDOOM 2.4m x 1.4m DHCBSHED2414 INSTALLATION MANUAL Important! All dimensions are approximate and subject to the limitations of the materials used and the methods of manufacture Manufacturer: Unique Shed Reference Number Dunster House Ltd. Caxton Road Bedford Customer Service: Bedfordshire _____________________________ England cs@dunsterhouse.co.uk MK41 0LF www.dunsterhouse.co.uk...
- Page 2 Email: cs@dunsterhouse.co.uk Post: FAO Customer Services, Dunster House Ltd - Factory 1, Caxton Road, Bedford, MK41 0LF Our Customer Services department is open 9:00 - 17:00, Monday to Friday. Please include your Sales Order number starting with SO or your postcode so we can locate your order.
- Page 3 Should you discover a rip or tear, the best course of action is to replace it immediately. At Dunster House, we sell high-grade mineral felt. More information on replacing the shed's roof material can be found here:...
- Page 4 DHCBSHED2414 SENSOVDOOM 2.4x1.4 Packing list PART NUMBER THK_mm WIDTH_mm MATERIAL DESCRIPTION LNG_mm INSTALL CODE H4 - M6x60 BOLT M6x60 bolt,m6 washer,M6 nut M6x60 A HASP & STAPLE HASP & STAPLE LOCK H&SL T.Button 50mm Turn Button TB50 H4 - M6x50 BOLT M6x50 bolt,m6 washer,M6 nut M6x50 B DOOR ASSM R...
-
Page 5: Pack Contents
PACK CONTENTS SEE PACKING LIST FOR QUANTITIES AND DIMENSION CBP-2 CBP-1 CB Panel 2 CB Panel 1 1 1 4 DRAS-R DRAS-L Door/Panel Rgt Door/Panel left Loose Components CB10 Cheese4 L Cheese4 R Cheese3 L Cheese3 R 1055 1055 Cheese2 L Cheese2 R 1140 1140... - Page 6 PACK CONTENTS SEE PACKING LIST FOR QUANTITIES AND DIMENSION door trim 12,5 12,5 1895 trims 12,5 trims 1280 roof Purlin Panel 1 1140 12,5 FB 2 FB 1 Floor Board Floor Board HS LOCK TB50 SB70 Hasp &staple lock Turn Button Shoot Bolt 70mm...
- Page 7 Assembly Steps Pre-drill parts before fixing with screws FLOOR Ensuring the base is level, space bearers evenly. The bearer layout consists of double bearers on the ends. Depending on the size you purchased, there will be more double bearers needed where the floor board(s) will eventually join. Use 60mm screws to secure them as shown in the image (1.1).
- Page 8 Assembly Steps Pre-drill parts before fixing with screws PANELS CBP-1 Start by establishing the layout of your shed. Fix panels onto the bearers, use 60 mm screws. Start with the wall parallel to the bearers. CBP-1 Screw through the panel frame into the bearers Double bearer Fix a secondary panel to make a corner, use 60mm screws fixing through the side frame.
-
Page 9: Door Panels
Assembly Steps DOOR PANELS Pre-drill parts before fixing with screws CBP-1 DRAS-L M6x60 A M6x50 B In this diagram back and side panels are hidden for visibility Fix the bolts to the hinges Use 60mm screws to fix the door panel and make sure they are evenly spaced Make sure it is flush all the way down the corner DRAS-R... - Page 10 Assembly Steps Pre-drill parts before fixing with screws LINTEL PANELS Fix the upper panel to the front panel as shown using 60mm screw CBP-2 CBP-2 Flush CBP-1 In this diagram the door assembly has been hidden for visibility The door base is fixed to the panel and each bearer using 60mm screw Side and back panels are removed for visibility FB 2...
- Page 11 Assembly Steps Pre-drill parts before fixing with screws ROOF Inside view Fix the purlins to the panel using 70mm screws Fix the roof Boards to purlins using 30mm shank nail with a 2mm gap between each panel RN30...
- Page 12 Assembly Steps Pre-drill parts before fixing with screws EAVES Fix the eaves. Ensure the top is flush with the roof boards and the front is flush with the purlin. Flush Fix the sofit to the underside of the purlin on each side. Sofit Fix the the rear facia board.
- Page 13 Assembly Steps Pre-drill parts before fixing with screws HASP & STAPLE, TURN BUTTONS Position the hasp, staple and turn buttons to correct position as shown in the diagram (right hand) Fix the hasp, staple and turn buttons into the frame by using 35mm screws. Principles of Installation Hasp &...
- Page 14 Assembly Steps Pre-drill parts before fixing with screws TRIMS a) Secure corner trims at each corner of your shed with 30mm nails. Extra trims are provided to cover any joins between side wall panels. These may need cutting down with a saw DRAS-R Fix the door trim to the right door using 20mm screw...
Need help?
Do you have a question about the SENSOVDOOM DHCBSHED2414 and is the answer not in the manual?
Questions and answers