
Related Manuals for CAME MITHO


Summary of Contents for CAME MITHO
- Page 1 Manuale per l’Utente ________________________________ User Guide _________________________________________________________ MithoDomotici_UTE IT 24811880 26-01-2015...
-
Page 3: Table Of Contents
Mitho plus: Principali funzioni associate alle icone della schermata di apertura . . . . . . . . . . . . . . . - Page 4 Cancellare uno Scenario Personalizzato . . . . . . . . . . . . . . . . . . . . . . . . . . . . . . . . . . . . . . . . . . . . . . . . . . . . . . . . . . . . . 44 IL MENÙ CITOFONIA (SU TERMINALI MITHO PLUS E MITHO XL E XLE) .
- Page 5 Consultazione memoria allarmi . . . . . . . . . . . . . . . . . . . . . . . . . . . . . . . . . . . . . . . . . . . . . . . . . . . . . . . . . . . . . . . . . . . . . 58 MODALITÀ MAPPE (SOLO SU TERMINALI MITHO XL E MITHO XLE) .
-
Page 6: Informazioni Generali
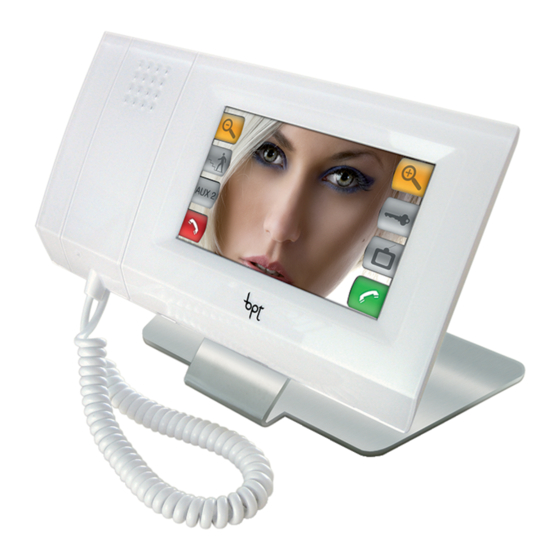
INFORMAZIONI GENERALI Mitho plus: Caratteristiche tecniche Mitho plus è l’innovativo terminale multifunzione a colori touch screen, pensato per la gestione e il controllo della automazione elettrica CAME, della sicurezza antintrusione PROXINET e della videocitofonia BPT negli impianti con montante a 2 o 4 fili . -
Page 7: Mitho Plus: Principali Funzioni Associate Alle Icone Della Schermata Di Apertura
La schermata di apertura permette di accedere rapidamente ed in maniera intuitiva a tutte le funzioni gestibili dal terminale Mitho plus e di avere un immediato feedback degli eventi che interessano il sistema . Menù principale per impianti senza Centralino di Portineria... -
Page 8: Mitho Ha: Caratteristiche Tecniche
Manuale per l’Utente INFORMAZIONI GENERALI Mitho HA: Caratteristiche tecniche Mitho HA è l’innovativo terminale multifunzione a colori touch screen, pensato per la gestione e il controllo dell’automazione elettrica CAME e della sicurezza antintrusione PROXINET . 1 – Display 16:9 touch screen 4,3”... -
Page 9: Mitho Ha: Principali Funzioni Associate Alle Icone Della Schermata Di Apertura
Mitho HA: Principali funzioni associate alle icone della schermata di apertura La schermata di apertura permette di accedere rapidamente ed in maniera intuitiva a tutte le funzioni gestibili dal terminale Mitho HA e di avere un immediato feedback degli eventi che interessano il sistema . Menù principale... -
Page 10: Mitho Xl E Mitho Xle: Caratteristiche Tecniche
INFORMAZIONI GENERALI Mitho XL e Mitho XLE: Caratteristiche tecniche Mitho XL e Mitho XLE sono gli l’innovativi terminali multifunzione a colori touch screen, pensati per la gestione e il controllo della automazione elettrica CAME, della sicurezza antintrusione PROXINET e della videocitofonia BPT negli impianti con montante a 2 o 4 fili . -
Page 11: Manutenzione Ed Utilizzo Del Terminale
Manuale per l’Utente INFORMAZIONI GENERALI Manutenzione ed utilizzo del Terminale • Non utilizzare utensili, penne o altri strumenti appuntiti che potrebbero danneggiare il display e compro- metterne il funzionamento . • Non esporre lo schermo LCD alla luce diretta del sole . •... -
Page 12: Menù Principale Con Funzione Mappe E Audio Abilitata In Impianti Senza Centralino Di Portineria
Manuale per l’Utente INFORMAZIONI GENERALI Menù principale con funzione Mappe e Audio abilitata in impianti senza Centralino di Portineria Spia segreteria videocitofonica comfort citofonia L’icona indica che la segreteria videocitofonica è attiva (vedi pagina 49). risparmio sicurezza scenari setup Pulsante Mappe: permette l’accesso alla Pulsante Audio: permette l’accesso rappresentazione grafica dell’impianto e la gestione alle funzioni di gestione di impianti... -
Page 13: Il Menù Comfort
Manuale per l’Utente IL MENÙ COMFORT Principali funzioni controllabili mediante il menù comfort Il menù comfort permette il controllo delle aperture (tapparelle, tende da sole ecc . . . ) , delle luci e dell’impian- to di riscaldamento/raffrescamento dell’abitazione . É... -
Page 14: Controllo Aperture
Manuale per l’Utente IL MENÙ COMFORT Zona 1 Controllo Aperture Premere l’icona aperture, selezionare la Zona de- Spazio 1 Spazio 2 siderata e successivamente selezionare lo spazio contenente le aperture che si vogliono comandare . Spazio 3 Spazio 4 Spazio 5 Spazio 6 Selezionare una delle aperture disponibili in elenco . -
Page 15: Controllo Punti Luce
Manuale per l’Utente IL MENÙ COMFORT Zona 1 Controllo Punti Luce Premuta l’icona luci, si accede per default alla prima Zona disponibile . Spazio 1 Spazio 2 Almeno una luce all’interno dello spazio è accesa Spazio 3 Spazio 4 Tutte le luci all’interno dello spazio sono spente Accendere o spegnere tutte le luci di uno Zona 1... -
Page 16: Controllo Di Luci Dimmerate
Manuale per l’Utente IL MENÙ COMFORT Controllo di luci dimmerate Dimmerata Se uno dei punti luce in elenco è dotato di dimmer Punto l 1 Punto l 2 per il controllo dell’intensità luminosa, il pulsante che lo rappresenta presenterà il simbolo Per controllare l’intensità... -
Page 17: Controllo Zone Termiche
Manuale per l’Utente IL MENÙ COMFORT Notte Controllo Zone Termiche 21.2 21.2 Dalla schermata iniziale del menù “Comfort”, pre- Camera Bagno 1 mere il pulsante per accedere alla sezione dedi- cata al controllo delle Zone Termiche . 21.2 Bagno 2 Con le frecce poste sulla parte superiore dello schermo è... -
Page 18: Principali Funzioni Del Diagramma Temperature/Ore
Manuale per l’Utente IL MENÙ COMFORT Principali funzioni del diagramma temperature/ore Giorni della settimana. In giallo il giorno della settimana del quale si sta visualizzando il diagramma Zona 1 zona termica/termostato Spazio 2 di zona visualizzato lun mar mer gio ven sab dom Giorno corrente Asse delle ore del giorno Ora corrente... -
Page 19: Copiare Un Diagramma Temperature In Altri Giorni Della Settimana
Manuale per l’Utente IL MENÙ COMFORT Zona 1 Copiare un diagramma temperature in altri giorni della settimana Spazio 2 lun mar mer gio ven sab dom Selezionare il giorno della settimana del quale si vuole copiare il diagramma e successivamente selezionare il pulsante 5 . -
Page 20: Creare Un Programma Jolly
Manuale per l’Utente IL MENÙ COMFORT Se la zona termica è dotata di ventilconvettori, pre- Zona 1 mendo il pulsante (fig . 17) è possibile regolare la Spazio 2 velocità delle ventole (fig . 18) . AUTO Nota: Per variare la modalità di funzionamento della zona termica premere il pulsante 8. -
Page 21: Setup Zone Termiche
Manuale per l’Utente IL MENÙ COMFORT Zona 1 Setup Zone Termiche Spazio 2 lun mar mer gio ven sab dom Ciascun cronotermostato di zona può essere “tara- to” per rilevare e regolare la temperatura nel modo più corretto possibile, tenendo conto delle caratte- ristiche ambientali del luogo in cui è... -
Page 22: Regolazione Temperature Di Riferimento (T1, T2, T3)
Manuale per l’Utente IL MENÙ COMFORT Regolare con il pennino in dotazione il cursore della temperatura; le frecce laterali permettono di affina- re la regolazione in decimi di grado . Nota: La funzione antigelo NON è attiva solo se il controllo sull’impianto di termoregolazione viene TOTALMEN- TE disabilitato (vedi capitolo “Controllo Zone Termi- che”). -
Page 23: Impostare Un Differenziale Termico Proporzionale Integrale
Manuale per l’Utente IL MENÙ COMFORT Il differenziale termico può essere liberamente mo- dificato per essere adattato alle diverse tipologie di riscaldamento (termoconvettori, riscaldamento a pavimento, riscaldatori elettrici) . Premere sul pulsante (fig . 28) e regolare con il pennino in dotazione il cursore della temperatura (fig . -
Page 24: Gestione Dispositivi Generici
Manuale per l’Utente IL MENÙ COMFORT Gestione dispositivi generici Presa 2 Presa 1 Premendo il pulsante si accede all’elenco dei dispositivi generici controllati dal sistema . Presa 3 Presa 4 In questa sezione vengono raccolti quei dispositivi (diversi da luci, aperture, ecc . . . ) che non trovano collocazione tra quelli normalmente dislocati all’in- terno di una abitazione . -
Page 25: Controllo Uscite Analogiche
Manuale per l’Utente IL MENÙ COMFORT Premere il pulsante per consultare un elenco delle misurazioni che hanno provocato l’attivazione di allarmi o azioni sull’impianto . 23-2-2009 16:12 Allarme vento 23-2-2009 16:07 Allarme vento Controllo uscite analogiche Premere il pulsante per accedere alla sezione de- dicata al controllo di uscite analogiche (ad esempio Valv. -
Page 26: Il Menù Risparmio
Manuale per l’Utente IL MENÙ RISPARMIO Il menù risparmio contiene tutti i comandi necessari a pilotare i dispositivi per la gestione dei consumi, la gestione delle attivazioni temporizzate, il controllo dei relè generici e l’impianto di irrigazione . Navigazione all’interno del menù risparmio Gestione lun mar mer gio ven sab dom carichi controllati... -
Page 27: Controllo Consumi
3 kW = 3000 W) . Premere il pulsante 3, e digitare il valore di variazio- ne di consumo minimo (espresso in Watt) superato il quale Mitho procederà a verificare immediata- mente che non vi siano carichi programmati per il distacco . -
Page 28: Creare Un Diagramma Di Controllo Consumi
Manuale per l’Utente IL MENÙ RISPARMIO Creare un diagramma di controllo consumi Una volta inserita la massima potenza impegnata lun mar mer gio ven sab dom con il fornitore di energia elettrica, l’asse verticale del diagramma consumi viene automaticamente suddiviso in fasce di consumo prestabilite . Premere il pulsante “set”... -
Page 29: Controllo Carichi
. . . ) , può essere mantenuta sotto controllo (controllo carichi) . Mitho provvederà a disattivare, secondo tempi e priorità programmati, i carichi che provocano il superamen- to della soglia di consumo impostata . - Page 30 Manuale per l’Utente IL MENÙ RISPARMIO Se l’icona che rappresenta il dispositivo è spenta (fig . 11), significa che il dispositivo non è sottoposto al controllo carichi . Punto luce 1 Carico 1 Dispositivo controllato Carico 2 Carico 3 Dispositivo controllato e disattivato Dispositivo non controllato Premere il pulsante 2;...
-
Page 31: La Finestra Controllo Carico
Manuale per l’Utente IL MENÙ RISPARMIO La finestra controllo carico Giorno visualizzato Dispositivo controllato Forno Pulsanti per programmare Giorni della settimana lun mar mer gio ven sab dom fasce orarie di controllo Lasso di tempo durante il quale il carico è controllato Spia avvenuta disattivazione del carico Priorità... -
Page 32: Cancellare Una Fascia Oraria Di Controllo Carico
Manuale per l’Utente IL MENÙ RISPARMIO Premere infine il pulsante “P” e digitare il livello di Carico 2 priorità da abbinare al dispositivo nel lasso di tempo precedentemente immesso . Il livello di priorità può andare da 01 a 99 . I dispositivi ai quali viene assegnata una priorità... -
Page 33: La Finestra Programmazione Temporizzazioni
Manuale per l’Utente IL MENÙ RISPARMIO Gestione dispositivi temporizzati Alcuni dispositivi dell’impianto possono essere Luce scale Luce vialetto controllati da temporizzatori che consentono di programmarne l’attivazione in fasce orarie e giorni stabiliti . Premendo il pulsante si accede all’elenco dei dispositivi temporizzati . -
Page 34: Temporizzare Un Dispositivo
Manuale per l’Utente IL MENÙ RISPARMIO Temporizzare un dispositivo Luce vialetto Premere uno dei pulsanti per la programmazione lun mar mer gio ven sab dom delle quattro possibili fasce orarie di temporizza- zione; premere il pulsante e digitare l’ora di inizio della Luce vialetto fascia oraria di temporizzazione;... -
Page 35: Cancellare Una Fascia Oraria Di Temporizzazione
Manuale per l’Utente IL MENÙ RISPARMIO Cancellare una fascia oraria di temporizzazione Premere uno dei quattro pulsanti per la programmazione delle fasce orarie di temporizzazione; premere il pulsante ; premere il pulsante “C” per cancellare i dati presenti; premere il pulsante “OK” . Premere il pulsante ;... -
Page 36: La Finestra Programmazione Scenario Irrigazione
Manuale per l’Utente IL MENÙ RISPARMIO La finestra programmazione scenario irrigazione Giorni nel corso dei quali verrà eseguito lo scenario irrigazione Nome dello scenario Giorni della settimana Siepe Accesso alla lun mar mer gio ven sab dom Attivazione immediata del programmazione ciclo di irrigazione dei singoli irrigatori... -
Page 37: Impostare L'ora E I Giorni Di Attivazione Di Uno Scenario Irrigazione
Manuale per l’Utente IL MENÙ RISPARMIO premere “OK” per confermare i dati immessi, il Siepe programma provvederà a ricalcolare i cicli di irri- gazione e di conseguenza l’ora di fine esecuzione dello scenario di irrigazione in modo da soddisfare lun mar mer gio ven sab dom la richiesta . -
Page 38: Programmare I Singoli Irrigatori
Manuale per l’Utente IL MENÙ RISPARMIO Programmare i singoli irrigatori Siepe Ogni scenario comanda l’attivazione di una serie lun mar mer gio ven sab dom di irrigatori . Per programmare i singoli irrigatori, premere il pulsante 6 . INIZIO Premere il pulsante e selezionare l’icona dell’irri- Siepe gatore da programmare . -
Page 39: Il Menù Scenari
Per scenario si intende un insieme di attivazioni (accensione luci, aperture tende o tapparelle ecc . . . ) accomu- nate in un unico comando . Mitho prevede che l’utente possa attivare o modificare (mediante terminale) gli Scenari preimpostati in fase di installazione . - Page 40 Manuale per l’Utente IL MENÙ SCENARI La finestra che appare presenta un elenco dei di- Entra spositivi controllati dallo Scenario selezionato . Punto luce 1 Punto luce 2 Dispositivo controllato dallo scenario Punto luce 3 Punto luce 4 Punto luce 5 Punto luce 6 Selezionare i dispositivi che si vogliono sottrarre dall’attivazione dello scenario (fig .
-
Page 41: Creare Uno Scenario Personalizzato (Metodo 1)
Manuale per l’Utente IL MENÙ SCENARI Variare la programmazione di un termostato di zona funzionante in modalità manuale Cucina Qualora lo scenario preveda l’impostazione ma- nuale della temperatura su una zona termica, essa apparirà in elenco (fig . 6) come dispositivo le cui funzioni sono modificabili . - Page 42 Manuale per l’Utente IL MENÙ SCENARI Assegnare mediante la tastiera un nome allo scena- Notte rio personalizzato . Premere il pulsante per salvare e tornare alla finestra precedente . Premendo il pulsante si dà inizio alla creazione Notte dello scenario personalizzato il cui nome sarà quello che si legge sulla parte alta della finestra .
-
Page 43: Creare Uno Scenario Personalizzato (Metodo 2)
Manuale per l’Utente IL MENÙ SCENARI Creare uno Scenario Personalizzato (metodo 2) Esiste un secondo modo per creare uno scenario personalizzato . Una volta premuto il pulsante (fig . 13) è possibile eseguire fisicamente le operazioni che si vogliono far includere nello scenario in corso di creazione . -
Page 44: Modificare Uno Scenario Personalizzato
Manuale per l’Utente IL MENÙ SCENARI Modificare uno Scenario Personalizzato Selezionare il pulsante M; il pulsante “EDIT” e suc- Scenario 0 Scenario 1 cessivamente l’icona dello scenario da modificare . Procedere come per la modifica di scenari preim- postati . Cancellare uno Scenario Personalizzato Premere il pulsante “CANC”... -
Page 45: Il Menù Citofonia (Su Terminali Mitho Plus E Mitho Xl E Xle)
Manuale per l’Utente IL MENÙ CITOFONIA (su terminali Mitho plus e Mitho XL e XLE) Funzioni base Rispondere ad una chiamata comfort citofonia In caso di chiamata, la schermata principale viene automaticamente sostituita dalla schermata che risparmio sicurezza mostra l’immagine del chiamante ripreso dal posto videocitofonico esterno . -
Page 46: Trasferire Una Chiamata Verso Altri Interni
Manuale per l’Utente IL MENÙ CITOFONIA (su terminali Mitho plus e Mitho XL e XLE) Trasferire una chiamata verso altri interni Premendo il pulsante (fig . 4) apparirà un elenco degli interni verso i quali è possibile deviare la chia- mata;... -
Page 47: Assegnare Un Nome Ad Un Interno
Manuale per l’Utente IL MENÙ CITOFONIA (su terminali Mitho plus e Mitho XL e XLE) Selezionare uno degli interni in elenco per avviare immediatamente la chiamata . Intercom 1 Intercom 2 Intercom 3 Intercom 4 Intercom 5 Intercom 6 Torna alla schermata precedente... -
Page 48: Elenco Chiamate Da Portiere
Manuale per l’Utente IL MENÙ CITOFONIA (su terminali Mitho plus e Mitho XL e XLE) Elenco chiamate da portiere Qualora l’impianto videocitofonico preveda la pre- senza di un centralino di portineria, sarà possibile intercom esterno consultare una lista delle chiamate senza risposta effettuate dalla portineria verso il nostro interno . -
Page 49: La Segreteria Videocitofonica
IL MENÙ CITOFONIA (su terminali Mitho plus e Mitho XL e XLE) La segreteria videocitofonica Mitho consente di registrare delle videochiamate dal posto esterno in caso di assenza o di impossibilità alla risposta . Quando la funzione segreteria è attiva, in caso di chiamata, sul posto esterno può essere riprodotto un mes- saggio, preregistrato dall’utente, che avvisa il chiamante della possibilità... -
Page 50: Consultare La Segreteria Videocitofonica
Manuale per l’Utente IL MENÙ CITOFONIA (su terminali Mitho plus e Mitho XL e XLE) Per attivare la segreteria videocitofonica (con o senza riproduzione del messaggio) premere l’icona sulla schermata principale (fig . 17 ) . Segreteria Attiva Segreteria NON Attiva Consultare la segreteria videocitofonica Dalla schermata principale selezionare l’icona “ci-... - Page 51 Manuale per l’Utente IL MENÙ CITOFONIA (su terminali Mitho plus e Mitho XL e XLE) Il pulsante cancella il messaggio che si sta visualizzando . Nota: La presenza di messaggi videocitofonici non letti in segreteria è rivelata dall’icona “segreteria” in giallo...
-
Page 52: Il Menù Sicurezza
Manuale per l’Utente IL MENÙ SICUREZZA Informazioni generali Mitho può fungere da terminale di controllo per la gestione delle funzioni basilari di centrali antintrusione PROXINET compatibili . Mediante il terminale MItho è possibile attivare totalmente o parzialmente gli impianti antintrusione connes- si, tacitare i dispositivi di allarme, visualizzare lo stato delle aree o accedere ad una lista di eventi che hanno provocato l’attivazione o cambiato lo stato delle centrali antifurto connesse . -
Page 53: Principali Funzioni Associate Alle Icone Della Schermata "Sicurezza
Manuale per l’Utente IL MENÙ SICUREZZA Principali funzioni associate alle icone della schermata “sicurezza” Visualizzazione stato delle aree Identificativo della centrale sulla quale si sta agendo. Area disinserita Per cambiare centrale Area inserita premere sulle frecce laterali. Area in allarme (lampeggiante) 01 Area 02 Area Inserimento totale... -
Page 54: Inserire E Disinserire Totalmente L'impianto Antintrusione
Manuale per l’Utente IL MENÙ SICUREZZA Inserire e disinserire totalmente centrale 1 l’impianto antintrusione 01 Area 02 Area Premere il pulsante 1 . Nota: 03 Area 04 Area L’esempio si riferisce all’attivazione dell’impianto da parte di un Utente che possiede i privilegi necessari 05 Area 06 Area all’attivazione di tutte le aree. -
Page 55: Inserire Parzialmente L'impianto Antintrusione In Modalità "Aree
Manuale per l’Utente IL MENÙ SICUREZZA Inserire parzialmente l’impianto centrale 1 antintrusione in modalità “Aree” Selezionare dall’elenco (scorrendolo con le apposite 01 Area 02 Area frecce) le aree da attivare . 03 Area 04 Area Area selezionata 06 Area 05 Area Una volta raggiunta la configurazione desiderata, premere sul pulsante per confermare le scelte... -
Page 56: Forzare L'inserimento Di Aree "Non Pronte
Manuale per l’Utente IL MENÙ SICUREZZA Forzare l’inserimento di aree “non pronte” centrale 1 Aree non pronte L’impianto antintrusione tiene continuamente mo- 01 Area nitorati i sensori connessi e ne rileva lo stato anche a centrale disinserita . Se, nel corso della procedura di inserimento, uno dei sensori si trova in stato di allarme (per esempio una finestra aperta), l’area viene considerata “non pronta”... -
Page 57: Tacitare Le Sirene
Manuale per l’Utente IL MENÙ SICUREZZA Tacitare le sirene Nel caso si verifichi un allarme, sulla schermata prin- citofonia cipale di Mitho l’icona sicurezza lampeggerà . comfort sicurezza risparmio scenari setup Nel caso in cui l’impianto preveda la presenza di più centrali antintrusione, premendo sull’icona sicurezza, sarà... -
Page 58: Reset Visualizzazione Allarmi
Manuale per l’Utente IL MENÙ SICUREZZA Reset visualizzazione allarmi centrale 1 Una volta cessati gli allarmi in corso, premendo il 01 Area 02 Area pulsante “RESET” ed inserito il proprio codice utente, verrà resettata la visualizzazione degli allar- mi avvenuti e la centrale tornerà nello stato prece- 03 Area 04 Area dente l’attivazione . -
Page 59: Modalità Mappe (Solo Su Terminali Mitho Xl E Mitho Xle)
Manuale per l’Utente MODALITÀ MAPPE (solo su terminali Mitho XL e Mitho XLE) Accesso alla modalità Mappe Premere l’icona per visualizzare l’impianto in mo- comfort citofonia dalità Mappe, ovvero attraverso immagini preimpo- state in fase di installazione . risparmio sicurezza... - Page 60 Manuale per l’Utente MODALITÀ MAPPE (solo su terminali Mitho XL e Mitho XLE) Living Premendo sull’icona Aperture, appare un popup mediante il quale è possibile comandare Schermi solari Living l’apertura . Chiudi dispositivo Apri dispositivo Blocca movimento Cucina Notte L’icona o il pulsante di colore giallo indicano che il dispositivo è...
-
Page 61: Audiodiffusione (Solo Su Terminali Mitho Xl E Mitho Xle)
Manuale per l’Utente AUDIODIFFUSIONE (solo su terminali Mitho XL e Mitho XLE) Gestione dell’audiodiffusione Premere l’icona per visualizzare l’elenco delle Zo- comfort citofonia ne Audio disponibili precedentemente nominate e programmate mediante la centrale audio connessa . risparmio sicurezza scenari setup... -
Page 62: Il Menù Setup
Dalla schermata principale, premere sull’icona “se- tup” 1 . comfort citofonia risparmio sicurezza Nota: • Sui terminali Mitho HA l’accesso al menù “setup” può scenari setup essere protetto da password. Il menù “setup” raccoglie tutte le impostazioni di base del terminale . sveglia... -
Page 63: Regolare Numero E Pausa Degli Squilli
Manuale per l’Utente IL MENÙ SETUP Premendo il pulsante “TONI” 3, sarà possibile at- tivare/disattivare il suono associato alla pressione TONI dei pulsanti e regolarne il volume con le frecce ESTERNO INTERCOM poste sulla parte superiore della finestra . PIANEROTT. SVEGLIA PORTIERE TONI... -
Page 64: Regolare Data E Ora Del Terminale
Manuale per l’Utente IL MENÙ SETUP Regolare Data e Ora del Terminale Premere sul pulsante “data/ora” (fig . 2) . Per impostare l’ora esatta selezionare il pulsante e premere il pulsante “SET” . Sulla tastiera che appare, digitare l’ora esatta e premere “OK”... -
Page 65: Setup Citofonia (Su Terminali Mitho Plus E Mitho Xl E Xle)
Manuale per l’Utente IL MENÙ SETUP Setup Citofonia (su terminali Mitho plus e Mitho XL e XLE) Premere sul pulsante “citofonia” . sveglia melodie La schermata che appare, contiene i comandi ne- data/ora display cessari per registrare e riascoltare il messaggio da lasciare in segreteria . -
Page 66: Setup Home Page (Solo Su Terminale Mitho Ha)
è possibile personalizzare due dei pulsanti della home page (come illustrato) per l’accesso rapido a funzioni preferite . Pagina principale Mitho HA Scegliere le funzioni desiderate premendo luci le frecce poste al lato del pulsante . -
Page 67: Funzione Sveglia
Manuale per l’Utente IL MENÙ SETUP Funzione Sveglia Premere sul pulsante “sveglia” (fig . 15) . Per impostare l’ora di sveglia selezionare il pulsante e premere il pulsante “SET” . Sulla tastiera che appare, digitare l’ora e minuto di sveglia desiderata e premere “OK” . Nota: Programmando solo l’ora di sveglia la suoneria verrà... -
Page 68: Setup Tecnico (Su Terminale Mitho Ha)
. Selezionare il pulsante per regolare la luminosi- tà del display quando si trova in modalità stand-by (luminosità attenuata) . Setup Tecnico (su terminale Mitho HA) Premere sul pulsante “setup” sulla pagina prin- Entra comfort clima cipale . -
Page 69: Assegnare Una Password Al Menù "Setup
Manuale per l’Utente IL MENÙ SETUP Assegnare una password al menù “setup” Selezionare il pulsante 8 . Digitare una password e premere il pulsante La password memorizzata verrà richiesta ogni volta che si tenterà di accedere al menù “setup” . Se non viene digitato alcun carattere alfanumerico in fase di registrazione della password, essa viene disabilitata e non verrà... -
Page 70: Setup Tecnico (Su Terminali Mitho Plus E Mitho Xl)
Manuale per l’Utente IL MENÙ SETUP Setup Tecnico (su terminali Mitho plus e Mitho XL) Premere sul pulsante “tecnico”: sveglia melodie data/ora display Le funzioni di setup tecnico sono riservate a personale qualificato per questo motivo l’accesso INFO citofonia tecnico a questa area può... -
Page 71: Setup Citofonia
Manuale per l’Utente IL MENÙ SETUP Premere il pulsante per abilitare la possibilità di attivare mediante scenari predefiniti l’impianto antintrusione . Attenzione! L’attivazione di questa funzione in centrali che non prevedono la presenza di scenari annullerà di fatto la possibilità di inserire parzialmente l’impianto an- tintrusione. -
Page 72: Setup Domotica
Selezionare il pulsante 8 . Il pulsante è necessario all’identificazione del di- spositivo qualora si stia programmando l’impianto da PC mediante software PC Mitho . Il pulsante permette di salvare la configurazione dell’impianto nella scheda di memoria removibile . invio SN Assegnare una password al menù... -
Page 73: Scelta Lingua Terminale
Il pulsante “INFO” permette di visualizzare una serie di informazioni tecniche sul terminale che Bios version: 0.01 possono tornare utili al Vostro installatore per SW version: 2.08 HW version: 1.00 aggiornamenti del software o interventi tecnici . Mitho type: MITHO Plus Serial Number: 43000028... -
Page 74: Reset Dispositivo
Manuale per l’Utente Mitho plus Mitho HA Reset Reset Mitho XL Reset Reset dispositivo Ogni volta che anomalie di funzionamento, interventi e altre ragioni tecniche richiedono il reset dell’ap- parecchio, premere leggermente il pulsante collocato all’interno dell’apertura al di sotto della scocca del dispositivo (vedi figura), utilizzando il pennino in dotazione;... - Page 75 Mitho plus: Main functions associated with the icons on the opening screen . . . . . . . . . . . . . . .
- Page 76 Deleting a customized scenario . . . . . . . . . . . . . . . . . . . . . . . . . . . . . . . . . . . . . . . . . . . . . . . . . . . . . . . . . . . . . . . . . . . . . 116 THE DOOR ENTRY MENU (ONLY TERMINAL MITHO PLUS AND MITHO XL AND XLE) .
- Page 77 Alarm memory consultation . . . . . . . . . . . . . . . . . . . . . . . . . . . . . . . . . . . . . . . . . . . . . . . . . . . . . . . . . . . . . . . . . . . . . . . . 130 MAPS MODE (ONLY ON MITHO XL AND MITHO XLE TERMINALS) .
-
Page 78: General Information
GENERAL INFORMATION Mitho plus: Technical Features Mitho plus is the innovative colour touch screen multifunctional terminal designed for the management and control of CAME electrical automation, PROXINET burglar alarm and video entry control in systems with a 2- or 4-wire post . -
Page 79: Mitho Plus: Main Functions Associated With The Icons On The Opening Screen
Mitho plus: Main functions associated with the icons on the opening screen The opening screen provides fast, intuitive access to the functions managed by the Mitho plus terminal . It also provides immediate feedback on events involving the system . -
Page 80: Mitho Ha: Technical Features
GENERAL INFORMATION Mitho HA: Technical Features Mitho HA is the innovative colour touch screen multifunctional terminal designed for the management and control of CAME electrical automation and PROXINET burglar alarm . 1 – 4 . 3 ” touch screen 16:9 display 2 –... -
Page 81: Mitho Ha: Main Functions Associated With The Icons On The Opening Screen
Mitho HA: Main functions associated with the icons on the opening screen The opening screen provides fast, intuitive access to the functions managed by the Mitho HA terminal . It also provides immediate feedback on events involving the system . -
Page 82: Mitho Xl And Mitho Xle: Technical Features
GENERAL INFORMATION Mitho XL and Mitho XLE: Technical Features Mitho XL and Mitho XLE are the innovative colour touch screen multifunctional terminals designed for the management and control of CAME electrical automation, PROXINET burglar alarm and BPT video entry control in systems with a 2- or 4-wire post . The touch screen display allows all the components of the system to be programmed, activated and monitored . -
Page 83: Maintenance And Use Of The Terminal
User Guide GENERAL INFORMATION Maintenance and Use of the Terminal • Do not use utensils, pens or other pointy tools that may damage the screen and compromise operation . • Do not expose the LCD screen to direct sun light . •... -
Page 84: Main Menu With Maps And Audio Function Activated In Systems Without Porter Switchboard
User Guide GENERAL INFORMATION Main menu with Maps and Audio function activated in systems without Porter switchboard Video entry control voice mail indicator comfort door entry The icon indicates that the video entry control voice mail is active (see page 121). saving security scenarios... -
Page 85: The Comfort Menu
User Guide THE COMFORT MENU Main functions which can be controlled using the comfort menu The comfort menu lets you control openings (blinds, curtains, etc . ) , lights, and the heating/cooling system of the home . In addition, it is possible to control generic relays connected to the system, which can activate/deactivate any device;... -
Page 86: Openings Control
User Guide THE COMFORT MENU Zone 1 Openings control Press the openings icon, select the desired zone and Space 1 Space 2 then select the space that contains the opening you want to control . Space 3 Space 4 Space 5 Space 6 Select one of openings available in list . -
Page 87: Control Of Lighting
User Guide THE COMFORT MENU Zone 1 Control of lighting When the lights icon is pressed, you access by de- fault the first available zone . Space 1 Space 2 At least one light in the space is on Space 3 Space 4 All lights in the space are off Zone 1... -
Page 88: Control Of Lights With Dimmer
User Guide THE COMFORT MENU Control of lights with dimmer Dimmer-controlled If one of the light points in the list is equipped with Point l 1 Point l 2 a dimmer for the control of brightness, the button that represents it will be marked with the symbol Dimmer-controlled To control the brightness of the device, press but- and select the desired light point . -
Page 89: Control Of Thermal Zones
User Guide THE COMFORT MENU Night Control of Thermal Zones 21.2 21.2 From the initial screen of the “Comfort” menu, press Bedroom Bathroom 1 button to access the section dedicated to the control of Thermal Zones . 21.2 Bathroom 2 With the arrows placed on the higher part of the screen it is possible to scroll the available “Zones”;... -
Page 90: Main Functions Of The Diagram Of Temperatures/Hours
User Guide THE COMFORT MENU Main functions of the diagram of temperatures/hours Days of the week. The day of the week for which the diagram is currently displayed is shown in yellow Zone 1 thermal zone/zone Space 2 thermostat displayed Axis of the hours mon tue wed thu Current day... -
Page 91: Copying A Temperature Diagram To Other Days Of The Week
User Guide THE COMFORT MENU Zone 1 Copying a temperature diagram to other days of the week Space 2 mon tue wed thu Select the day of the week where you want to copy the diagram and then select button 5 . Zone 1 Select the day or days of the week where you want to copy the diagram and press “OK”... -
Page 92: Creating An All-Purpose Programme
User Guide THE COMFORT MENU If the thermal zone features fan coil units, by press- Zone 1 ing button (fig . 17) it is possible to adjust the Space 2 speed of the fans (fig . 18) . AUTO Note: To change the operating mode of the thermal zone press button 8. -
Page 93: Setup Of Thermal Zones
User Guide THE COMFORT MENU Zone 1 Setup of thermal zones Space 2 mon tue wed thu Each zone programmable thermostat can be cali- brated to measure and adjust the temperature as correctly as possible, taking into account the environmental characteristics of the place where it is installed, the needs of the user and the technical characteristics of the system . -
Page 94: Adjustment Of The Reference Temperature (T1, T2, T3)
User Guide THE COMFORT MENU Use the provided pen to adjust the temperature cursor; the side arrows let you fine tune the adjust- ment in tenths of a degree . Note: The anti-freeze function is NOT active only if the con- trol of the thermal regulation system is COMPLETELY disabled (see the chapter on control of thermal zones). -
Page 95: Setting And Integral Proportional Thermal Differential
User Guide THE COMFORT MENU The thermal differential can be freely modified to suit the various types of heating (fan coil units, floor heating, electric heaters) . Press button (fig . 28) and use the provided pen to adjust the temperature cursor (fig . 29) . The side arrows let you fine tune the adjustment in tenths of a degree . -
Page 96: Management Of Generic Devices
User Guide THE COMFORT MENU Management of generic devices Press button to access the list of generic devices Generic device 2 Generic device 1 controlled by the system . Generic device 3 Generic device 4 This section includes those devices (other than lights, openings, etc . -
Page 97: Control Of Analogue Outputs
User Guide THE COMFORT MENU Press button to consult a list of the measure- ments that caused the activation of alarms or ac- tions on the system . 23-2-2009 16:12 Wind alarm 23-2-2009 16:07 Wind alarm Control of analogue outputs Press button to access the section dedicated to the control of analogue outputs (for example,... -
Page 98: The Saving Menu
User Guide THE SAVING MENU The saving menu contains all of the controls required to control the devices for management of consump- tion, management of timer-controlled activations, control of generic relays and the irrigation system . Navigation in the saving menu Management of Management of mon tue wed thu... -
Page 99: Consumption Control
. g . : 3 kW = 3000 W) . Press button 3, and type the minimum consump- tion variation value (expressed in watts) exceeded which Mitho proceed immediately to verify if there are loads planned for the posting . -
Page 100: Creating A Consumption Control Diagram
User Guide THE SAVING MENU Creating a consumption control diagram Once the maximum power used with the provider mon tue wed thu of electrical energy has been inserted, the vertical axis of the consumption diagram is automatically divided into preset consumption ranges . Press the “set”... -
Page 101: Control Of Power Loads
The amount of power absorbed by some devices that make up the electrical system (e . g . oven, washing machine, dishwasher, etc . ) can be monitored (power loads) . Mitho will deactivate, according to programmed priorities and times, the power loads that cause the set consumption threshold to be exceeded . - Page 102 User Guide THE SAVING MENU If the icon that represents the device is off (fig . 11), it means that the device is not subjected to power loads . Light point 1 Power load 1 Device controlled Power load 2 Power load 3 Device controlled and deactivated Device not controlled...
-
Page 103: The Power Load Control Window
User Guide THE SAVING MENU The power load control window Day displayed Device controlled Oven Buttons for programming Days of the week mon tue wed thu control time periods Period of time during which the power load is controlled Power load deactivation indicator Priority of deactivation referred to the time period below Assigning priority to power loads... -
Page 104: Deleting A Power Load Control Time Period
User Guide THE SAVING MENU Finally, press button “P” and type in the level of prior- Power load 2 ity to assign to the device in the period of time that was previously inserted . The level of priority may be between 01 and 99 . The devices to which a low priority (01) is assigned will be the first to be deactivated if there is an over- load of the system . -
Page 105: Timer Control Programming Window
User Guide THE SAVING MENU Management of timer controlled devices Some devices of the system may be controlled by Stair lighting Driveway light timers that allow them to be programmed for acti- vations on certain days and in certain time periods . Press button to access the list of timer control- led devices . -
Page 106: Setting Timer Control Of A Device
User Guide THE SAVING MENU Setting timer control of a device Driveway light Press one of the buttons to programme the four mon tue wed thu possible time periods for timer control . Press the button and type in the start time of the Driveway light timer control period . -
Page 107: Deleting A Timer Control Period
User Guide THE SAVING MENU Deleting a timer control period Press one of the four buttons for programming the timer control periods . Press the button . Press the but- ton “C” to delete the data present . Press the button “OK” . Press the button , press the button “C”... -
Page 108: The Irrigation Scenario Programming Window
User Guide THE SAVING MENU The irrigation scenario programming window Days of the week on which the irrigation scenario will be run Scenario name Days of the week Hedge Access to programming mon tue wed thu Immediate activation of the of single irrigation irrigation cycle devices... -
Page 109: Setting The Time And Days For Activation Of An Irrigation Scenario
User Guide THE SAVING MENU Press “OK” to confirm the inserted data . The pro- Hedge gramme will re-calculate the irrigation cycles and as a result the time the irrigation scenario ends so as to satisfy the request . mon tue wed thu START Setting the time and days for activation Hedge... -
Page 110: Programming Single Irrigation Devices
User Guide THE SAVING MENU Programming single irrigation devices Hedge Each scenario controls the activation of a series of mon tue wed thu irrigation devices . To programme the single irrigation devices, press button 6 . START Press button and select the icon for the irrigation Hedge device to programme . -
Page 111: The Scenarios Menu
A scenario is a set of activations (turning on lights, opening curtains or blinds, etc . ) which have a common command . Mitho allows a user to activate or modify (by means of a terminal) scenarios that are preset during instal- lation . - Page 112 User Guide THE SCENARIOS MENU The window that appears presents a list of the de- Enter vices controlled by the selected scenario . Light point 1 Light point 2 Device controlled by the scenario Light point 3 Light point 4 Light point 5 Light point 6 Select the devices that you want to remove from...
-
Page 113: Creating A Customized Scenario (Method 1)
User Guide THE SCENARIOS MENU Changing the programming of a zone thermo- stat working in manual mode Kitchen If the scenario includes manual setting of the tem- perature in the a thermal zone, it will appear in the list (fig . 6) as a device with modifiable functions . Once the device is selected, you can use the pro- vided pen on the cursor (fig . - Page 114 User Guide THE SCENARIOS MENU Assign a name to the customized scenario using Night the keyboard . To save and return to previous window press the button To begin the creation of custom scenario, press the Night button K . The name of the scenario can be read at the top of the window .
-
Page 115: Creating A Customized Scenario (Method 2)
User Guide THE SCENARIOS MENU Creating a customized scenario (method 2) There is a second way to create a customized scenario . After pressing button (fig . 13), you can physically perform the operations that you want to include in the scenario you are creating . -
Page 116: Modifying A Customized Scenario
User Guide THE SCENARIOS MENU Modifying a customized scenario Select button M, the “EDIT” button and then the Scenario 0 Scenario 1 icon of the scenario to modify . Proceed in the same way as for modifying the pre- set scenarios . Deleting a customized scenario Press the button “CANC”... -
Page 117: The Door Entry Menu (Only Terminal Mitho Plus And Mitho Xl And Xle)
User Guide THE DOOR ENTRY MENU (only terminal Mitho plus and Mitho XL and XLE) Standard functions Answering a call comfort door entry In the event of a call, the main screen is automati- cally replaced by the screen in which shows the... -
Page 118: Transferring A Call To Other Extensions
User Guide THE DOOR ENTRY MENU (only terminal Mitho plus and Mitho XL and XLE) Transferring a call to other extensions If you press button (fig . 4), a list will appear of the extensions where you can transfer the call . S elect the desired extension, wait for an answer and hang up to transfer the call . -
Page 119: Assigning A Name To An Extension
User Guide THE DOOR ENTRY MENU (only terminal Mitho plus and Mitho XL and XLE) Select one of the extensions listed to begin the call immediately . Intercom 1 Intercom 2 Intercom 3 Intercom 4 Intercom 5 Intercom 6 Back to the previous screen... -
Page 120: Porter Call List
User Guide THE DOOR ENTRY MENU (only terminal Mitho plus and Mitho XL and XLE) Porter call list If the video entry system includes a porter switch- board, it will be possible to consult a list of the intercom entry panel unanswered calls made from the porter’s office to... -
Page 121: Video Entry Control Voice Mail
Video entry control voice mail Mitho lets you record the video calls from the entry panel if your are not at home or cannot answer . When the voice mail function is active, if there is a call, a message can be shown on the entry panel, pre- recorded by the user, which informs the caller that it is possible to leave a video message (e . -
Page 122: Checking The Video Entry Control Voice Mail
User Guide THE DOOR ENTRY MENU (only terminal Mitho plus and Mitho XL and XLE) To activate the video entry control voice mail (with or without the message), press icon on the main screen (fig . 17) . Voice mail active... - Page 123 User Guide THE DOOR ENTRY MENU (only terminal Mitho plus and Mitho XL and XLE) Button deletes the message you are viewing . Note: The presence of unread video entry control messages on your voice mail is indicated by the yellow flashing...
-
Page 124: The Security Menu
THE SECURITY MENU General information Mitho may act as a control panel for the management of the basic functions of compatible PROXINET anti- intrusion control units . By means of the terminal, you can fully or partially activate the connected anti-intrusion systems, silence alarm devices, display the status of the areas, or access a list of events that caused activation or changed the status of the connected anti-intrusion systems . -
Page 125: Main Functions Associated With The Icons On The "Security" Screen
User Guide THE SECURITY MENU Main functions associated with the icons on the “security” screen Area status display Identification of the control unit you are working on. Area disarmed To change control units, Area armed press on the side arrows. Area in alarm status (flashing) 01 Area 02 Area... -
Page 126: Fully Arming Or Disarming The Anti-Intrusion System
User Guide THE SECURITY MENU Fully arming or disarming the anti- central 1 intrusion system 01 Area 02 Area Press button 1 . Note: 03 Area 04 Area The example refers to activation of the system by a user who is authorized to activate all areas. 05 Area 06 Area Type in your user code and press “OK”... -
Page 127: Partially Arming The Anti-Intrusion System In "Areas" Mode
User Guide THE SECURITY MENU Partially arming the anti-intrusion central 1 system in “Areas” mode Select the areas to be activated from the list by 01 Area 02 Area scrolling with the arrows . 03 Area 04 Area Area selected 06 Area 05 Area Once the desired configuration has been achieved,... -
Page 128: Forced Arming On "Not Ready" Areas
User Guide THE SECURITY MENU Forced arming on “not ready” areas central 1 Areas not ready The anti-intrusion alarm constantly monitors the 01 Area connected sensors and detects their status even when the control unit is disconnected . During the arming procedure, if one of the sensors is in alarm status (for example because a window is open), the area is considered “not ready”... -
Page 129: Silencing The Sirens
User Guide THE SECURITY MENU Silencing the sirens If an alarm occurs, the security icon will flash on the door entry main screen . comfort security saving scenarios setup If the system has more than one anti-intrusion con- trol unit, press the security icon to see which control unit has detected the alarm . -
Page 130: Alarm Display Reset
User Guide THE SECURITY MENU Alarm display reset central 1 Once the alarms in progress have ceased, press the 01 Area 02 Area button “RESET” and insert your user code . This will reset the display of alarms that have occurred and the control unit will return to its previous ac- 03 Area 04 Area... -
Page 131: Maps Mode (Only On Mitho Xl And Mitho Xle Terminals)
User Guide MAPS MODE (only on Mitho XL and Mitho XLE terminals) Accessing the Maps mode Press icon to display the system in Maps mode, in comfort door entry other words through default images set during the installation phase . - Page 132 User Guide MAPS MODE (only on Mitho XL and Mitho XLE terminals) Living room Press the Openings icon: a window pops up for you to control the opening . Living room sun screens Close device Open device Block movement Kitchen...
-
Page 133: Sound Diffusion (Only On Mitho Xl And Mitho Xle Terminals)
User Guide SOUND DIFFUSION (only on Mitho XL and Mitho XLE terminals) Sound diffusion control Press icon to display the list of Audio Zones avail- comfort door entry able, previously named and programmed on the connected audio control unit . -
Page 134: The Setup Menu
. comfort door entry Note: saving security • On Mitho HA terminals, access to the “setup” menu may be password-protected. scenarios setup The “setup” menu includes all the basic settings for the terminal . alarm clk. -
Page 135: Adjust Number And Pause Of Rings
User Guide THE SETUP MENU Pressing the “TONE” button allows you to activate or deactivate the sound associated with pressing TONE the buttons and to regulate their volume with the ENTRY PANEL INTERCOM arrows at the top of the window . INPUT ALARM CLK. -
Page 136: Adjusting The Terminal Date And Time
User Guide THE SETUP MENU Adjusting the terminal date and time Press the “date/time” button (fig . 2) . To set the current time, select button and press the “SET” button . On the keypad that appears (fig . 9), type in the cur- rent time and press “OK”... -
Page 137: Service Setup (On Mitho Plus And Mitho Xl And Xle Terminal)
User Guide THE SETUP MENU Service setup (on Mitho plus and Mitho XL and XLE terminal) alarm clk. melodies Press the “door entry” button . date/time display The screen that appears contains the commands needed to record and listen to your voice mail INFO message . -
Page 138: Setup Home Page (Only On Mitho Ha Terminal)
User Guide THE SETUP MENU Setup home page (only on Mitho HA terminal) Press the button “home page” . melodies alarm clk. The display which appears features all the buttons date/time display necessary to personalise the home page . home page... -
Page 139: Alarm Clock Function
User Guide THE SETUP MENU Alarm clock function Press the “alarm clock” button (fig . 15) . To set the alarm clock time, select button press the “SET” button . On the keypad that appear, type the hour and minutes for the desired alarm time and press “OK” . Note: If you programme only the alarm time, the alarm will sound every day. -
Page 140: Service Setup (On Mitho Ha)
. Select button to adjust the luminosity of the display when the terminal is in standby mode (re- duced luminosity) . Service setup (on Mitho HA) Select button “setup” on main page . Enter comfort clima Exit... -
Page 141: Assigning A Password To The "Setup" Menu
User Guide THE SETUP MENU Assigning a password to the “setup” menu Select button 8 . Dial a password and press the button The memorized password will be required every time the “setup” menu is accessed . If nothing is dialled during the password registra- tion phase, it is disabled and no password will be New Password requested for any subsequent access to the “setup”... -
Page 142: Service Setup (On Mitho Plus And Mitho Xl Terminal)
User Guide THE SETUP MENU Service setup (on Mitho plus and Mitho XL terminal) Press the “service” button . alarm clk. melodies date/time display The technical setup functions are reserved to qualified personnel, for this reason access to this INFO... -
Page 143: Door Entry Setup
User Guide THE SETUP MENU Select the button to enable the possibility to activate the anti-intrusion system by means of preset scenarios . Warning! The activation of this function in control units that do not include scenarios will eliminate the option of partially arming the anti-intrusion system. -
Page 144: Home Automation Setup
THE SETUP MENU Home automation setup Select button 8 . button is needed to identify the device if it is being programmed from a PC using PC Mitho software . Button lets you save the configuration of the system in the removable memory card . -
Page 145: Terminal Language Selection
The “INFO” button allows you to view a series of technical information on the terminal, which could Bios version: 0.01 be useful for your installer in terms of software up- SW version: 2.08 HW version: 1.00 dates or technical operations . Mitho type: MITHO Plus Serial Number: 43000028... -
Page 146: Device Reset
User Guide Mitho plus Mitho HA Reset Reset Mitho XL Reset Device reset Any time that operating anomalies, servicing or other technical reasons require the unit to be reset, press lightly on the button located inside the opening under the body of the device (see figure), using the pen provided . - Page 147 User Guide...
- Page 148 Eventuali aggiornamenti del presente documento sono disponibili sul sito www.Came.com. Any updates made to this document are available at this site: www.Came.com. Il produttore si riserva il diritto di apportare qualsiasi modifica al prodotto al fine di migliorarne le funzionalità.
Need help?
Do you have a question about the MITHO and is the answer not in the manual?
Questions and answers