Table of Contents
Advertisement
Quick Links
Advertisement
Table of Contents

Related Manuals for KOBLE Nora


Summary of Contents for KOBLE Nora
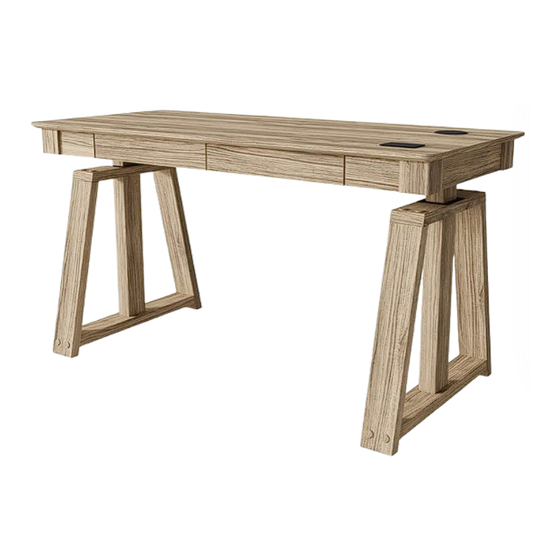
- Page 1 Nora Height Adjustable Desk Thank you for purchasing the Nora Height Adjustable Desk. In order to make the best use of this product and to use it safely, please read the manual carefully before use and keep it for future reference.
-
Page 2: Important Safety Instructions
Important Safety Instructions When using an electrical furnishing, basic precautions should always be followed, including the following: Read all instructions before using (this furnishing). DANGER – To reduce the risk of electric shock: 1. Unplug the power plug before cleaning, wipe the dust on surface with damp cloth when cleaning. Be careful not to let water drops into the internal parts, or loose the connector. - Page 3 19. For loading always put heavier items at the bottom and not near the top in order to help prevent the possibility of the furnishing tipping over. SAVE THESE INSTRUCTIONS For Household use only SERVICING OF DOUBLE-INSULATED PRODUCTS In a double-insulated product, two systems of insulation are provided instead of grounding. No grounding means is provided on a double-insulated product, nor is a means for grounding to be added to the product.
- Page 4 For Household use only 1. The maximum functional load of weight that can be placed on this product is 50kg. 2. This product must not be used as a seat. 3. Always use the original AC power adapter and power cable supplied, otherwise it may cause slow wireless charging.
- Page 5 Desk Top Leg (Right) Leg (Left) Motor Guard Transmission Rod (Long) Aluminium Tube Transmission Rod (Short)
- Page 6 Desk top Qty 1 Leg (Right) Leg (Left) Motor Qty 1 Qty 1 Qty 1 Transmission Rod (Long) Guard Qty 1 Qty 1 Aluminium Tube Transmission Rod Qty 1 (Short)Qty 1...
- Page 7 Fixings, Fittings And Tools Please check you have all the parts listed below The quantities below are the correct amount to complete the assembly. In some cases more fittings may be supplied than are required. M6x12mm Small M6x20mm Small Self-adhesive Cable Strap Allen Screw Qty 8 M4 Allen Key Qty 1 Machine Screw Qty 4...
- Page 8 Step 1 Push short transmission rod into motor Ensure the notch is located as shown. Notch Step 2 Carefully locate the motor through the hole in right leg...
- Page 9 Step 3 Secure the motor using fixings M6x20mm Small Machine Screw Qty 4 Step 4 Ensure legs are asembled in the locations shown. Secure using fixings Left Back Right Motor this side Front M6x12mm Small Shown upside down Allen Screw Qty 8 M4 Allen Key Qty 1...
- Page 10 Step 5 Loosen the grub screws in aluminium tube to allow long transmission rod to be located inside aluminium tube Ensure it is free to slide for final adjustment. Loosen grub screws M2 Allen Key Qty 1...
- Page 11 Step 6 1. Slide the open end of aluminium tube over short transmission rod as shown. Adjust until the end of the aluminium tube is 10mm from the motor. 2. Lock the aluminium tube by tightening the grub screw. 3. Carefully slide long transmission rod into the hexagonal shaped hole in left leg .
- Page 12 Step 7 Assemble guard using fixings Back Front Shown upside down M3x12mm Small Machine Screw Qty 6...
- Page 13 Step 8 Stick eva pads to the bottom of legs Back Front Peel off sticker Shown upside down Footpads Qty 4...
- Page 14 Step 9 Make all cable connections as shown. Plug power adaptor plug into one of the sockets on the rear apron of top Install the power plug on the socket Connect the motor cable to the cable from the back of the control panel. Shown upside down Back Power sockets...
- Page 15 Step 10 Connect to mains power. Factory reset is recommended before first use. (See Page 15 - Reset operation)
-
Page 16: Operation
Operation Controls Ⅰ Ⅱ Ⅲ Button Initial Sedentary Factory preset Factory preset Factory preset Raise / Up Lower / Down Value height 800mm height 950mm height 1100mm reminders LED Control Panel Back of Control Panel Wireless Charger(Qi) Motor 1,2 line Controller line sequence sequence... -
Page 17: Thermal Protection
Operation Stand Reminder: Press and hold the " " button of the manual controller for more than 3 seconds. The display screen flashes and displays the current default display of 60 minutes. At this time, you can press the" △ "and" ▽ "keys to switch the sitting time (45 minutes, 60 minutes, 90 minutes, 120 minutes). -
Page 18: Default Parameters
Operation Code Default Setting Display Code Name Remark Display parameters Select Unit of 0: “cm” Measure “inch” (cm or inch) Numerical value ranges: Bottom-(top -10)cm, one step setting is 1cm, At the same time, Top (minimum Select Lowest the setting value should be at least 10cm Bottom~(Top-10) height) Height Position... -
Page 19: Trouble Removal
If you have a wireless charging compatible device, please put the phone on the wireless charging indicator and check if the phone is successfully connected to the charging function. If not , move the mobile phone near the logo until the connection is successfully. Some phone cases may inhibit the wireless charging function or it’s efficiency It may be necessary to remove the phone case if difficulties are experienced. - Page 21 After Sales Support / Product Returns...
Need help?
Do you have a question about the Nora and is the answer not in the manual?
Questions and answers