Table of Contents
Advertisement
Quick Links
Advertisement
Table of Contents

Related Manuals for VOX electronics FN2-45


Summary of Contents for VOX electronics FN2-45
- Page 1 User manual NF 3890/NF 3890IX NO FROST Refrigerator freezer...
- Page 2 Content 1. Safety Information Page 1~5 2. Overview Page 6 3. Reverse Door Page 7~9 4. Installation Page 10~11 5. Daily Use Page 12~15...
-
Page 3: Safety Information
Safety information In the interest of your safety and to ensure the correct use, before installing and first using the appliance, read this user manual carefully, including its hints and warnings. To avoid unnecessary mistakes and accidents, it is important to ensure that all people using the appliance are thoroughly familiar with its operation and safety features. - Page 4 Safety information WARNING! Do not use other electrical appliances (such as ice cream makers) inside of refrigerating appliances, unless they are approved for this purpose by the manufacture. WARNING! Do not touch the light bulb if it has been on for a long period of time because it could be very hot.
- Page 5 Safety information Power cord must not be lengthened. Make sure that the power plug is not squashed or damaged by the back of the appliance. A squashed or damaged power plug may overheat and cause a fire. ...
- Page 6 Safety information Installation Important! For electrical connection carefully follow the instructions given in specific paragraphs. Unpack the appliance and check if there are damages on it. Do not connect the appliance if it is damaged. Report possible damages immediately to the place you bought it.
- Page 7 Safety information Environment_Protection This appliance does not contain gasses which could damage the ozone layer, in either its refrigerant circuit or insulation materials. The appliance shall not be discarded together with the urban refuse and rubbish. The insulation foam contains flammable gases: the appliance shall be disposed according to the appliance regulations to obtain from your local authorities.
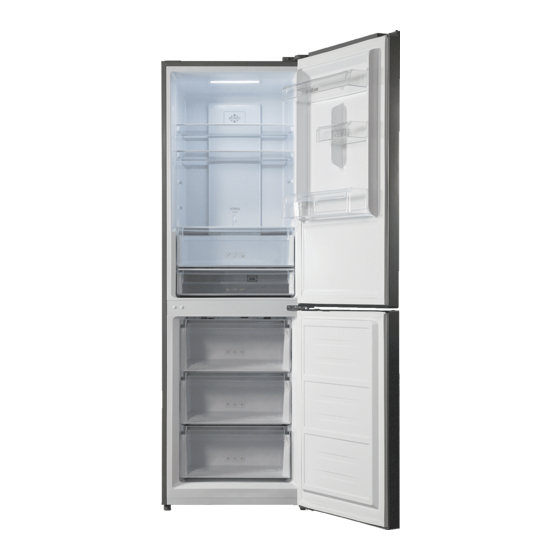
- Page 8 Overview Balconies Fridge shelves Crisper Freezer drawers Leveling feet Note:The picture above is only for reference.
-
Page 9: Installation
Installation Space Requirement Select a location without direct exposure to sunlight; Select a location with enough space for the refrigerator doors to open easily; Select a location with level (or nearly level) flooring; Allow sufficient space to install the refrigerator on a flat surface; Allow clearance to the right, left, back and top when installing. -
Page 10: Door Reversibility
Installation Door Reversibility Before reversing the door, please be prepared below tools and material: straight screwdriver, cross screwdriver, spanner and the components included in the poly bag: Decorative Cover of Right Door x1 Left Door Hinge Cover x 1 3. Please upwarp and take off plastic cover by straight screwdriver after opening the door. Please be careful of the wire inside. - Page 11 Installation 6. Laying down the refrigerator, take out the adjusting feet as below, then take off the lower hinge by cross screwdriver. 5. Adjusting the hinge core position of the lower hinge and upper hinge to opposite position 8. Install the lower hinge under to the refrigerator like below, screwing in the adjusting feet, make sure the position in horizon.
- Page 12 Installation Using the Decorative Cover of Right Door from poly bag to cover the insert and take out the other side one accordingly.In the meanwhile change the wire to another side. 9. Install the upper door, then fix the upper door hinge onto the cabinet. 14.
- Page 13 Installation 12.change the Decorative Cover from one to another side. Follow the instruction to take out of the decorative cover, be careful not to ruin the cover. 13. Lastly, using the screw to fix the top cover.
-
Page 14: Daily Use
Daily Use Using the Control Panel 1.1 KEY OPERATION A.Temperature Control of Fridge Compartment B.Temperature Control of Freezer Compartment C.Mode/ Locking / Unlocking 1.2 LED DISPLAY 1.Temperature of Fridge Comparment 2.Temperature of Freezer Comparment 3.ECO Mode 4.Holiday Mode 5.Super Mode 6.Locking / Unlocking 2.0 OPERATING CONDITION a.The control panel is 100% lit up for 3 seconds, which operates exactly as per the setting... - Page 15 Daily Use 2.1.6 The panel will be lit up by any key operation whereas the light would be out 2 minutes after the last operation. 2.1.7 Display during normal operation Temperature Display of the Fridge Compartment: Indicating the temperature of the current setting.
- Page 16 Daily Use 4.0 ECO mode Press mode to choose ECO mode, ECO icon keeps bright after 5 sec flashing. 5°in fridge compartment and -18°in freezer compartment under eco mode, “Freezer”&“Fridge“ button in vain while eco icon will flash three times in alarm. Exit eco mode Press mode again to exit eco mode after 5 sec, entering the selected mode.
-
Page 17: First Use
Daily Use First use Cleaning the interior Before using the appliance for the first time, wash the interior and all internal accessories with lukewarm water and some neutral soap so as to remove the typical smell of a brand new product, then dry thoroughly. Important! Do not use detergents or abrasive powders, as these will damage the finish. - Page 18 Daily Use Hints for storage of frozen food To obtain the best performance from this appliance, you should: make sure that the commercially frozen foodstuffs were adequately stored by the retailer; be sure that frozen foodstuffs are transferred from the food store to the freezer in the shortest possible time; not open the door frequently or leave it open longer than absolutely necessary.
-
Page 19: Troubleshooting
Daily Use Troubleshooting Caution! Before troubleshooting, disconnect the power supply. Only a qualified electrician of competent person must do the troubleshooting that is not in this manual. Important! There are some sounds during normal use (compressor, refrigerant circulation). Problem Possible cause Solution Mains plug is not plugged in Insert mains plug. -
Page 20: Specifications
Specifications Model FN2-45 Appliances Category Category 7 (Refrigerator-Freezer) Overall Dimension (WxDxH) 599 x 684 x 1855 mm Net Fresh Food Storage Volume 222 L Net Frozen Food Storage Volume 95 L Defrosting Type Frost Free Climate Class SN-T C ~ 8...
Need help?
Do you have a question about the FN2-45 and is the answer not in the manual?
Questions and answers