Table of Contents
Advertisement
Quick Links
HARBOR BREEZE and logo design are trademarks or
registered trademarks of LF, LLC. All rights reserved.
ATTACH YOUR RECEIPT HERE
Purchase Date _________________________
Questions, problems, missing parts? Before returning to your retailer, call our customer
service department at 888-251-1003, 8 a.m. - 8 p.m., EST, Monday - Sunday. You could also
contact us at partsplus@lowes.com.
AS23097
1
ITEM #5303206
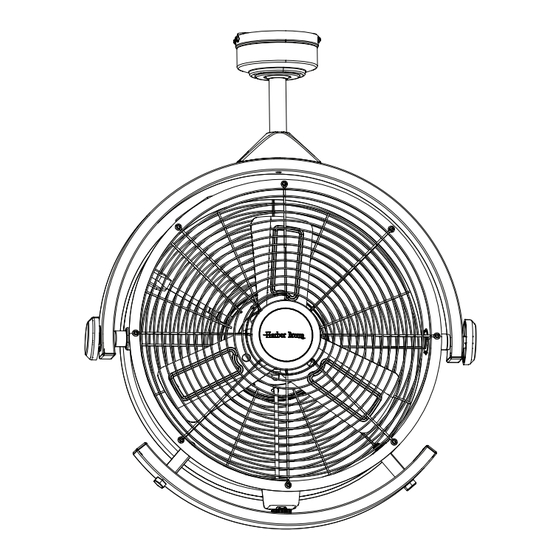
GARAGE FAN
MODEL #42955
Español p. 12
Advertisement
Table of Contents

Subscribe to Our Youtube Channel
Related Manuals for LF Harbor Breeze 42955


Summary of Contents for LF Harbor Breeze 42955
- Page 1 MODEL #42955 Español p. 12 HARBOR BREEZE and logo design are trademarks or registered trademarks of LF, LLC. All rights reserved. ATTACH YOUR RECEIPT HERE Purchase Date _________________________ Questions, problems, missing parts? Before returning to your retailer, call our customer service department at 888-251-1003, 8 a.m.
-
Page 2: Table Of Contents
TABLE OF CONTENTS Package Contents ..............3 Hardware Contents . -
Page 3: Package Contents
PACKAGE CONTENTS PART DESCRIPTION QUANTITY Mounting Bracket (preassembled to Canopy [B]) Canopy Mounting Bracket Screw (preassembled to Mounting Bracket [A]) Downrod Downrod Clip (preassembled to Downrod [D]) Downrod Pin (preassembled to Downrod [D]) Yoke Cover 12-Inch Downrod (optional) Cord Clip Yoke (preassembled to Fan Assembly [K]) Fan Assembly Tilt Knob (preassembled to Fan Assembly [K]) -
Page 4: Hardware Contents
HARDWARE CONTENTS Lock Washer Wood Screw Washer Qty. 2 Qty. 2 Qty. 2 PREPARATION Before beginning the assembly of this product, ensure that all parts are present. Compare all parts with the package contents list and hardware contents list. If any part is missing or damaged, do not attempt to assemble the product. -
Page 5: Assembly Instructions
ASSEMBLY INSTRUCTIONS 1. Loosen all four mounting bracket screws (C) and completely remove the two screws from the round holes in the canopy (B). Save the screws for later. Remove the canopy (B) from the mounting bracket (A). 2. Determine the mounting method to use. Standard Mounting is best suited for ceilings 8 ft. - Page 6 ASSEMBLY INSTRUCTIONS 4. The fan includes an optional 12-inch downrod (H). The 6-inch downrod is preassembled to the square bracket. If longer downrod is needed, see REPLACE DOWNROD, page 9. Then, remove the downrod clip (E) and downrod pin (F) from the downrod (D). Insert the downrod (D or H) through the canopy (B) and yoke cover (G).
- Page 7 ASSEMBLY INSTRUCTIONS 7. Install the square bracket into the opening of the mounting bracket (A). Tabs on square bracket should face the sides of the mounting bracket (A) to engage the slots inside the mounting bracket (A). Retighten the two set screws to secure. Screw Square Bracket 8.
- Page 8 ASSEMBLY INSTRUCTIONS 10. Use cord clips (I) to secure the fan’s power cord to ceiling in a path toward the power outlet. Backing Peel the backing off of the double-sided tape preassembled to back side of each cord clip (I). Note: Cord clips have a round hole to accommodate a wood screw (sold separately) as an option to the taping method.
-
Page 9: Replace Downrod
REPLACE DOWNROD (OPTIONAL) 1. Tilt the downrod ball in the square bracket to access and remove the set screw with Phillips screwdriver. Downrod Ball Set Screw Square Bracket 2. Lower the downrod ball and square bracket to access and remove the pin. Downrod Ball Square... -
Page 10: Operating Instructions
OPERATING INSTRUCTIONS 1. Fan Control is located on the bottom side of the fan. The fan has four settings: 0 - Off 1 - Low Speed 2 - Medium Speed 3 - High Speed Speed Control 2. Use tilt knobs on sides of fan to adjust airflow up or down. -
Page 11: Care And Maintenance
CARE AND MAINTENANCE At least twice each year, tighten all screws on the fan. Clean the fan assembly with only a soft brush or lint-free cloth to avoid scratching the finish. Important: Unplug the fan from outlet before you begin any maintenance tasks. Do not use water or a damp cloth to clean the ceiling fan. -
Page 12: Replacement Parts
REPLACEMENT PARTS LIST For replacement parts, call the customer service department at 888-251-1003, 8 a.m. - 8 p.m., EST, Monday - Sunday. You could also contact us at partsplus@lowes.com. PART DESCRIPTION PART# Yoke Cover 4A000024960 Cord Clip 4A000025310 Tilt Knob 4A000025320 Yoke Cover Screw (x2) 4A000025330...
Need help?
Do you have a question about the Harbor Breeze 42955 and is the answer not in the manual?
Questions and answers