Advertisement
Available languages
Available languages
Quick Links
HARBOR BREEZE and logo design are
trademarks or registered trademarks of LF,
LLC. All rights reserved.
Serial Number
Purchase Date
Thank you for purchasing this HARBOR BREEZE product.
Questions, problems or missing parts?
Before returning, contact us on:
888-251-1003, 8 a.m. - 8 p.m., EST, Monday - Sunday or ascs@lowes.com.
SG241146
ITEM #6307946/6307945/6307942
MODEL #AR48-52BN/AR48-52MBK/AR48-52MWH
EDDINGTON INDOOR
CEILING FAN
1
Español p. 18
Advertisement

Related Manuals for LF Harbor Breeze EDDINGTON AR48-52BN


Summary of Contents for LF Harbor Breeze EDDINGTON AR48-52BN
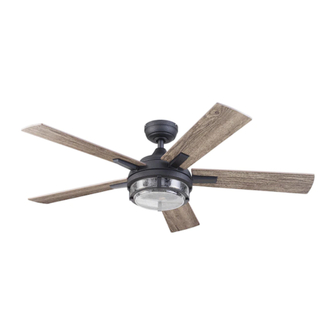
- Page 1 ITEM #6307946/6307945/6307942 MODEL #AR48-52BN/AR48-52MBK/AR48-52MWH EDDINGTON INDOOR CEILING FAN HARBOR BREEZE and logo design are trademarks or registered trademarks of LF, Español p. 18 LLC. All rights reserved. Serial Number Purchase Date Thank you for purchasing this HARBOR BREEZE product. Questions, problems or missing parts? Before returning, contact us on: 888-251-1003, 8 a.m.
- Page 2 TABLE OF CONTENTS Package Contents ..........................Hardware Contents ..........................Safety Information ..........................Preparation ............................Initial Installation ..........................Fan Installation ............................ Wiring ..............................Final Installation ..........................Operating Instructions ......................... Care and Maintenance ........................Troubleshooting ........................... Limited Lifetime Warranty ........................Replacement Parts List ........................
- Page 3 PACKAGE CONTENTS PART DESCRIPTION QUANTITY PART DESCRIPTION QUANTITY Mounting Bracket Blade Canopy Fan motor Assembly Canopy Bottom Cover Light Kit Downrod Pull chain and fob Coupling Cover IMPORTANT REMINDER: You must use the parts provided with this fan for proper installation and safety.
- Page 4 HARDWARE CONTENTS Wire Nut Qty. 3 + 1 extra SAFETY INFORMATION Modifications not approved by the party responsible for compliance could void the user's authority to operate the equipment. NOTE: This equipment has been tested and found to comply with the limits for a Class B digital device, pursuant to Part 15 of the FCC Rules.
- Page 5 SAFETY INFORMATION READ AND SAVE THESE INSTRUCTIONS Please read and understand this entire manual before attempting to assemble, install or operate the product. • Do not discard fan carton or foam inserts. Should this fan need to be returned to the factory for repairs, it must be shipped in its original packaging to ensure proper protection against damage that might exceed the initial cause for return.
- Page 6 SAFETY INFORMATION CAUTION To reduce the risk of personal injury, use only the screws provided with the outlet box. Be sure outlet box is properly grounded and that a ground wire (green or bare) is present. Before beginning installation, carefully check all screws, bolts and nuts on fan motor assembly to ensure that they are secured.
- Page 7 INITIAL INSTALLATION 1. Turn off circuit breakers and wall switch to the fan supply line leads. DANGER: Failure to disconnect power supply prior to installation may result in serious injury or death. 2. Determine mounting method to use. A. Standard mount B.
- Page 8 FAN INSTALLATION 1. Remove the canopy bottom cover (C) from the canopy (B) by turning the canopy bottom cover (C) counterclockwise. Remove the mounting bracket (A) from the Canopy Mounting canopy (B) by loosening canopy mounting Canopy Mounting Screw screws a half turn from the screw head. Screw Next, turn the canopy (B) counterclockwise to remove the mounting bracket (A) from the...
- Page 9 FAN INSTALLATION 4. Insert downrod (D) through canopy (B), canopy bottom cover (C) and coupling cover (E). Thread wires from fan motor assembly (G) up through downrod (D). 5. Slip downrod (D) into collar, align holes and re-install clevis pin and cotter pin. Tighten two set screws in collar.
- Page 10 WIRING WARNING: To reduce the risk of fire, electrical shock or personal injury, wire connectors provided with this fan are designed to accept only one 12-gauge house wire and two lead wires from the fan. If your house wire is larger than 12-gauge or there is more than one house wire to connect to the two fan lead wires, consult an electrician for the proper size wire connectors to use.
- Page 11 WIRING 1C. FAN AND LIGHT CONTROLLED BY FAN AND LIGHT CONTROLLED BY TWO WALL SWITCHES TWO WALL SWITCHES: If you intend to control the fan and light with separate wall 120V POWER FROM CEILING switches, connect BLACK wire from fan to BLACK (WALL SWITCH) BLACK wire from the independent wall switch BLACK...
- Page 12 FINAL INSTALLATION 1. Make sure connections are neatly tucked into the ceiling outlet box. Slide the canopy (B) up to the mounting bracket (A) and place the key holes on the Canopy Mounting canopy (B) over the loose canopy mounting Screw screws on the mounting bracket (A).
- Page 13 FINAL INSTALLATION 4. Unscrew the three light kit mounting screws from the light kit (H), and keep them then Light Kit detach the light kit mounting plate from the Mounting light kit (H). Plate Light Kit Mounting Screw 5. Unscrew one of the three light kit mounting plate screws from the mounting ring and loosen the other two light kit mounting plate screws.
- Page 14 OPERATING INSTRUCTIONS 1. The pull chain controls the fan speed as follows: 1 pull - High, 2 pulls - Medium, 3 pulls - Low, 4 pulls - Off. The light pull chain controls the light kit: "ON" and "OFF". 2. The reverse switch is located on the surface of the light kit.
- Page 15 CARE AND MAINTENANCE Check the support connections, brackets, and blade attachments twice a year. Make sure they are secure. Because of the fan’s natural movement, some connections may become loose over time. It is not necessary to remove the fan from the ceiling. Clean your fan periodically. Use only a soft brush or lint-free cloth to avoid scratching the finish.
- Page 16 TROUBLESHOOTING PROBLEM POSSIBLE CAUSE CORRECTIVE ACTION Fan operates but 1. Wires in canopy not wired properly. 1. Check wires in canopy and, if light fails. 2. Wall switch to fan is off. necessary, re-wire according to 3. Plugs not connected properly. instructions on pages 10.
- Page 17 REPLACEMENT PARTS LIST For replacement parts, call our customer service department at 888-251-1003, 8 a.m. - 8 p.m., EST, Monday - Sunday. You could also contact us at ascs@lowes.com. PART DESCRIPTION PARTS # COVERED UNDER WARRANTY Mounting Bracket 6307946-A 6307945-A 6307942-A YES/ONE YEAR Canopy 6307946-B 6307945-B 6307942-B...
- Page 18 VENTILADOR DE TECHO PARA INTERIORES HARBOR BREEZE y el diseño del EDDINGTON logotipo son marcas comerciales o marcas registradas de LF, LLC. Todos los derechos reservados. Número de serie Fecha de compra Gracias por comprar este producto HARBOR BREEZE. ¿Tiene preguntas, problemas o piezas faltantes? Antes de volver a la tienda, póngase en contacto al:...
- Page 19 ÍNDICE Contenido del paquete ......................... Aditamentos ............................Información de seguridad ........................Preparación ............................Instalación inicial ..........................Instalación del ventilador ........................Cableado .............................. Instalación final ............................ Instrucciones de funcionamiento ......................Cuidado y mantenimiento ........................Solución de problemas ........................Garantía limitada de por vida ....................... Lista de piezas de repuesto .........................
- Page 20 CONTENIDO DEL PAQUETE PIEZA DESCRIPCIÓN CANTIDAD PIEZA DESCRIPCIÓN CANTIDAD Soporte de montaje Aspa Base Ensamble del motor del ventilador Cubierta inferior de la base Varilla Kit de luces Cadena y cadenilla de tiro Cubierta del acoplador RECORDATORIO IMPORTANTE: Debe utilizar las piezas que se incluyen con este ventilador para la instalación adecuada y por seguridad.
- Page 21 ADITAMENTOS Empalme plástico Cant. 3 + 1 adicional INFORMACIÓN DE SEGURIDAD Las modificaciones que no estén aprobadas por la parte responsable del cumplimiento podrían anular la autorización del usuario para utilizar el equipo. NOTA: Este equipo se probó y se verificó que cumple con los límites para un dispositivo digital de clase B, conforme a la sección 15 de las reglas de la FCC.
- Page 22 INFORMACIÓN DE SEGURIDAD LEA Y GUARDE ESTAS INSTRUCCIONES Lea y comprenda completamente este manual antes de intentar ensamblar, instalar o usar el producto. • No deseche la caja del ventilador ni los accesorios de espuma. En caso de que deba devolver este ventilador a la fábrica para que se le realicen reparaciones, debe enviarlo en su empaque original para asegurar una protección adecuada contra daños que puedan agravar la causa inicial de la devolución.
- Page 23 INFORMACIÓN DE SEGURIDAD PRECAUCIÓN Para reducir el riesgo de lesiones personales, use solo los tornillos que se incluyen con esta caja de salida. Asegúrese de que la caja de salida tenga la puesta a tierra correcta y de que haya un conductor (verde o desnudo) de puesta a tierra.
- Page 24 INSTALACIÓN INICIAL 1. Interrumpa la línea de entrada del ventilador al apagar los interruptores de circuito y el interruptor de pared. PELIGRO: Si no desconecta el suministro de electricidad antes de realizar la instalación, se pueden producir lesiones graves o la muerte.
- Page 25 INSTALACIÓN DEL VENTILADOR 1. Retire la cubierta inferior de la base (C) de la base (B) girándola (C) en dirección contraria a las manecillas del reloj. Afloje media vuelta los tornillos de montaje de Tornillo de la base, desde la cabeza del tornillo, para Tornillo de montaje de montaje de...
- Page 26 INSTALACIÓN DEL VENTILADOR 4. Inserte la varilla (D) a través de la base (B), la cubierta inferior de la base (C) y la cubierta del acoplador (E). Pase los conductores desde el ensamble del motor de ventilador (G) a través de la varilla (D). 5.
- Page 27 CABLEADO ADVERTENCIA: Para reducir el riego de incendios, descargas eléctricas o lesiones, los conectores de cables proporcionados con este ventilador están diseñados para soportar solo un conductor doméstico de calibre 12 y dos cables conductores del ventilador. Si el conductor de la casa es de un calibre superior a 12 o hay más de un conductor de la casa para conectar a los dos cables conductores del ventilador, pregúntele a un electricista cuál es el tamaño adecuado de los conectores de cables que debe utilizar.
- Page 28 CABLEADO 1C. VENTILADOR Y LUCES CONTROLADOS VENTILADOR Y LUZ CONTROLADOS POR DOS POR DOS INTERRUPTORES DE PARED: INTERRUPTORES DE PARED Si desea controlar el ventilador y la luz con ALIMENTACIÓN DE interruptores de pared separados, conecte el 120 V DESDE EL TECHO conductor NEGRO del ventilador al conductor NEGRO (INTERRUPTOR NEGRO del interruptor de pared independiente...
- Page 29 INSTALACIÓN FINAL 1. Asegúrese de que los cables estén bien colocados en la caja de salida del techo. Desplace la base (B) hasta el soporte de montaje (A) y ubique los orificios guía en la base (B) sobre los tornillos de montaje de la Tornillo de montaje base flojos en el soporte de montaje (A).
- Page 30 INSTALACIÓN FINAL 4. Desatornille los tres tornillos de montaje del Placa de kit de luces (H) y guárdelos, luego separe la montaje placa de montaje del kit de luces (H). del kit de luces Tornillo de montaje del kit de luces 5.
- Page 31 INSTRUCCIONES DE FUNCIONAMIENTO 1. La cadena de tiro controla la velocidad del ventilador de la siguiente forma: al tirar 1 vez, alta; al tirar 2 veces, media; al tirar 3 veces, baja; al tirar 4 veces, se apaga. La cadena de tiro para las luces controla el juego de luces: "ON"...
- Page 32 CUIDADO Y MANTENIMIENTO Compruebe las conexiones de soporte, los soportes y las fijaciones de las aspas dos veces al año. Cerciórese de que estén aseguradas. Debido al movimiento natural del ventilador, algunas conexiones pueden soltarse con el tiempo. No es necesario retirar el ventilador del techo. Limpie el ventilador periódicamente.
- Page 33 SOLUCIÓN DE PROBLEMAS PROBLEMA CAUSA POSIBLE ACCIÓN CORRECTIVA El ventilador 1. Los conductores de la base no 1. Revise los conductores de la base están bien conectados. y, si es necesario, vuelva a funciona pero la luz 2. El interruptor de pared del ventilador conectarlos de acuerdo con las está...
- Page 34 LISTA DE PIEZAS DE REPUESTO Para obtener piezas de repuesto, llame a nuestro Departamento de Servicio al Cliente al 888-251-1003, de lunes a domingo, de 8 a.m. a 8 p.m., hora estándar del Este. También puede ponerse en contacto con nosotros a través de ascs@lowes.com. PIEZA DESCRIPCIÓN PIEZAS #...
Need help?
Do you have a question about the Harbor Breeze EDDINGTON AR48-52BN and is the answer not in the manual?
Questions and answers