
Related Manuals for Uplift Desk MON061


Summary of Contents for Uplift Desk MON061
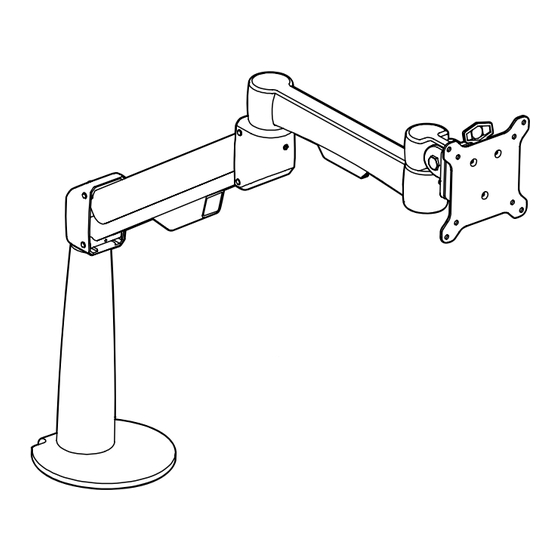
- Page 1 Range-X Single Monitor Arm ® MON061 Scan QR code for product webpage For assembly assistance, visit upliftdesk.com/contact, or call 800-349-3839, or email info@upliftdesk.com ©2023 UPLIFT Desk®. All Rights Reserved...
- Page 2 Safety and Warnings Bolt-through plate CAUTION: Read all instructions before assembly. Failure to assemble or operate properly may result in damage or personal injury. Retain manual for future reference. WARNING: Desk, table, and other mounting surface build quality varies. Ensure the mounting surface is sufficient to support this monitor arm and a monitor.
- Page 3 The Range-X Monitor Arm support monitors that weigh 4 lb to 17.6 lb. WARNING: This product contains a spring mechanism that can cause injury. Be careful when removing monitors as the arm can spring up when the weight of the monitor is removed. Step 1 - Determine Your Mounting Method There are two ways to attach the Range-X Single Monitor Arm to your desktop or table:...
-
Page 4: Bottom Plate
4. For thicker desktops (3.75’’ maximum), invert the orientation of the Clamp Elbow and reattach it to the lower two holes of the Clamp Base as shown. You will also need to remove the Clamp Bolt, flip it around, and reinsert it as shown Reinsert with so that the pointed end is facing up. - Page 5 Step 2.B - Bolt-Through Method Bolt-Through Hole Fit 1. The desktop must have a hole between 0.4’’ and 3.1’’ 0.4” in diameter to use this option. Using a grommet 3.1” hole already in your desktop is acceptable, or drill a hole anywhere on the desktop, taking care to avoid frame hardware underneath.
- Page 6 Attach Bolt-Through Plate 4. Align the three large holes in the Base Post with the holes in the Bolt-Through Plate with the rubber pad facing away from the Base Post to protect the desktop. The logo on the Bolt-Through Plate should be oriented on the same side as the curved slot for the stopping pin at the top of the Base Post and opposite the set screw in the back of the Base...
-
Page 7: Step 3 - Arm Assembly
Step 3 - Arm Assembly Monitor Joint A. The Gas Arm has a stopping pin pre-installed in the Extension Arm bottom. This pin limits the arm’s rotation to 180° so that it won’t swing past the back edge of your Gas Arm desktop. - Page 8 Step 6 - Mount Monitor A. Slide the VESA Mount into the slot of the Monitor Joint. B. With one hand supporting the underside of the Monitor Joint and the other hand on top of the monitor, press down firmly on the top of the monitor until the tab on the VESA Mount clicks into place in the Monitor Joint.
-
Page 9: Adjustment Information
Step 9 - Wire Management A. The Range-X Single Monitor Arm comes with pre-installed cable management channels located on the bottom side of each arm segment. B. Feed the power and display cables through each of the cable management channels to keep them secure and out of the way. C. - Page 10 Notes...
- Page 11 Notes...
- Page 12 © Copyright Notice: This guide is a component of this UPLIFT Desk product. This guide is a part of the scope of delivery, even if the item is resold. This guide is also available on the UPLIFT Desk website: upliftdesk.com. These specifications are subject to United States copyright law.
Need help?
Do you have a question about the MON061 and is the answer not in the manual?
Questions and answers