
Related Manuals for Uplift Desk MON033


Summary of Contents for Uplift Desk MON033
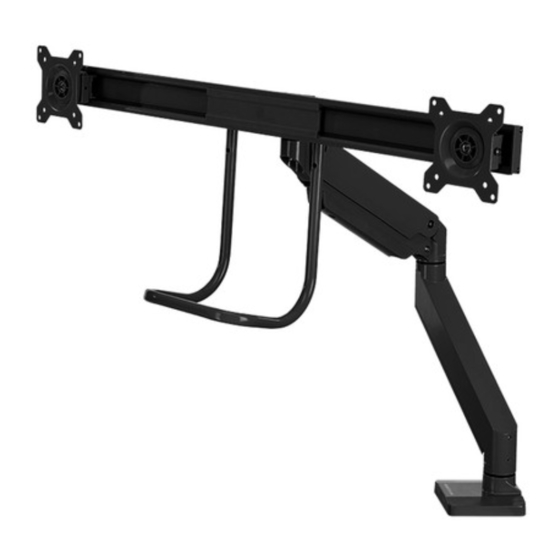
- Page 1 Crestview Align Dual Monitor Arm MON033 Scan QR code for product webpage For assembly assistance, visit upliftdesk.com/contact, call 800-349-3839, or email info@upliftdesk.com ©2023 UPLIFT Desk®. All Rights Reserved...
-
Page 2: Lower Arm
Base Vesa m Base Vesa mount (x1) Base Vesa mount (x1) Lower arm 3mm Allen wrench 4mm Allen wrench Safety and Warnings 3mm Allen wrench 4mm Allen wrench Base Vesa mount (x1) CAUTION: Read all instructions before assembly. Failure to assemble or operate properly may result 3mm Allen wrench 4mm A in damage or personal injury. - Page 3 Pad and attach it to the bottom of the Base and Upper Clamp as shown. Align the pad with the front edge of the Base first, then work to the back. © UPLIFT Desk • 800-349-3839 • info@upliftdesk.com • upliftdesk.com...
- Page 4 .25” Step 4 (Clamp Method) 0.25” 0.25” A. Use the 4mm Allen Wrench to adjust the four pre- installed screws on the back of the Lower Clamp so that there are about 0.25” of thread between the plate and screw heads. B.
- Page 5 Do not over-tighten this set screw, doing so may hinder arm movement. © UPLIFT Desk • 800-349-3839 • info@upliftdesk.com • upliftdesk.com...
- Page 6 Step 11 A. Slide the Upper Arm into the hole on the Lower Arm until it is fully seated B. Tighten the set screw on the Lower Arm with the flat-head end of the provided 3mm Allen Wrench (or a small flat head screwdriver). This will prevent the Upper Arm from becoming separated from the Lower Arm during adjustment.
- Page 7 • If the monitor assembly drifts upward when you let go, turn the adjustment screw towards the “-” until the monitor remains in place when you let go. © UPLIFT Desk • 800-349-3839 • info@upliftdesk.com • upliftdesk.com...
- Page 8 Step 17 A. To adjust the angle of the Bar, use the 4mm Allen wrench to slightly loosen the four screws shown on the back of the Bar attachment piece. Do not remove these screws completely. B. Once the four screws are loose, adjust the angle of the Bar and monitors until they are positioned how you like them and then re-tighten the four screws.
-
Page 9: Height Adjustment
Each monitor can rotate at each VESA mount a full 360°. Monitor Assembly Swivel The monitor assembly can swivel 180° (+/-90°) at the hinge at the top of the Upper arm. 90° 90° © UPLIFT Desk • 800-349-3839 • info@upliftdesk.com • upliftdesk.com... - Page 10 Monitor Assembly Rotation A. The Bar and monitor assembly can rotate clockwise 4° or counterclockwise 4°. B. See page 6, step 17 for more details. Upper Arm Swivel A. The Upper Arm can swivel a full 360°. However, we do not recommend swiveling the monitor past the back of the desk as this may cause instability.
- Page 11 Notes © UPLIFT Desk • 800-349-3839 • info@upliftdesk.com • upliftdesk.com...
- Page 12 Study this manual carefully. If this product is sold, please provide this manual to the buyer, installers, or support personnel operating the product. Copyright Notice: This manual is a component of this UPLIFT Desk product. This manual is a ©...
Need help?
Do you have a question about the MON033 and is the answer not in the manual?
Questions and answers