Table of Contents
Advertisement
Quick Links
Advertisement
Table of Contents

Related Manuals for Jet 723544OSCK-M


Summary of Contents for Jet 723544OSCK-M
- Page 1 JWDS‐2244OSC‐M Oscillating Drum Sander Zylinderschleifmaschine Ponceuse à cylindre oscillant Original: GB Operating Instructions Translations: D Gebrauchsanleitung F Mode d´emploi TOOL FRANCE SARL 9 Rue des Pyrénées, 91090 LISSES, France www.jettools.com M‐723544OSCKM 2019‐06 ...
- Page 2 CE‐Conformity Declaration CE‐Konformitätserklärung Déclaration de conformité CE Product / Produkt / Produit: Drum sander / Zylinderschleifmaschine / Ponceuse à cylindre JWDS‐2244OSC‐M 723544OSCK‐M Brand / Marke / Marque: JET Manufacturer / Hersteller / Fabricant: TOOL FRANCE SARL 9 Rue des Pyrénées, 91090 LISSES, France We hereby declare that this product complies with the regulations Wir erklären hiermit, dass dieses Produkt der folgenden Richtlinie entspricht Par la présente, nous déclarons que ce produit correspond aux directives suivantes 2006/42/EC Machinery Directive / Maschinenrichtlinie / Directive Machines 2014/30/EU Electromagnetic compatibility / elektromagnetische Verträglichkeit / compatibilité électromagnétique 2011/65/EU RoHS directive / RoHS‐Richtlinie / Directive RoHS designed in consideration of the standards und entsprechend folgender zusätzlicher Normen entwickelt wurde et été développé dans le respect des normes complémentaires suivantes EN ISO 12100:2010 EN 60204‐1:2006+A1:2009 EN 61000‐6‐2:2005 EN 61000‐6‐4:2007+A1:2011 Responsible for the Documentation / Dokumentations‐Verantwortung / Responsabilité de Documentation: Head Product‐Mgmt / Leiter Produkt‐Mgmt. / Resp. de Gestions Produits TOOL FRANCE SARL ...
-
Page 3: Table Of Contents
GB ‐ ENGLISH Operating Instructions Dear Customer, Many thanks for the confidence you have shown in us with the purchase of your new JET‐machine. This manual has been prepared for the owner and operators of a JET JWDS‐2244OSC‐M oscillating drum sander to promote safety during installation, operation and maintenance procedures. Please read and understand the information contained in these operating instructions and the accompanying documents. To obtain maximum life and efficiency from your machine, and to use the machine safely, read this manual thoroughly and follow instructions carefully. Table of Contents Section ... -
Page 4: Declaration Of Conformity
responsibility is transferred exclusively to the 1. Declaration of conformity operator. On our own responsibility we hereby declare that this 3.2 General safety notes product complies with the regulations listed on page 2. Designed in consideration with the standards. Woodworking machines can be dangerous if not used properly. Therefore the appropriate general technical rules as well as the following notes must be observed. 2. Warranty TOOL France SARL guarantees that the supplied product(s) is/are free from material defects and manufacturing faults. ... -
Page 5: Remaining Hazards
Keep an ergonomic body position. Maintain a balanced Your appliance contains valuable materials which can stance at all times. be recovered or recycled. Please leave it at a specialized institution. Do not operate the machine under the influence of drugs, alcohol or any medication. Be aware that medication can change your behaviour. Never reach into the machine while it is operating or ... -
Page 6: Specifications
4.0 Specifications Model number ............................. J WDS‐2244OSC‐M Stock numbers: Sander with closed stand ........................... 723544OSCK‐M Closed stand only ........................ ( provided standard) 723544CS Folding infeed/outfeed tables ......................... 7 23551 (optional) Digital readout ............................ 7 23552 (optional) Motor and electricals: Drum motor: Motor type……………………………………………. .................... induction motor Output power ............................ 1.3kW (1.75 HP) Voltage ...............................~230V, PE, 50Hz Listed FLA (full load amps) ............................ 9.5 A Motor speed ................................ 1 400 /min ... -
Page 7: Features And Terminology
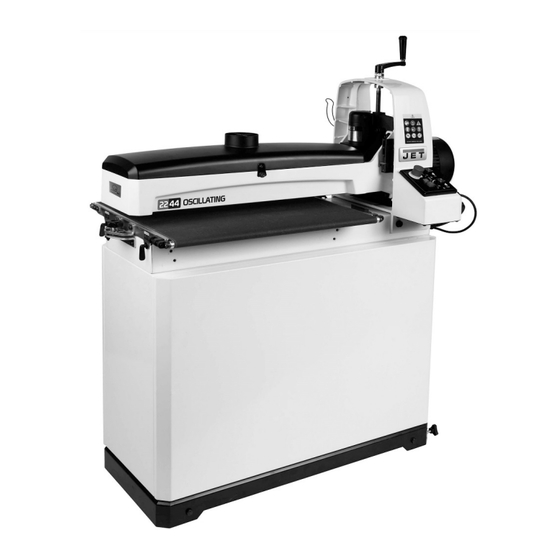
Minimum extraction volume required ......................... 560 m /h Dimensions: Shipping carton, base machine ................ … …………………….. 1320 x 700 x 718 mm Shipping carton, closed stand................. … ………………………………1030 x 508 x 770 mm Assembled dimensions……………………………………. ................ 1200 x 610 x 1320 mm Weights: Net weight ................................... 9 8 kg Shipping weight ................................. 1 31 kg The specifications in this manual were current at time of publication, but because of our policy of continuous improvement, JET reserves the right to change specifications at any time and without prior notice, without incurring obligations. 5.0 Features and Terminology The illustration below shows the major components and features of the JWDS‐2244OSC‐M Sander. These are referenced throughout the manual and will help to familiarize you with the operation and functions of the machine. Figure 5‐1: features and terminology... -
Page 8: Setup And Assembly
Read and understand the entire contents of this manual before attempting set‐up or operation! Failure to comply may cause serious injury. NOTE: Figures in this manual may show optional accessories. Depending upon your model, these may be purchased separately. 6.0 Setup and assembly Open boxes and check for shipping damage. Report any damage immediately to your distributor and Figure 6‐1: Sander contents shipping agent. Do not discard any shipping material until the Drum Sander is assembled and running properly. Compare the contents of your boxes with the following parts list to make sure all parts are intact. Any missing parts should be reported to your distributor. Read this instruction manual thoroughly for assembly, maintenance and safety instructions. 6.1 Shipping contents Box #1: (see Figure 6‐1) 1 Sander with conveyor table (A) 1 Height adjust handle (B) 1 Hose hanger (C) 2 Socket head screw M6x12 (C1) 2 Flat washer 6mm (C2) 1 Instruction manual 1 Spare parts list Box #2: Infeed and outfeed tables (Optional, see Figure 6‐2) Figure 6‐2: Infeed/Outfeed Tables (OPTIONAL) ... -
Page 9: Assembling Stand
Figure 6‐3: Assembly of Sander and OPTIONAL Infeed/Outfeed Tables 6.3 Assembling stand A closed stand is provided standard with the JWDS‐ 6.6 Infeed and outfeed tables (optional 2244OSC‐M Sander. Refer to the assembly accessory) instructions that accompany the stand. The sander must be bolted to the stand or a work 6.4 Mounting sander to stand ... -
Page 10: Dust Collection
An 80‐grit, 76mm wide abrasive strip is pre‐installed and repeat. on the drum. Loosen screw (HP6) and rotate eccentric cam (TIP: If you are using an after‐market abrasive, use a (HP8) until it contacts lip of table bracket. Do this new JET‐supplied abrasive as a template to quickly on both sides of infeed table. This ensures infeed cut a new strip. table will remain level with conveyor table each time it is returned to operating position. Tighten screws (HP6). If stock being sanded is bowed, warped or otherwise ... -
Page 11: Electrical Connections
8.0 Adjustments Disconnect sander from power source before making adjustments. 8.1 Drum Height Control Drum height and depth of cut are controlled by height adjustment handle (see Figure 5‐1). Rotating handle clockwise lowers drum, counter‐clockwise raises it. One revolution of handle will move drum approximately 1.6mm (or 1/4 turn = approx. 0.4mm), as shown on the label below handle. Figure 6‐8 ... -
Page 12: Conveyor Belt Tension/Tracking
8.4.3 Trackers The sander comes equipped with “Trackers”, ceramic 8.4 Conveyor belt tension/tracking guides that reduce the amount of adjustments Conveyor belt tension adjustment may be necessary needed to keep conveyor belt tracked (centered) on during the break‐in period to compensate for belt conveyor table. These guides have a magnetic stretching. ... -
Page 13: Tension Roller Adjustment
Retighten table lock screws (B). 8.5.1 Fine‐tuning drum alignment Note: This is an operational test for sanding boards wider than the drum. Perform this procedure only after you have become familiar with sander operation. When sanding boards wider than the drum, table alignment is critical and table must be adjusted exactly ... -
Page 14: Oscillating Mode
A combination of several variables will determine proper depth of cut to use, including the following: Abrasive type and grit size. Width of piece being processed. Hardness of piece. Feed rate of conveyor belt. NOTE: The use of a carrier or backer board (not provided), is recommended for cuts 1,5mm or less. This is a flat board, usually of wood or MDF, slightly larger ... -
Page 15: Maximum Performance Tips
9.7 Maximum performance tips If the drum motor is lugging down, if conveyor belt is slipping, or if you observe a ripple effect on the stock, The versatility designed into the drum sander allows slow the feed rate. If the finish is smooth and the it to be used for a variety of tasks that will boost machine is not overworking, you can experiment return on your investment. For example, it will speed ... -
Page 16: User-Maintenance
10.1 Cleaning and lubrication clamp several pieces together to prevent them from slipping or tipping on the conveyor belt. For best results, make cleaning the sander a regular 9.7.5 Sanding imperfect stock shop procedure. Allowing excess build‐up of dust and debris can adversely affect performance through When sanding stock with a cup or crown, place the loading of the abrasives, slippage on the conveyor crown up. This will stabilize the stock to help prevent ... -
Page 17: Conveyor Belt Replacement
Figure 10‐3 Note: If conveyor belt continually tracks to one side Figure 10‐2: maintenance areas of the machine, reversing the belt on the conveyor table may remedy the problem. To make sure the 10.2 Drum elevation adjustment conveyor table is not twisted, place a level on the If ... -
Page 18: Additional Servicing
side wall of conveyor table. Do not install tracker Abnormal coloration of spring if edge of conveyor belt is damaged or torn. Broken lead in spring Collapsed spring Install new brush (or reinstall current brush) and gently press it all the way into hole until the brass clip is secured. Install cap. Repeat for other brush. NOTE: It is recommended that sander be run without load for several minutes to seat new brushes. Figure 11‐1: Underside of conveyor shown With first tracker installed, slide conveyor belt into bottom slot of tracker. Note: When installed Figure 10‐4 properly, only bottom lip of tracker will be visible. ... -
Page 19: Abrasives
12.2 Cleaning abrasive strips equal tension on conveyor belt at all times and not allowing conveyor belt to buckle under Regularly clean the abrasive strip on the drum with conveyor table. commercially available cleaning sticks, following the manufacturer’s directions. When cleaning, also brush the stick crumbs from the drum while it is still 12.0 Abrasives ... -
Page 20: Troubleshooting
13.0 Troubleshooting JWDS‐2244OSC‐M Drum Sander Symptom Possible Cause Correction * Drum motor won’t start No incoming current. Check connections at plug or circuit panel. when switch is activated. Low voltage. Check power line for proper voltage. Open circuit in motor or loose connection. Inspect all lead connections on motor for loose or open connections. Switch malfunction. Replace switch. Drum motor will not start: Short circuit in line cord or plug. Inspect cord or plug for damaged insulation and fuses blow or circuit shorted wires. breakers trip. Short circuit in motor or loose Inspect all connections on motor for loose or connections. shorted terminals or worn insulation. Incorrect fuse or circuit breaker in power Install correct fuse or circuit breaker. line. Drum motor overheats. Air circulation through motor restricted. Clean motor fan with compressed air to restore normal air circulation. Motor overloaded (SandSmart not Have controls inspected and repaired. functioning properly). Drum motor stalls, Short circuit in motor or loose Inspect connections on motor for loose or ... -
Page 21: Optional Accessories
Symptom Possible Cause Correction * Snipe marks. Improper tension on rollers. Re‐tension rollers. Sander burns wood. Abrasive strip is overlapped. Re‐wrap abrasive strip. Abrasive is loaded. Clean abrasive. Depth of cut excessive for fine grit. Use coarser grit or reduce depth of cut. Feed rate too slow. Increase feed rate. Abrasive is worn. Replace abrasive. Board slips on conveyor Tension rollers too high. Lower tension rollers. belt. Excessive feed rate. Reduce feed rate. Dirty or worn conveyor belt. Replace conveyor belt. Ripples in sanded surface. A. Uneven feed rate. Conveyor belt slipping (see above) A. Non‐uniformly spaced Board slips on conveyor belt (see above). ripples. Conveyor motor stalls (see above). B. Uniformly spaced B. Conveyor table flexing or vibration. Reduce depth of cut and/or feed rate. Check for ripples. loose bolts, loose shaft coupling set screws, or out‐of‐balance drum. Wood is gouged. Stock slipping on conveyor. Correct depth of cut or roller tension. ...
Need help?
Do you have a question about the 723544OSCK-M and is the answer not in the manual?
Questions and answers