
Subscribe to Our Youtube Channel
Related Manuals for Moxa Technologies EXPC-1319


Summary of Contents for Moxa Technologies EXPC-1319
- Page 1 EXPC-1319 Windows Embedded Standard 7 User Manual First Edition, July 2013 www.moxa.com/product © 2013 Moxa Inc. All rights reserved.
- Page 2 EXPC-1319 Windows Embedded Standard 7 User Manual The software described in this manual is furnished under a license agreement and may be used only in accordance with the terms of that agreement. Copyright Notice © 2013 Moxa Inc. All rights reserved.
-
Page 3: Table Of Contents
Installing Moxa MxView ........................ 7-6 Basic Configuration of MxView ...................... 7-7 Loading the Synmap MIB File ...................... 7-10 Using Synmap OIDs to Control the EXPC-1319 ................7-12 Using Synmap to Read the Voltage Sensor ................... 7-13 Using the Host Resources MIB ......................7-13 Checking CPU Load Using the Host Resources MIB ................. -
Page 4: Introduction
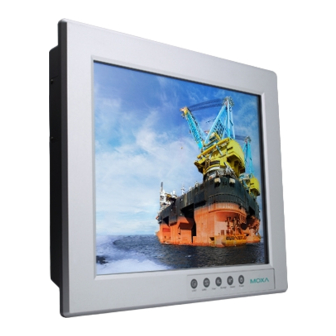
Introduction Thank you for buying Moxa’s EXPC-1319-STS panel computer. It comes with the Windows 7 Embedded software platform, providing a simple and familiar development environment for various industrial applications. Windows Embedded Standard 7 OS Components... -
Page 5: Windows Embedded Standard 7 Os Components
EXPC-1319-W7E Series Introduction Windows Embedded Standard 7 OS Components Refer to the following content for the software components of the Windows Embedded Standard 7 pre-installed on the EXPC-1319-STS computes. Core OS: • 32-bit support • Remote Client • Remote Procedure Call Applications and Services Development: •... - Page 6 EXPC-1319-W7E Series Introduction Security: • Credential Roaming Service • Credentials and Certificate Management • Windows Authorization Manager (AZMAN) • Windows Security Center • Active Directory Rights Management • Security Base • Encrypted File System (EFS) Embedded Features: • Enhanced Write Filter (EWF) •...
-
Page 7: System Initialization
System Initialization This chapter describes how to use the initial boot procedure to set up Windows 7 Embedded Standard system user account settings on your EXPC-1319-STS computer. The following topics are covered in this chapter: Overview Setting Up a New User Account... -
Page 8: Overview
EXPC-1319-W7E Series System Initialization Overview Like most laptop computer, you need to type a user name to create your user account to enable the embedded computer to work, follow the steps below: Setting Up a New User Account After booting up the computer for the first time, a new user account will need to be created. Choose a user name and enter it into the login screen you are presented with immediately following the completion of the boot procedure. - Page 9 Public Network; however, some Windows conveniences may be disabled when using this profile. If problems arise with certain applications on the local network, consult your systems admininstrator and/or security auditor. You may now use this user account to operate your EXPC-1319-STS embedded computer.
-
Page 10: Panel Control Buttons And Osd
Panel Control Buttons and OSD This chapter describes how to use the panel control buttons and OSD (On-screen Display) for the EXPC-1319-STS panel computer. The following topics are covered in this chapter: Overview Power Adjusting Brightness Configuring the Function Key... -
Page 11: Overview
EXPC-1319-W7E Series Panel Control Buttons and OSD Overview There are five control buttons on the bottom of the front panel. See the following figures and description of the functions of each control button. Control Buttons Press to turn on the computer. Press again to Power turn off the computer. -
Page 12: Power
EXPC-1319-W7E Series Panel Control Buttons and OSD Power It is possible to use Windows to configure different power profiles. These can help you conserve power usage. Step 1: Navigate to Control PanelSystem and SecurityPower Options, and click on the selection in the right column, Choose what the power button does. -
Page 13: Adjusting Brightness
EXPC-1319-W7E Series Panel Control Buttons and OSD Adjusting Brightness You may adjust the brightness using the + and – buttons. When pressing the button, an adjustment scale will display in the lower middle of the display. Please note that when in the DirectDraw Full Screen Mode, this scale will not display. -
Page 14: Enabling And Disabling The Touch Screen
EXPC-1319-W7E Series Panel Control Buttons and OSD L Win + E + None will launch Windows Explorer. When finished, click Apply. To entirely disable the function key, click Clear. For detailed descriptions of available hot key combinations, you may refer to the following links: http://technet.microsoft.com/en-us/magazine/ee851673.aspx... -
Page 15: Touch Screen Calibration
Touch screen Calibration This chapter describes how to calibrate the touchscreen function. The following topics are covered in this chapter: Calibrating the Touch Screen Standard Calibration Advanced Calibration PenMount Calibration Utility Parameters Turn off EEPROM Storage ... -
Page 16: Calibrating The Touch Screen
Touch screen Calibration Calibrating the Touch Screen This chapter describes the calibration process for the EXPC-1319 touch panel. First, Open the PenMount control panel. This may be found under the Windows 7 Start Menu, in the Programs list in the PenMount Windows Universal Driver(WHQL) folder. From the PenMount folder, navigate to the Utility folder and open the PenMount Control Panel. -
Page 17: Penmount Calibration Utility Parameters
EXPC-1319-W7E Series Touch screen Calibration Advanced Calibration: Calibration Data Graph If you performed an advanced calibration and ticked the Plot Calibration Data selection, then after you complete an advanced calibration the calibration utility will provide you with a graph comparing ideal panel linearity as assumed by the PenMount utility (the black lines) plotted against the approximate linearity derived by the PenMount utility from the user calibration process (the blue lines). -
Page 18: Edge Compensation
EXPC-1319-W7E Series Touch screen Calibration Beep mode allows you to configure a beeping sound to play whenever contact is made (or broken) with the screen. The beep may be configured for tone, frequency, and duration. The cursor stabilizer removes jitter from the cursor when the computer is being used in high vibration environments. -
Page 19: Configuring Serial Interface
Configuring Serial Interface This chapter describes how to configure the serial interfaces of the EXPC-1319 panel computer. The following topics are covered in this chapter: Overview Configuring the Serial Interfaces... -
Page 20: Overview
EXPC-1319-W7E Series Configuring Serial Interface Overview The EXPC-1319-STS features two software-selectable serial ports that support three different serial interfaces: RS232, RS485 (2-wire) and RS422/RS485 (4-wire). The device handles for the serial ports are COM1 and COM2. Please see the following notes for these serial interfaces: COM1 and COM2 support baudrate up to 115200 bps, but 38400 or less is recommended, as the FIFO will be overrun when throughput is high. - Page 21 EXPC-1319-W7E Series Configuring Serial Interface To change the a COM port to a different serial interface, type SetInterface [Port] [Mode], where [PORT] is either 1 (for COM1) or 2 (for COM2), and [Mode] is either 0 (for RS-232), 1 (for RS-485 2-wire), or 2 (for RS-422 / RS-485 4-wire).
-
Page 22: Enabling Embedded Filters
Enabling Embedded Filters This chapter describes how to operate the embedded enabling features on the EXPC-1319-STS panel computer. The following topics are covered in this chapter: Enhanced Writer Filter File-Based Write Filter... -
Page 23: Enhanced Write Filter
EXPC-1319-W7E Series Enabling Embedded Filters Enhanced Write Filter Overview Enhanced Write Filter (EWF) provides a means for protecting a volume from writes. This allows the operating system (OS) to boot from write-protected hard disks. All written data to an EWF-protected volume (The Hard disk in the following figure) are redirected to an overlay (EWF Volume in the following figure). -
Page 24: Enabling Enhanced Write Filter
EXPC-1319-W7E Series Enabling Embedded Filters Enabling Enhanced Write Filter Follow these steps to enable the Enhanced Write Filter First open command console by running cmd.exe. To verify that Enhanced Write Filter is disabled, type ewfmgr c:. - Page 25 EXPC-1319-W7E Series Enabling Embedded Filters To enable the Enhanced Write Filter, type ewfmgr c: -enable. Reboot the system to take effect. To verify again that Enhanced Write Filter is enabled, type ewfmgr c:. To disable the Enhanced Write Filter, type ewfmgr c: -commitanddisable.
-
Page 26: File-Based Write Filter
EXPC-1319-W7E Series Enabling Embedded Filters File-Based Write Filter Overview According to Microsoft: File-Based Write Filter (FBWF) allows the Windows Embedded platform to maintain the appearance of read and write access on write-sensitive or read-only storage. FBWF makes read and write access transparent to applications. - Page 27 EXPC-1319-W7E Series Enabling Embedded Filters When system reboots, under command prompt, type fbwfmgr /displayconfig again to check if the status has been changed to “enabled”.
-
Page 28: Moxa Software Package
Moxa Software Package This chapter describes the software package for users to easily control and monitor the EXPC-1319-STS computers. The following topics are covered in this chapter: The Synmap™ Virtualization Layer: Full Software Interoperability with Any Moxa Device Overview ... - Page 29 EXPC-1319-W7E Series Moxa Software Package...
-
Page 30: The Synmap™ Virtualization Layer: Full Software Interoperability With Any Moxa Device
EXPC-1319-W7E Series Moxa Software Package The Synmap™ Virtualization Layer: Full Software Interoperability with Any Moxa Device Overview Synmap™ is Moxa’s revolutionary software virtualization, an evolutionary advance in network device control that adapts solid, reliable SNMP into a fully portable remote procedure interface. Synmap allows engineers to automate remote processes using SNMP object identifiers (OIDs) rather than device- or OS-specific API addressing, making a scripted Synmap procedure fully interoperable with any other Synmap device. -
Page 31: Moxa Synmap Oids
Moxa Synmap OIDs The full list of SynMap OIDs is reproduced as Appendix A: The Moxa Synmap OID Table. The table below lists the Synmap OIDs that are currently enabled on the EXPC-1319 panel computer. Item Name Access Description productName 1.3.6.1.4.1.8691.17.1.1.1... -
Page 32: Installing The Synmap Virtualization Layer
EXPC-1319-W7E Series Moxa Software Package Possible values are Vcore, V1.05, V1.5_S3, V1.5. voltSensorsValue 1.3.6.1.4.1.8691.17.1.5.1.2.1.3 read-only Returns/sends a value indicating or changing the sensor’s state usbDeviceProductID 1.3.6.1.4.1.8691.17.1.6.4.1.3.1.3 read-only Returns the USB’s hexadecimal product ID usbDeviceActiveClass 1.3.6.1.4.1.8691.17.1.6.4.1.3.1.4 read-only Returns the USB device class for any... -
Page 33: Installing Moxa Mxview
EXPC-1319-W7E Series Moxa Software Package Installing Moxa MxView mxView_Trial_V2.3.msi 1. MXview is included on your TC-6110 software DVD. Double click in the Utility \utility\4.mxViewTrial folder, which you can find on the software DVD in . Select OK to choose the language, and when the next dialog appears click Next to continue. -
Page 34: Basic Configuration Of Mxview
EXPC-1319-W7E Series Moxa Software Package 6. After MXview has installed, you must enter the IP address of the machine on which it is located. This may be the localhost address, 127.0.0.1, or if you are connecting to MXview over a LAN it will be a remote IP address. - Page 35 EXPC-1319-W7E Series Moxa Software Package the suggested settings above, then to login using HTTP would be 127.0.0.1:81, and using HTTPS you would use 127.0.0.1:443. WARNING For security’s sake, Moxa strongly recommends resetting the password to a strongly secure password of at least 8 characters, mixing numbers and symbols in a non-word series.
- Page 36 EXPC-1319-W7E Series Moxa Software Package 7. Click Install to continue. 8. Click Close to complete.
-
Page 37: Loading The Synmap Mib File
EXPC-1319-W7E Series Moxa Software Package 9. In Windows IE, a banner will appear at the top of the browser window. Click the message and select Enable Intranet Settings. 10. A security warning will appear, telling you that intranet settings are not secure enough for the open Internet. - Page 38 EXPC-1319-W7E Series Moxa Software Package 2. Click Start, wait for the System Status indicator to show Running, and then select Launch Client. When the MXview Setup Wizard appears, click Cancel to skip the setup process and directly open the MXview interface.
-
Page 39: Using Synmap Oids To Control The Expc-1319
MIB file following the instructions above. Using Synmap OIDs to Control the EXPC-1319 Follow these steps to use Synmap to use the Moxa MIB to set up automated controls for the EXPC-1319. Retrieving Basic Device Information 1. In this first step, we will use Synmap to retrieve specific device information about the TC-6110. -
Page 40: Using Synmap To Read The Voltage Sensor
The Host Resources MIB is a mainstay industry standard, defined by RFC2790. The steps for using the EXPC-1319 Host Resources MIB with your chosen NMS are described below. MXView does not provide table views of MIB data. If your NMS does, however, you may use any of the available OIDs that are provided in the Host Resources MIB. -
Page 41: Checking Cpu Load Using The Host Resources Mib
EXPC-1319-W7E Series Moxa Software Package ATTENTION All of the information reproduced below regarding OIDs of the Host Resources MIB—as well as much more regarding—may be found using the Cisco SNMP Object Navigator, which may currently be found at this web address: http://tools.cisco.com/Support/SNMP/do/BrowseOID.do?local=en... -
Page 42: Checking Data Storage Stats Using The Host Resources Mib
EXPC-1319-W7E Series Moxa Software Package ATTENTION All of the information reproduced below regarding OIDs of the Host Resources MIB—as well as much more regarding—may be found using the Cisco SNMP Object Navigator, which may currently be found at this web address: http://tools.cisco.com/Support/SNMP/do/BrowseOID.do?local=en... - Page 43 16,384 bytes (or 16 kB). Using the hrStorageTable OIDs, it is possible to determine all relevant statistics regarding your system’s memory storage performance. The following example is a brief summary of the EXPC-1319’s storage system: Description...
-
Page 44: Checking Network Status
EXPC-1319-W7E Series Moxa Software Package Physical Memory 65536 32574 15468 Ex. 1: To derive the total capacity of the C drive, use the formula: hrStorageAllocationUnits.1 * hrStorageSize.1 4096 7790335 = 31909212160 bytes, or 30 GB Ex. 2: If you want to know the physical memory (RAM) capacity, use the following formula: hrStorageAllocationUnits.4 * hrStorageSize.4... -
Page 45: Sample Code
Sample Code This chapter describes how to use various examples on the EXPC-1319-STS computers for different functions. The following topics are covered in this chapter: Watchdog Enabling Watchdog Function... - Page 46 EXPC-1319-W7E Series Sample Code Watchdog EXPC-1319 computers provide sample code for enabling the watchdog timer, found under <Software DVD>\examples\C++\WatchDog. The executable file Watchdog.exe is under <Software DVD>\examples\Release. Enabling the Watchdog Timer c:\programs\example If you haven’t already, create a folder and copy Watchdog.exe into the folder.
-
Page 47: System Recovery
System Recovery The EXPC-1319-STS ready-to-run embedded computers are a Windows Embedded Standard 7 platform. This chapter describes the recovery process in the event of system instability. The following topics are covered in this chapter: Recovery Environment Recovery Procedure... - Page 48 In this section, you will learn how to prepare a USB drive with the recovery environment and system image, and how to set up the system for a system recovery. The EXPC-1319’s system recovery is built on the Clonezilla system recovery solution.
- Page 49 EXPC-1319-W7E Series System Recovery 5. Select the type of device to be used to store the recovery environment. For this example that will be USB Drive. 6. Next, select what Drive the USB is mounted under. This will most likely be D:\.
- Page 50 EXPC-1319-W7E Series System Recovery Setting up the BIOS To enable the system to boot from the USB drive you will need to change the BIOS settings. 1. Turn on the computer and when you hear a beep press F2; this will take you to the BIOS setup menu.
- Page 51 To do this, you will need to have completed the above section, Setting up the BIOS. Connect the USB drive to any of the EXPC-1319-STS’s USB ports and then reboot the computer. The system should now boot from the USB drive into the Clonezilla rescue environment.
- Page 52 EXPC-1319-W7E Series System Recovery 5. Wait for the files to be copied over. Depending on the speed of your USB, this could take some time. 6. Select (0) Poweroff to power off the computer. 7. Remove the USB drive after the computer has been powered off.
-
Page 53: Saving The System To The Usb Drive
1. Select clonezilla live save disk. This will take you into the Clonezilla image generation process, where will the EXPC-1319’s entire software platform will be automatically copied over to your USB. It is very important to make sure your USB drive is large enough to accommodate all of the system data. - Page 54 EXPC-1319-W7E Series System Recovery 2. Wait for the USB drive boot process to finish. 3. Clonezilla will warn you that you are about to erase all files currently located in the USB’s image directory. Enter y to confirm that you want to continue.
- Page 55 EXPC-1319-W7E Series System Recovery 4. Wait for the copying process to finish. 5. Once the new image is completed, select (0) Poweroff to turn off the computer. 6. After the computer has turned off, remove the USB from the port and return the BIOS to its original...
-
Page 56: Moxa Synmap Oid Table
Moxa Synmap OID Table This appendix describes the Moxa SynMap OID Table The following topics are covered in this appendix: Moxa SynMap OID Table... -
Page 57: The Moxa Synmap Oid Table
EXPC-1319-W7E Series Moxa Synmap OID Table The Moxa Synmap OID Table Item Name Access Description Supported productName 1.3.6.1.4.1.8691.17.1.1.1 read-only Returns product name. ■ productDesc 1.3.6.1.4.1.8691.17.1.1.2 read-only Returns product short ■ description. productVersion 1.3.6.1.4.1.8691.17.1.1.3 read-only Returns product version. ■ productBuildDate 1.3.6.1.4.1.8691.17.1.1.4... - Page 58 EXPC-1319-W7E Series Moxa Synmap OID Table pwrOnAfterPwrFail 1.3.6.1.4.1.8691.17.1.4.8.1 read-write Select power on after power fail behavior. pwrLanWakeUp 1.3.6.1.4.1.8691.17.1.4.8.3 read-write Enable/Disable wake on LAN functionality. tempSensorsIndex 1.3.6.1.4.1.8691.17.1.5.1.1.1.1 read-only Reference index for each ■ observed device. tempSensorsDevice 1.3.6.1.4.1.8691.17.1.5.1.1.1.2 read-only The name of the temperature sensor we ■...
- Page 59 EXPC-1319-W7E Series Moxa Synmap OID Table 0 is low, 1 is high. ledNumber 1.3.6.1.4.1.8691.17.1.6.2.1 read-only Number of LED in current system ledIndex 1.3.6.1.4.1.8691.17.1.6.2.2.1.1 read-only Reference index for each LED. ledPort 1.3.6.1.4.1.8691.17.1.6.2.2.1.2 read-only The port number of LED. ledValue 1.3.6.1.4.1.8691.17.1.6.2.2.1.3 read-write The LED status, 0 is low, 1 is high.
- Page 60 EXPC-1319-W7E Series Moxa Synmap OID Table the expired time. watchdogStatus 1.3.6.1.4.1.8691.17.1.6.6.2.2 read-write To show the watchdog ■ monitor program status. powerPolicy 1.3.6.1.4.1.8691.17.1.7.2 read-write Current system power ■ policy. moxaSystemTrapIP 1.3.6.1.4.1.8691.17.1.9.1 read-write Set Trap IP address. moxaSystemTrapCommu 1.3.6.1.4.1.8691.17.1.9.2 read-write Trap community.
Need help?
Do you have a question about the EXPC-1319 and is the answer not in the manual?
Questions and answers