
Subscribe to Our Youtube Channel
Related Manuals for Moxa Technologies UC-8410-LX


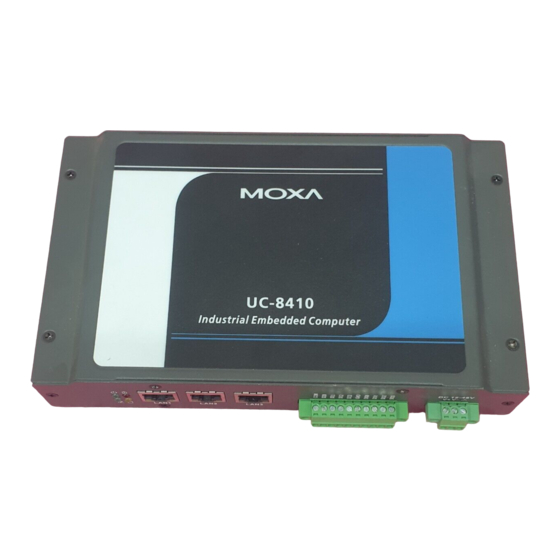
Summary of Contents for Moxa Technologies UC-8410-LX
- Page 1 UC-8410/8416/8418/8430-LX User’s Manual Sixth Edition, June 2011 www.moxa.com/product © 2011 Moxa Inc. All rights reserved. Reproduction without permission is prohibited.
- Page 2 UC-8410/8416/8418/8430 LX User’s Manual The software described in this manual is furnished under a license agreement and may be used only in accordance with the terms of that agreement. Copyright Notice Copyright ©2011 Moxa Inc. All rights reserved. Reproduction without permission is prohibited. Trademarks The MOXA logo is a registered trademark of Moxa Inc.
-
Page 3: Table Of Contents
Table of Contents Introduction ............................1-1 Overview ............................1-2 Software Architecture .......................... 1-2 Journaling Flash File System (JFFS2) ..................... 1-3 Software Features ........................1-3 Getting Started..........................2-1 Powering on the UC-8410/8416/8418/8430 ................... 2-2 Connecting the UC-8410/8416/8418/8430/8430 to a PC ................. 2-2 Serial Console .......................... - Page 4 SRAM .............................. 5-15 Make File Example ..........................5-16 Moxa CAN Programming Guide ......................5-17 Introduction..........................5-17 Programming Guide ........................5-17 Software Lock ..........................5-19 Qt-embedded ........................... 5-20 Compile and Test the QT Program on an X86 Machine ..............5-21 Set up Qt development ......................5-21 Cross-compile the Qt application and run with Dual-display ............
-
Page 5: Introduction
Introduction Welcome to the Moxa UC-8400 Series of RISC-based communication platforms. The UC-8410/8416/8418/8430 embedded computer comes with 8 RS-232/422/485 serial ports, 3 Ethernet ports, 4 digital input channels, 4 digital output channels, (12 digital input channels and 12 digital output channels for UC-8418), 8 10/100 Mbps switch ports (UC-8416 only), a CompactFlash socket, and 2 USB 2.0 ports. -
Page 6: Overview
UC-8410/8416/8418/8430 Introduction Overview The UC-8410/8416/8418/8430 computer, which features a RISC CPU, RAM memory, serial ports for connecting RS-232/422/485 devices, and 3 10/100 Mbps Ethernet ports, is designed for embedded applications. The UC-8410/8416/8418/8430 uses an Intel XScale IXP435 533 Mhz RISC CPU. Unlike the x86 CPU, which uses a CISC design, the RISC architecture and modern semiconductor technology provide this computer with a powerful computing engine and communication functions, but without generating a lot of heat. -
Page 7: Journaling Flash File System (Jffs2)
UC-8410/8416/8418/8430 Introduction and then enable services and daemons. During this time, the kernel will start searching for system configuration parameters via rc or inittab. Normally, the kernel uses the Root File System to boot up the system. The Root File System is protected, and cannot be changed by the user, providing a “safe”... - Page 8 UC-8410/8416/8418/8430 Introduction openvpn: virtual private network service manager pppd: dial in/out over serial port daemon snmpd: snmpd agent daemon openssl: open SSL Application Development Software: Moxa Linux API device control Linux Tool Chain: Firmware v1.X: • GCC (V4.2.1): C/C++ PC Cross Compiler •...
-
Page 9: Getting Started
Getting Started In this chapter, we explain how to connect the UC-8410/8416/8418/8430, turn on the power, and then get started with programming and using other functions. The following topics are covered in this chapter: Powering on the Connecting the UC-8410/8416/8418/8430/8430 to a PC ... -
Page 10: Powering On The Uc-8410/8416/8418/8430
UC-8410/8416/8418/8430 Getting Started Powering on the UC-8410/8416/8418/8430 Connect the SG wire to the Shielded Contact located in the upper left corner of the UC-8410/8416/8418/8430, and then power on the computer by connecting it to the power adaptor. It takes about 30 to 60 seconds for the system to boot up. -
Page 11: Ssh Console
UC-8410/8416/8418/8430 Getting Started To connect to a hub or switch connected to your local LAN, use a straight-through Ethernet cable. The default IP addresses and netmasks are shown above. To log in, type the Login name and password as requested. The default values are both root: Login: root... -
Page 12: Configuring The Ethernet Interface
UC-8410/8416/8418/8430 Getting Started Linux Users From a Linux machine, use the “ssh” command to access the UC-8410/8416/8418/8430’s Console utility via SSH. #ssh 192.168.3.127 Select yes to complete the connection. [root@bee_notebook root]# ssh 192.168.3.127 The authenticity of host ‘192.168.3.127 (192.168.3.127)’ can’t be established. RSA key fingerprint is 8b:ee:ff:84:41:25:fc:cd:2a:f2:92:8f:cb:1f:6b:2f. - Page 13 UC-8410/8416/8418/8430 Getting Started Static IP addresses: As shown below, 3 network addresses need to be modified: address, network, netmask, and broadcast. The default IP addresses are 192.168.3.127 for LAN1, 192.168.4.127 for LAN2, and 192.168.5.127 for LAN3, with default netmasks of 255.255.255.0. # We always want the loopback interface.
-
Page 14: Modifying Network Settings Over The Network
UC-8410/8416/8418/8430 Getting Started Modifying Network Settings over the Network IP settings can be activated over the network, but the new settings will not be saved to the flash ROM without modifying the file /etc/network/interfaces. For example, type the command #ifconfig eth0 192.168.1.1 to change the IP address of LAN1 to 192.168.1.1. -
Page 15: Checking The Flash Memory Space
UC-8410/8416/8418/8430 Getting Started ATTENTION If you have an older version of Linux Tool Chain on your Moxa embedded computer (such as the W300 Series, IA240/241, and UC-7112-LX Plus) and would like to install the new Linux Tool Chain for the UC-8410/8416/8418/8430, the old Linux Tool Chain files will be immediately overwritten, and the programs compiled by this new Tool Chain may not work on your old models. -
Page 16: Uploading And Running The "Hello" Program
UC-8410/8416/8418/8430 Getting Started [root@localhost hello]# make xscale-linux-gcc –o hello-release hello.c xscale-linux-strip –s hello-release xscale-linux-gcc –ggdb -o hello-debug hello.c [root@localhost hello]# _ Next, execute hello.exe to generate hello-release and hello-debug, which are described below: hello-release—an IXP platform execution file (created specifically to run on the UC-8410/8416/8418/8430) hello-debug—an IXP platform GDB debug server execution file (see Chapter 5 for details about the GDB debug tool). -
Page 17: Managing Embedded Linux
Managing Embedded Linux This chapter includes information about version control, deployment, updates, and peripherals. The following topics are covered in this chapter: System Version Information Firmware Upgrade Upgrading the Firmware Loading Factory Defaults Enabling and Disabling Daemons ... -
Page 18: System Version Information
UC-8410/8416/8418/8430 Managing Embedded Linux System Version Information To determine the hardware capability of your UC-8410/8416/8418/8430/8430 and what kind of software functions are supported, check which version of the firmware your UC-8410/8416/8418/8430/8430 is running. Contact Moxa to determine the hardware version. You will need the Production S/N (Serial number), which is located on the UC-8410/8416/8418/8430’s bottom label. - Page 19 UC-8410/8416/8418/8430 Managing Embedded Linux root@Moxa:/# upramdisk root@Moxa:/# df -h Filesystem Size Used Available Use% Mounted on /dev/mtdblock2 14.0M 11.2M 2.8M 80% / /dev/ram15 1.7M 18.0k 1.6M 1% /dev /dev/ram0 499.0k 34.0k 440.0k 7% /var /dev/mtdblock3 15.8M 2.6M 13.1M 17% /tmp /dev/mtdblock3 15.8M 2.6M...
-
Page 20: Loading Factory Defaults
UC-8410/8416/8418/8430 Managing Embedded Linux 150 Opening data connection for FWR_uc8400_Va.b.c_Build_YYMMDDHH.hfm 226 Transfer complete. 12904012 bytes received in 2.17 secs (5925.8 kB/s) ftp> 3. Next, use the upgradehfm command to upgrade the kernel and root file system: #upgradehfm FWR_uc8400_Va.b.c_Build_YYMMDDHH.hfm 192.168.3.127 – PuTTY root@Moxa:/mnt/ramdisk# upgradehfm FWR_uc8400_Va.b.c_Build_YYMMDDHH.hfm Moxa UC-8400 Upgrade firmware utility version 1.0. -
Page 21: Enabling And Disabling Daemons
UC-8410/8416/8418/8430 Managing Embedded Linux ATTENTION Reset-to-default will erase all data stored in /dev/mtdblock4 If you have stored data in the writable partition, you will need to back up these files before resetting the system to default. On the UC-8410/8416/8418/8430, the directories /tmp, /etc, /usr/local/bin, /usr/local/sbin, /usr/local/lib, /usr/local/libexec, and /home are mounted on /dev/mtdblock4. - Page 22 UC-8410/8416/8418/8430 Managing Embedded Linux 881 root 1292 S /bin/reportip 883 nobody 12560 S /usr/bin/httpd -k start -d /etc/apache 884 nobody 12560 S /usr/bin/httpd -k start -d /etc/apache 885 nobody 12560 S /usr/bin/httpd -k start -d /etc/apache 886 nobody 12560 S /usr/bin/httpd -k start -d /etc/apache 887 nobody 12560 S...
-
Page 23: Setting The Run-Level
UC-8410/8416/8418/8430 Managing Embedded Linux 829 root 1360 S /bin/inetd 832 bin 1300 S /bin/portmap 838 root 2428 S /bin/sh --login 843 root 1360 S /bin/snmpd -c public 867 root 3508 S /bin/sshd -f/etc/ssh/sshd_config 873 root 7284 S /usr/bin/httpd -k start -d/etc/apache 876 root 1292 S /bin/reportip... -
Page 24: Setting The System Time
UC-8410/8416/8418/8430 Managing Embedded Linux To remove the daemon, use the following command to remove the run file from /etc/rc.d/rc3.d: #rm –f /etc/rc.d/rc3.d/S60tcps2 Setting the System Time There are two ways to support the timezone configuration on a Moxa embedded computer. One is using the TZ variable. -
Page 25: Ntp Client
UC-8410/8416/8418/8430 Managing Embedded Linux 192.168.3.127 – PuTTY root@Moxa:~# date Fri Jun 23 23:30:31 CST 2000 root@Moxa:~# hwclock Fri Jun 23 23:30:35 2000 -0.557748 seconds root@Moxa:~# date 070910002006 Sun Jul 9 10:00:00 CST 2006 root@Moxa:~# hwclock –w root@Moxa:~# date ; hwclock Sun Jul 9 10:01:07 CST 2006 Sun Jul 9 10:01:08 2006 -0.933547 seconds root@Moxa:~#... -
Page 26: Cron-Daemon To Execute Scheduled Commands
UC-8410/8416/8418/8430 Managing Embedded Linux # /etc/resolv.conf file. hwclock –w sleep 100 # Updates every 100 seconds. The min. time is 100 seconds. Change 100 to a larger number to update RTC less often. Save the shell script using any file name. E.g., fixtime How to run the shell script automatically when the kernel boots up Copy the example shell script fixtime to directory /etc/init.d, and then use chmod 755 fixtime to change the shell script mode. -
Page 27: Connecting Peripherals
UC-8410/8416/8418/8430 Managing Embedded Linux Connecting Peripherals USB Mass Storage The UC-8410/8416/8418/8430/8430 supports PNP (plug-n-play), and hot pluggability for connecting USB mass storage devices. The UC-8410/8416/8418/8430/8430 has a built-in auto mount utility that eases the mount procedure. The connected USB mass storage device will be mounted automatically. You can check the location of the USB disk by mount command. -
Page 28: Managing Communication
Managing Communication In this chapter, we explain how to configure the UC-8410/8416/8418/8430’s various communication functions. The following topics are covered in this chapter: Telnet/FTP DNS Web Service—Apache IPTABLES NAT NAT Example Enabling NAT at Bootup ... -
Page 29: Telnet/Ftp
UC-8410/8416/8418/8430 Managing Communication Telnet/FTP In addition to supporting Telnet client/server and FTP client/server, the UC-8410/8416/8418/8430/8430 also supports SSH and sftp client/server. To enable or disable the Telnet/ftp server, you first need to edit the file /etc/inetd.conf. Enabling the Telnet/ftp server The following example shows the default content of the file /etc/inetd.conf. -
Page 30: Web Service-Apache
UC-8410/8416/8418/8430 Managing Communication Web Service—Apache The Apache web server’s main configuration file is /etc/apache/conf/httpd.conf, with the default homepage located at /home/httpd/htdocs/index.html. Save your own homepage to the following directory: /home/httpd/htdocs/ Save your CGI page to the following directory: /home/httpd/cgi-bin/ Before you modify the homepage, use a browser (such as Microsoft Internet Explorer or Mozilla Firefox) from your PC to test if the Apache Web Server is working. -
Page 31: Iptables
UC-8410/8416/8418/8430 Managing Communication ATTENTION When you develop your own CGI application, make sure your CGI file is executable. 192.168.3.127 – PuTTY root@Moxa:/usr/www/cgi-bin# ls –al drwxr—xr-x 2 root root 0 Aug 24 1999 drwxr—xr-x 5 root root 0 Nov 5 16:16 -rwxr—xr-x 1 root root... - Page 32 UC-8410/8416/8418/8430 Managing Communication Incoming Packets Mangle Table PREROUTING Chain NAT Table PREROUTING Chain Local Host Other Host Packets Packets Mangle Table Mangle Table INPUT Chain FORWARD Chain Filter Table Filter Table INPUT Chain FORWARD Chain Local Mangle Table Process POSTROUTING Chain Mangle Table OUTPUT Chain NAT Table...
- Page 33 UC-8410/8416/8418/8430 Managing Communication The UC-8410/8416/8418/8430/8430 supports the following sub-modules. Be sure to use the module that matches your application. nf_conntrack nf_conntrack_ftp x_tables xt_CLASSIFY xt_MARK xt_NFLOG xt_NFQUEUE xt_TCPMSS xt_esp xt_length xt_limit xt_mac xt_mark xt_multiport xt_pkttype xt_string xt_tcpmss xt_tcpudp xt_u32 arp_tables arpt_mangle arptable_filter ip_tables ipt_CLUSTERIP...
- Page 34 UC-8410/8416/8418/8430 Managing Communication # iptables [-t tables] [-FXZ] Flush the selected chain (all the chains in the table if none is listed). Delete the specified user-defined chain. Set the packet and byte counters in all chains to zero. Examples: # iptables -L -n In this example, since we do not use the -t parameter, the system uses the default ‘filter’...
-
Page 35: Nat
UC-8410/8416/8418/8430 Managing Communication --dport: Destination port number. Jump target. Specifies the target of the rules; i.e., how to handle matched packets. For example, ACCEPT the packet, DROP the packet, or LOG the packet. Examples: Example 1: Accept all packets from lo interface. # iptables –A INPUT –i lo –j ACCEPT Example 2: Accept TCP packets from 192.168.0.1. -
Page 36: Nat Example
UC-8410/8416/8418/8430 Managing Communication NAT Example The IP address of LAN1 is changed to 192.168.3.127 (you will need to load the module ipt_MASQUERADE): #echo 1 > /proc/sys/net/ipv4/ip_forward #modprobe ip_tables #modprobe iptable_filter #modprobe ip_conntrack #modprobe iptable_nat #modprobe ipt_MASQUERADE #iptables -t nat –A POSTROUTING –o eth0 –j SNAT --to-source 192.168.3.127 #iptables –t nat –A POSTROUTING –o eth0 –j MASQUERADE Enabling NAT at Bootup In most real world situations, you will want to use a simple shell script to enable NAT when the... -
Page 37: Dial-Up Service-Ppp
UC-8410/8416/8418/8430 Managing Communication export PATH echo “1” > /proc/sys/net/ipv4/ip_forward /sbin/iptables -F /sbin/iptables -X /sbin/iptables -Z /sbin/iptables -F -t nat /sbin/iptables -X -t nat /sbin/iptables -Z -t nat /sbin/iptables -P INPUT ACCEPT /sbin/iptables -P OUTPUT ACCEPT /sbin/iptables -P FORWARD ACCEPT /sbin/iptables -t nat -P PREROUTING ACCEPT /sbin/iptables -t nat -P POSTROUTING ACCEPT /sbin/iptables -t nat -P OUTPUT ACCEPT... - Page 38 UC-8410/8416/8418/8430 Managing Communication verbose mode; log what we do to syslog “ “ Double quotes—don’t wait for a prompt, but instead do (note that you must include a space after the second quotation mark) ATDT5551212 Dial the modem, and then ... CONNECT Wait for an answer.
- Page 39 UC-8410/8416/8418/8430 Managing Communication How to check the connection Once you’ve set up a PPP connection, there are some steps you can take to test the connection. First, type: /sbin/ifconfig (The folder ifconfig may be located elsewhere, depending on your distribution.) You should be able to see all of the network interfaces that are UP.
-
Page 40: Pppoe
UC-8410/8416/8418/8430 Managing Communication Setting up a Machine for Incoming PPP Connections This first example applies to using a modem, and requires authorization with a username and password. pppd/dev/ttyM0 115200 crtscts modem 192.168.16.1:192.168.16.2 login auth You should also add the following line to the file /etc/ppp/pap-secrets: ““... - Page 41 UC-8410/8416/8418/8430 Managing Communication # other accounts that should not be able to use pppd! guest hostname “*” master hostname “*” root hostname “*” support hostname “*” stats hostname “*” “username@hinet.net” is the username obtained from the ISP to log in to the ISP account. “password” is the corresponding password for the account.
-
Page 42: Nfs (Network File System) Client
UC-8410/8416/8418/8430 Managing Communication 8. Use the following command to create a pppoe connection: pppd eth0 The eth0 is what is connected to the ADSL modem LAN port. The example above uses LAN1. To use LAN2, type: pppd eth1 9. Type ifconfig ppp0 to check if the connection is OK or has failed. If the connection is OK, you will see information about the ppp0 setting for the IP address. -
Page 43: Snmp
UC-8410/8416/8418/8430 Managing Communication Example: smtpclient –s test –f sender@company.com –S IP_address receiver@company.com < mail-body-message The mail subject. Sender’s mail address SMTP server IP address The last mail address receiver@company.com is the receiver’s e-mail address. mail-body-message is the mail content. The last line of the body of the message should contain ONLY the period ‘.’... -
Page 44: Openvpn
UC-8410/8416/8418/8430 Managing Communication OpenVPN OpenVPN provides two types of tunnels for users to implement VPNS: Routed IP Tunnels and Bridged Ethernet Tunnels. To begin with, check to make sure that the system has a virtual device /dev/net/tun. If not, issue the following command: # mknod /dev/net/tun c 10 200 An Ethernet bridge is used to connect different Ethernet networks together. - Page 45 UC-8410/8416/8418/8430 Managing Communication while read f1 f2 f3 f4 r3 if [ “$f1” = “iface” -a “$f2” = “$iface” -a “$f3” = “inet” -a “$f4” = “static” ];then i=`expr 0` while : if [ $i -gt 5 ]; then break i=`expr $i + 1` read f1 f2 case “$f1”...
- Page 46 UC-8410/8416/8418/8430 Managing Communication if [ ! \( -r “/dev/net/tun” \) ]; then # create a device file if there is none mknod /dev/net/tun c 10 200 # load modules “tun” and “bridge” mname=tun module_up mname=bridge module_up # create an ethernet bridge to connect tap devices, internal interface brctl addbr br0 brctl addif br0 $iface # the bridge receives data from any port and forwards it to other ports.
- Page 47 UC-8410/8416/8418/8430 Managing Communication break done brctl delif br0 $iface brctl delbr br0 ifconfig br0 down ifconfig $iface $IPADDR netmask $NETMASK broadcast $BROADCAST killall -TERM openvpn case “$1” in start) start stop) stop restart) stop start echo “Usage: $0 [start|stop|restart]” exit 1 esac exit 0 #---------------------------------- end -----------------------------...
- Page 48 UC-8410/8416/8418/8430 Managing Communication secret /etc/openvpn/secrouter.key cipher DES-EDE3-CBC auth MD5 tun-mtu 1500 tun-mtu-extra 64 ping 40 up /etc/openvpn/tap0-br.sh Next, modify the routing table in the /etc/openvpn/tap0-br.sh script file. #---------------------------------- Start---------------------------- #!/bin/sh # /etc/openvpn/tap0-br.sh # value after “-net” is the subnet behind the remote peer route add -net 192.168.2.0 netmask 255.255.255.0 dev br0 #---------------------------------- end ----------------------------- Note: Select cipher and authentication algorithms by specifying “cipher”...
- Page 49 UC-8410/8416/8418/8430 Managing Communication A successful ping indicates that you have created a VPN system that only allows authorized users from one internal network to access users at the remote site. For this system, all data is transmitted by UDP packets on port 5000 between OpenVPN peers.
- Page 50 UC-8410/8416/8418/8430 Managing Communication 2. On machine OpenVPN A, modify the remote address in the configuration file, /etc/openvpn/tun.conf. # point to the peer remote 192.168.8.174 dev tun secret /etc/openvpn/secrouter.key cipher DES-EDE3-CBC auth MD5 tun-mtu 1500 tun-mtu-extra 64 ping 40 ifconfig 192.168.2.173 192.168.4.174 up /etc/openvpn/tun.sh Next, modify the routing table in the /etc/openvpn/tun.sh script file.
-
Page 51: Package Management-Ipkg
UC-8410/8416/8418/8430 Managing Communication Package Management—ipkg ipkg is a very lightweight package management system. It also allows for dynamic installation/removal of packages on a running system. Because the disk space is limited, we provide the software as extension packages. You can use ipkg-cl to install or remove .ipk packages on the UC-8410/8416/8418/8430-LX. Install an .ipk package via an .ipk file Upload the .ipk package to the Moxa embedded computer: 192.168.3.127 –... -
Page 52: Playing A Wave File
UC-8410/8416/8418/8430 Managing Communication Playing a WAVE File vplay: vplay can be used for playing a wave file. It supports playing mono or stereo wave files at a 11025, 22050, or 44100 HZ sampling rate, with 8 or 16 bits. Device File on Linux: /dev/dsp vplay [-qvwrS] [-s speed] [-t seconds] -b bits [filename1 ...] Stereo (default is mono). -
Page 53: Programmer's Guide
Programmer's Guide This chapter includes important information for programmers. The following topics are covered in this chapter: Flash Memory Map Linux Tool Chain Introduction Debugging with GDB Device API RTC (Real Time Clock) Buzzer ... -
Page 54: Flash Memory Map
UC-8410/8416/8418/8430 Programmer's Guide Flash Memory Map Partition sizes are hard coded into the kernel binary. To change partition sizes, you will need to rebuild the kernel. The flash memory map is shown in the following table. Address Size Contents 0x00000000 – 0x0009FFFF 640 KB Boot Loader—Read ONLY 0x000A0000 –... -
Page 55: Debugging With Gdb
UC-8410/8416/8418/8430 Programmer's Guide For toolchain v3.x: #export PATH=“/usr/local/arm-linux-4.4.2/bin:$PATH” #export MANPATH=“/usr/local/arm-linux-4.4.2/man:$MANPATH” Alternatively, you can add the same commands to $HOME/.bash_profile to cause it to take effect for all login sessions initiated by this user. Obtaining help Use the Linux man utility to obtain help on many of the utilities provided by the tool chain. For example to get help on the arm-linux-gcc compiler, issue the command: #man arm-linux-gcc Cross Compiling Applications and Libraries... -
Page 56: Device Api
UC-8410/8416/8418/8430 Programmer's Guide This is where 2000 is the network port number on which the server waits for a connection from the client. This can be any available port number on the target. Following this are the name of the program to be debugged (hello-debug), plus that program’s arguments. -
Page 57: Buzzer
UC-8410/8416/8418/8430 Programmer's Guide Buzzer The device node is located at /dev/console. The UC-8410/8416/8418/8430/8430 supports Linux standard buzzer control, with the UC-8410/8416/8418/8430’s buzzer running at a fixed frequency of 100 Hz. You must include <sys/kd.h>. 1. Function: KDMKTONE ioctl(fd, KDMKTONE, unsigned int arg); Description: The buzzer’s behavior is determined by the argument arg. - Page 58 UC-8410/8416/8418/8430 Programmer's Guide unsigned long time - The time you wish to ack sWatchDog periodically. You must ack the sWatchDog before timeout. If you do not ack, the system will reboot automatically. The minimum time is 50 msec, and the maximum time is 60 seconds. The time unit is msec. Output If you receive 0 (zero), it means the function is working.
- Page 59 UC-8410/8416/8418/8430 Programmer's Guide When you “kill the application with -9” or “kill without option” or “Ctrl+c” the kernel will change to auto ack the sWatchDog. When your application enables the sWatchDog and does not ack, your application may have a logical error, or your application has made a core dump.
-
Page 60: Digital I/O
UC-8410/8416/8418/8430 Programmer's Guide static void stop_swatchdog() stopflag = 1; static void do_swatchdog(void) swtd_enable(swtdfd, 500); while ( stopflag == 0 ) { mydelay(250); swtd_ack(swtdfd); swtd_disable(swtdfd); main(int argc, char *argv[]) pid_t sonpid; signal(SIGUSR1, stop_swatchdog); swtdfd = swtd_open(); if ( swtdfd < 0 ) { printf(“Open sWatchDog device fail !\n”);... - Page 61 UC-8410/8416/8418/8430 Programmer's Guide #define DIO_ERROR_DURATION -4 // The value of duration is not 0 or not in the range, 40 <= duration <= 3600000 milliseconds (1 hour) #define DIO_ERROR_DURATION_20MS -5 // The value of duration must be a multiple of 20 #define DIO_OK 0 The definition of DIN and DOUT: #define DIO_HIGH 1...
- Page 62 UC-8410/8416/8418/8430 Programmer's Guide int get_din_event(int diport, int *mode, long int *duration) Description: To retrieve the DIN event configuration, including mode (DIN_EVENT_HIGH_TO_LOW or DIN_EVENT_LOW_TO_HIGH) , and the value of “duration.” int diport Input: - which DIN port you want to retrieve. - The port whose din event setting we wish to retrieve int *mode - save which event is set.
- Page 63 UC-8410/8416/8418/8430 Programmer's Guide printf(“\nSelect a number of menu, other key to exit. \n\ 1. set high to low event \n\ 2. get now data. \n\ 3. set low to high event \n\ 4. clear event \n\ 5. set high data. \n\ 6.
- Page 64 UC-8410/8416/8418/8430 Programmer's Guide for ( j=0; j<MAX_DOUT_PORT; j++ ) { retval=get_din_event(j, &i, &duration); switch ( i ) { case DIN_EVENT_HIGH_TO_LOW : printf(“(htl,%lu)”, duration); break; case DIN_EVENT_LOW_TO_HIGH : printf(“(lth,%lu)”, duration); break; case DIN_EVENT_CLEAR : printf(“(clr,%lu)”, duration); break; default : printf(“err “ ); break;...
-
Page 65: Uart
UC-8410/8416/8418/8430 Programmer's Guide Note: For the UC-8418, 8 additional digital input channels and 8 additional digital output channels are provided. The port numbers for these go from 4 to 11. UART The normal tty device node is located at /dev/ttyM0 … ttyM7, and the modem tty device node is located at /dev/cum0 …... - Page 66 UC-8410/8416/8418/8430 Programmer's Guide RS-422 RS-485 4-wire The following example sets /dev/ttyM0 to RS-422 mode root@Moxa:/# setinterface /dev/ttyM0 2 root@Moxa:~# setinterface /dev/ttyM0 Now setting is RS422 interface. root@Moxa:~# Example for setting the baudrate #include <moxadevice.h> #include <termios.h> struct termios term; fd, speed; fd = open(“/dev/ttyM0”, O_RDWR);...
-
Page 67: Sram
UC-8410/8416/8418/8430 Programmer's Guide 2. If you use stty to get the serial information, you will get a speed equal to 0. SRAM 1. Introduction The UC-8410/8416/8418/8430/8430 provides 256 KB of embedded SRAM. As there is a system battery inside the computer, the SRAM can work and be used to keep data even when the system is crashed. This means that the data stored on the SRAM will not be lost after the UC-8410/8416/8418/8430/8430 is powered off. -
Page 68: Make File Example
UC-8410/8416/8418/8430 Programmer's Guide /************************************************************** History : Versoin Author Date Comment Jared Wu. 09-11-2008 Read from the SRAM and compare with some pattern. **************************************************************/ #include <sys/types.h> #include <sys/stat.h> #include <stdio.h> #include <stdlib.h> #include <string.h> #include <fcntl.h> #include <linux/kd.h> #define SRAM_SIZE 0x00040000 // 256 Kbytes static char sram_buf1[SRAM_SIZE], sram_buf2[SRAM_SIZE];... -
Page 69: Moxa Can Programming Guide
UC-8410/8416/8418/8430 Programmer's Guide CPP = xscale-linux-gcc SOURCES = hello.c OBJS = $(SOURCES:.c=.o) all: hello hello: $(OBJS) $(CC) -o $@ $^ $(LDFLAGS) $(LIBS) clean: rm -f $(OBJS) hello core *.gdb Moxa CAN Programming Guide Introduction CAN is a broadcast serial bus standard for connecting electronic control units (ECUs). Each node is able to send and receive messages, but not simultaneously: a message (consisting primarily of an ID—usually chosen to identify the message-type/sender—and up to eight message bytes) is transmitted serially onto the bus, one bit after another. - Page 70 UC-8410/8416/8418/8430 Programmer's Guide unsigned char byte3; unsigned char byte4; unsigned char byte5; unsigned char byte6; unsigned char byte7; unsigned char byte8; } byte; } can_data_u; typedef struct user_frame_struct { info; // RTR & extend ID flag #define USER_RTR BIT(0) #define USER_EXTEND_ID BIT(1) data_length;...
-
Page 71: Software Lock
UC-8410/8416/8418/8430 Programmer's Guide i = write(fd1, &txframe, sizeof(txframe)); printf(“Write port1 data return = %d\n”, i); printf(“Write data contexts are following :\n”); for ( i=0; i<MAX_CAN_DATA_LENGTH; i++ ) printf("%c", txframe.data.array[i]); printf("\n"); usleep(1); i = read(fd2, &rxframe, sizeof(rxframe)); printf(“Read port2 data return = %d\n”, i); printf(“Receive frame id = %d, length = %d\n”, rxframe.id, rxframe.data_length);... -
Page 72: Qt-Embedded
UC-8410/8416/8418/8430 Programmer's Guide NOTE: Use the following command to clear the encryption key on the target computer. #setkey ““ 2. Develop and compile your program on the development PC. 3. On the development PC, run the utility program ‘binencryptor’ to encrypt your program with an encryption key. -
Page 73: Compile And Test The Qt Program On An X86 Machine
UC-8410/8416/8418/8430 Programmer's Guide int main(int argc, char *argv[]) QApplication app(argc, argv); QLabel *label = new QLabel("<H1>hello <font color=red>QT</font></H1>"); QWidget window; label->setWindowTitle("Hello"); label->setAlignment(Qt::AlignCenter); label->resize(200,100); label->show(); window.resize(320, 240); window.show(); window.setWindowTitle( QApplication::translate("toplevel", "Top-level widget")); return app.exec(); Compile and Test the QT Program on an X86 Machine •... -
Page 74: Upload The Binary To Target And Run It With Following Command
UC-8410/8416/8418/8430 Programmer's Guide To cross compile: Debian:~# make Upload the binary to target and run it with following command Run the Qt application with assigned input and VGA output: root@Moxa:/tmp# export QWS_MOUSE_PROTO=IntelliMouse:/dev/input/mouse0 ; root@Moxa:/tmp# ./hello -qws -geometry 1024x768 -display voyagerlib:/dev/fb0 & You can also run the second Qt application on another VGA output: root@Moxa:/tmp# export QWS_MOUSE_PROTO=IntelliMouse:/dev/input/mouse1 ;... -
Page 75: Firmware Upgrade Procedure
Firmware Upgrade Procedure Moxa provides a boot loader utility for firmware upgrade or recovery. You will need the following items to use this utility. 1. The embedded computer that you would like to upgrade or recover. 2. A PC or a laptop computer. 3. - Page 76 UC-8410/8416/8418/8430 Firmware Upgrade Procedure 3. Connect your embedded computer to the power source. The power input is located on the rear panel. 4. Launch a serial communication tool to access your embedded computer. We suggest that you use HyperTerminal, which is built into Windows XP. Click Start Programs Accessories Communications and then select HyperTerminal.
- Page 77 UC-8410/8416/8418/8430 Firmware Upgrade Procedure 7. Select File Properties from the main HyperTerminal screen. 8. You can change the COM port number in the Properties window. Click Configure for additional configuration options. 9. Configure the Port Settings with following parameters: •...
- Page 78 UC-8410/8416/8418/8430 Firmware Upgrade Procedure 10. Click the Settings tab and then select VT100 (for Emulation). Click OK to complete the configuration. B. Download and Installation of the TFTP Program 1. You will need to download a free TFTP server package to upgrade the firmware for the boot loader utility. Link to the following URL to download: ftp://papa.indstate.edu/ Download the TFTP program located in the following path:...
- Page 79 UC-8410/8416/8418/8430 Firmware Upgrade Procedure C. Download and Upgrade the Firmware through HyperTerminal. 1. Connect to Moxa’s website at http://www.moxa.com, and then select Software from the Support drop-down menu. 2. Under Search for Software, select the product line and then choose the specific product model. Click on Search to continue.
- Page 80 UC-8410/8416/8418/8430 Firmware Upgrade Procedure 3. In the software list, select the firmware for your model. Choose the appropriate OS and then click the download icon to start downloading the new firmware. Note: Check the filename, it may differ from the filename shown below. 4.
- Page 81 UC-8410/8416/8418/8430 Firmware Upgrade Procedure 6. Press and hold down the DEL key on your PC and power on the embedded computer at the same time. You will be guided to the boot loader utility menu, as show below. 1. In the boot loader utility, select [0] Network Configuration, and then [0] Change IP Setting to configure IP addresses.
- Page 82 UC-8410/8416/8418/8430 Firmware Upgrade Procedure 2. You will need to enter the IP address of the embedded computer and your PC. Follow the below to configure the IP addresses. a. From Start Settings, select Network Connections. b. Right-click on Local Area Connection, and then select Properties.
- Page 83 UC-8410/8416/8418/8430 Firmware Upgrade Procedure c. Click the General tab and select Internet Protocol (TCP/IP), and then click on Properties. d. Next, select Use the following IP address and enter the IP address and Subnet mask. For example: IP address: 192.168.1.1 (This IP address is only an example; you may assign any IP address of your choice as long as it’s on the same LAN as your PC.) Subnet mask: 255.255.255.0...
- Page 84 UC-8410/8416/8418/8430 Firmware Upgrade Procedure 3. Go back to the boot load utility menu and assign the local IP address, and then enter the server IP address. The local IP address is the IP address of the embedded computer. Note that the local IP address must be on the same LAN as the server IP address.
- Page 85 UC-8410/8416/8418/8430 Firmware Upgrade Procedure 5. To start the TFPF server, double-click on the tftpd32 icon to launch the TFTP server. 6. When the TFTP server has been launched, the following screen will appear. A-11...
- Page 86 UC-8410/8416/8418/8430 Firmware Upgrade Procedure 7. Go back to the boot loader utility menu and enter the file name of the firmware image. 8. The firmware upgrade will then start to run. 9. It will take several minutes for the firmware files to be written to your embedded computer. Do not power off your computer! A-12...
- Page 87 UC-8410/8416/8418/8430 Firmware Upgrade Procedure 10. When you see Update OK, the firmware upgrade is finished. At this point, you may reboot the embedded computer to complete the firmware upgrade or recovery from the boot loader utility. 11. If you cannot reboot your embedded computer (after following all the steps above), contact Moxa’s technical support staff for further assistance.
-
Page 88: System Commands
System Commands Linux Normal Command Utility Collection File Manager copy file list file make symbolic link file mount mount and check file system delete file chmod change file owner & group & user chown change file owner chgrp change file group chroot runs a command with a specified root directory. -
Page 89: Network
UC-8410/8416/8418/8430 System Commands pattern-directed scanning and processing language expand Converts all tabs to spaces tail Print the last 10 lines of each FILE to standard output. The GNU version of the tar archiving utility Translate, squeeze, and/or delete characters Print byte, word, and line counts, count the number of bytes, whitespace-separated words, and newlines in each given FILE, or standard input if non are given or for a FILE of ‘-’. -
Page 90: Special Moxa Utilities
UC-8410/8416/8418/8430 System Commands halt halt the server estimate file space usage gzip, gunzip compress or expand files hostname show system’s host namebasename return filename or directory portion of pathname dirname Convert a full pathname to just a path expr evaluate arguments as an expression false Do nothing, returning a non-zero (false) exit status true...
Need help?
Do you have a question about the UC-8410-LX and is the answer not in the manual?
Questions and answers