Table of Contents
Advertisement
Quick Links
Technical Support and E-Warranty Certificate www.vevor.com/support
HAND BENDING
OPERATION MANUAL
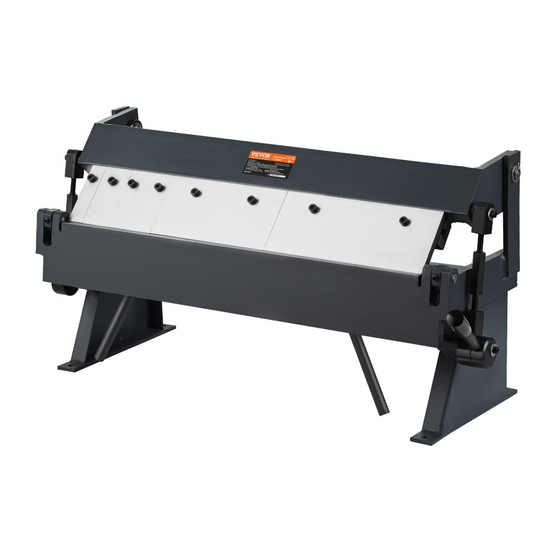
MODEL:W-1.0X610A
We continue to be committed to provide you tools with competitive price.
"Save Half", "Half Price" or any other similar expressions used by us only represents an
estimate of savings you might benefit from buying certain tools with us compared to the major
top brands and doses not necessarily mean to cover all categories of tools offered by us. You
are kindly reminded to verify carefully when you are placing an order with us if you are
actually saving half in comparison with the top major brands.
Advertisement
Table of Contents

Related Manuals for VEVOR W-1.0X610A


Summary of Contents for VEVOR W-1.0X610A
- Page 1 Technical Support and E-Warranty Certificate www.vevor.com/support HAND BENDING OPERATION MANUAL MODEL:W-1.0X610A We continue to be committed to provide you tools with competitive price. "Save Half", "Half Price" or any other similar expressions used by us only represents an estimate of savings you might benefit from buying certain tools with us compared to the major top brands and doses not necessarily mean to cover all categories of tools offered by us.
- Page 3 This is the original instruction, please read all manual instructions carefully before operating. VEVOR reserves a clear interpretation of our user manual. The appearance of the product shall be subject to the product you received. Please forgive us that we won't inform you again if there are any technology or software updates on our product.
-
Page 4: Specifications
Unpacking The Pan & Box Brake is shipped from the manufacturer in a carefully packed plywood case. Thoroughly inspect the product upon opening the package. After unpacking the unit,carefully inspect for any damage that may have occurred during transit . Check for loose, missing, or damaged parts. Immediately report missing parts to dealer. -
Page 5: General Safety Information
invoice number on the inside of front cover. Keep the instructions and invoice in a safe, dry place for future reference. General Safety Information CAUTION For your own safety, read all of the instructions and precautions before operating tool. SAFETY RULES 1. - Page 6 a purpose for which it was not intended. 2.Do not force tool. Your machine will do a better and safer job if used as intended. DO NOT use inappropriate attachments in an attempt to exceed the machines rated capacity. 3 . Overloading machine. By overloading the machine you may cause injury from flying parts.
- Page 7 Follow manufacturer’s label instructions when using any type of cleaning product. After cleaning, wipe unpainted metal surfaces with a light coating of quality oil or grease for protection. WARNING DO NOT USE gasoline or other petroleum products to clean the machine. They have low flash points and can explode or cause fire.
-
Page 8: Anchoring The Machine
that they will not extend into any aisles. Before beginning assembly, take note of the following precautions and suggestions. 1. Is the machine bolted to the pallet? Before attempting any of the assembly procedures remove all of the loose parts and hardware and unbolt the machine from the pallet. -
Page 9: Attaching The Counterweight
Attaching the Counterweight 1 . Have a helper hold the counterweight. 2. Back off the two hex bolts and slide the counterweight rod into the receiver pipe. 3. When the rod is flush with the bottom of the receiver, tighten the hex bolts.(Pic.2) NOTE DO NOT use the counterweight handle to raise the bending leaf. - Page 10 Adjusting the Setback Setback is the distance from the front edge of the finger to the front edge of the clamp block as shown in picture. This distance is determined by the gauge (thickness) of the piece part and inside radius of the bend . The setback is typically 1- 1/2-2 times the material thickness.
- Page 11 Adjusting the Clamping Pressure CAUTION 1.Excessive clamping pressure can“pre-load”and permanently distort the brake. 2.DO NOT bend material heavier than the rated capacity,even in shorter lengths. 3.Use material with square-sheared edges.(a rolled edge will cause bowing). 4.Bending a round object will warp or nick the clamp edge. 5.Adjust the clamp pressure accordingly for different metal gauges.
- Page 12 this thickness piece part . (When changing thickness it may become necessary to adjust again.) 2. Remove the piece part from under the clamping leaf, lock down the leaf with the handles, and loosen pressure on the top nut. 3. Unlock the clamping leaf and turn the bottom nut ½ turn in the desired direction.
-
Page 13: Operation
under bent,decrease the setback distance on that side.Again,move the setback adjustment past the desired set back point,and then forward to remove the slack. Bending Wing Alignment Bending accuracy is dependent on the top surface of the bending leaf and the attached bending wing being flush with the top face of the clamping block when the bending leaf is in the lowered position.If it appears that an adjustment is necessary,contact service team local,or manufacture. -
Page 14: Bending Allowance
Bending Sheet Metal 1. Lift and rotate the clamping handle (cw) clockwise to raise the clamping assembly. 2. Insert the piece part between the clamp block and the brake fingers. 3. Align the fingers of the hold down assembly to the scribed bend line of the piece part and clamp in place by pulling the clamp handle back. -
Page 15: Material Selection
return slightly to its original shape . The key to obtaining the correct bend angle is to over bend the metal a little and allow it to spring back to the desired angle . All metals exhibit a certain amount of spring back. MATERIAL SELECTION CAUTION It must be determined by the customer that materials being processed... -
Page 16: Troubleshooting
3.On a weekly basis clean the machine and the area around it. 4.Lubricate threaded components and sliding devices. 5.Apply rust inhibitive lubricant to all non-painted surfaces. Oil Ports Using an oil can with a good quality #30W oil,apply 5-6 drops into each of the ports on both ends of the machine.Repeat weekly or more often depending on usage.Wipe off any excess oil. - Page 17 Do not bend material 1. Exceeding the bending thicker than the machine BENDING LEAF limits of the brake. was designed for. HARD TO LIFT 2. Counterweight is not on Attach the counterweight AND BEND. leaf. to lessen force needed to lift bending leaf.
- Page 18 - 16 -...
- Page 19 Ref. Description QTY. Ref. Description QTY. Nut M18 Clamp Plate 34mm Left Eccentric Frame Handle Big Washer Case Left Connecting Shaft Ring Φ18 Washer Shaft Spacer Bush Shaft Cotter Pin φ4X25 Cotter Pin φ5X25 Pin φ16X70 Hex. Bolt M10X35 Eccentric Shaft Flat Gasket Φ10 Set Screw M8X8 Counterweight...
- Page 20 Technical Support and E-Warranty Certificate www.vevor.com/support...
Need help?
Do you have a question about the W-1.0X610A and is the answer not in the manual?
Questions and answers
I'm having trouble adjusting the Vevor hand bending tool. The finger separation across the width is not uniform and the finger set back interacts with the separation. WHAT ARE THE PROPER STEPS FOR ADJUSTING THE MACHINE?