Table of Contents
Advertisement
Quick Links
Advertisement
Table of Contents

Related Manuals for AC Infinity CLOUDLAB Series


Summary of Contents for AC Infinity CLOUDLAB Series
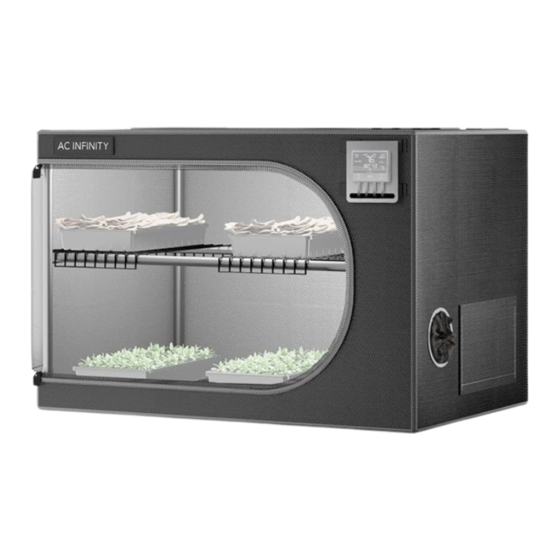
- Page 1 CLOUDLAB SERIES ADVANCE PROPAGATION TENT USER MANUAL USER MANUAL...
- Page 3 WELCOME Thank you for choosing AC Infinity. We are committed to product quality and friendly customer service. If you have any questions or suggestions, please don’t hesitate to contact us. Visit www.acinfinity.com and click contact for our contact information. EMAIL LOCATION support@acinfinity.com...
- Page 4 MANUAL CODE CBK2311X1 PRODUCT MODEL UPC-A Advance Propagation Tent AC-CBK322 819137024588...
-
Page 5: Table Of Contents
Key Features ................. Page 7 Product Contents ................Page 8 Installation ..................Page 9 Configurations ................Page 17 Controller Plate Setup ..............Page 21 Mounting Guide ................Page 22 Other AC Infinity Products ............. Page 23 Warranty ..................Page 24... -
Page 6: Product Warning
PRODUCT WARNING TO REDUCE THE RISK OF INJURY TO PERSONS OR DAMAGE TO PRODUCTS, OBSERVE THE FOLLOWING: Read all instructions before installing and using this product. Mounting bars will not support the weight of LED grow lights or heavy ventilation equipment. Safety precautions should be exercised during the installation, operation, and maintenance of this product. -
Page 7: Key Features
KEY FEATURES HEAVY-DUTY CANVAS CONVENIENT VIEWING MULTIPURPOSE DESIGN 2000D mylar canvas blocks Clear and easy-to-adjust Versatile frame features light from leaking through windows allow you to observe multiple shelving and device while intensifying reflectivity your growing plants without mounting options to best fit and locking in humidity. -
Page 8: Product Contents
PRODUCT CONTENTS PROPAGATION 24 x 24 IN. 24 x 36 IN. SHELF TENT CATCH TRAY CATCH TRAY RACK (x1) (x1) (x1) (x2) CONTROLLER FLAT-HEAD P-HEAD M3 HEX M5 HEX HOOK-AND- ADHESIVE PLATE SCREW SCREW SCREW LOOP PAD SILICONE PAD (x1) (x4) (x4) (x9) -
Page 9: Installation
INSTALLATION TENT ASSEMBLY STEP 1 Insert two (A1) and two (A3) poles into the (D1) corner pieces, with the (A1) and (A3) poles perpendicular to each other, as shown here. Repeat this step to create both bases. When assembling your propagation tent, make sure the feet of each corner (D1) piece faces the floor with the arrow facing down. - Page 10 INSTALLATION TENT ASSEMBLY STEP 3 DOOR Unzip the tent so that three of the walls lay flat. BASE ROOF STEP 4 Guide the frame into the floor of the tent, making sure its corners meet the tent’s corners.
- Page 11 INSTALLATION TENT ASSEMBLY STEP 5 Pull the roof over the assembled frame. STEP 6 Pull the upper and lower zippers to close the walls and door.
- Page 12 INSTALLATION TENT ASSEMBLY STEP 7 You can neatly hold the window wall open any time by using its attached hook-and-loop strap. STEP 8 Insert the catch tray and secure the hook-and- loop straps around the poles. Line the tent floor with the appropriate catch tray for the orientation you choose.
- Page 13 INSTALLATION MOUNTING BARS PRE-INSTALLATION You may use the included mounting bars to customize your propagation tent and fit your desired application. Remove the tent walls before installing the mounting bars. STEP 1 Place the adhesive silicone pads at the ends of each mounting bar, matching the correct size pads on both sides so that it fits snug on the propagation tent poles.
- Page 14 INSTALLATION MOUNTING BARS STEP 2 Route the hook-and-loop straps through the bar opening located at its ends, making sure the buckle is outside and the padded side is inside. This strap can loop around up to two bar openings. STEP 3 Wrap the hook-and-loop strap around the propagation tent pole and route it through its buckle.
- Page 15 INSTALLATION MOUNTING BARS STEP 4 Open the support clamp around the bar. STEP 5 Tighten and secure the clamp with the nut and screw so that its flat side is parallel to your propagation tent's walls.
- Page 16 INSTALLATION MOUNTING BARS STANDARD ORIENTATION The standard orientation will prevent your propagation tent from bowing. This configuration can also be used as a support system that allows elastic trellis nets to hook onto the side bars. SUPPORT ORIENTATION The support orientation will provide general use support throughout your propagation tent.
-
Page 17: Configurations
CONFIGURATIONS HORIZONTAL ORIENTATION STEP 1 Install two 3 ft. mounting bars against the front and back walls. You may install 2 ft. mounting bars onto the roof to support your desired lighting fixtures. STEP 2 Place shelf racks onto the 3 ft. mounting bars as desired. - Page 18 CONFIGURATIONS VERTICAL ORIENTATION STEP 1 Install the four 2 ft. mounting bars onto the side walls. You may install additional 2 ft. mounting bars (sold separately) above this setup to create another level of shelving. STEP 2 Place shelf racks onto the 2 ft. mounting bars as desired.
- Page 19 CONFIGURATIONS GROW TENT ORIENTATION STEP 1 Install two 2 ft. mounting bars onto the side walls. STEP 2 Place shelf racks onto the 2 ft. mounting bars as desired. You may place humidity domes and/or seedling mats on these shelf racks and utilize the space below them to house plants.
- Page 20 CONFIGURATIONS GROW TENT ORIENTATION (ALTERNATIVE) STEP 1 Install the four 2 ft. mounting bars onto the side walls, back wall, and roof. You may use the mounting bars to support grow equipment as needed. You may use this configuration to house larger plants.
-
Page 21: Controller Plate Setup
CONTROLLER PLATE SETUP STEP 1 Mount your controller onto the included controller plate. Use the included screws to mount an AC Infinity controller. Use the controller adhesive to attach a non-AC Infinity controller. STEP 2 Route your devices’ power connectors through the opening inside and plug them into your controller. -
Page 22: Mounting Guide
MOUNTING GUIDE HARDWARE MOUNTING Screw the bolts into the slot or mounting holes at the upper half of the plate. Hang your controller by the bolts using the holes on the backside. MAGNET MOUNTING You may also magnetically mount your controller onto the steel plate if it has a magnet located behind its label. -
Page 23: Other Ac Infinity Products
WARRANTY This warranty program is our commitment to you, the product sold by AC Infinity will be free from defects in manufacturing for a period of two years from the date of purchase. If a product is found to have a defect in material or workmanship, we will take the appropriate actions defined in this warranty to resolve any issues. - Page 24 AC INFINITY PRODUCTS Advance Grow Tents The CLOUDLAB series is a line of grow tents designed to create ideal growing conditions and facilitate indoor plant cultivation year-round. Features 2000D thick Oxford canvas lined with inner diamond patterned mylar that maximizes grow light luminosity, and a reinforced frame with 150 lb.
- Page 25 No part of the materials including graphics or logos available in this booklet may be copied, photocopied, reproduced, translated or reduced to any electronic medium or machine readable form, in whole or in part, without specific permission from AC Infinity Inc.
- Page 28 www.acinfinity.com...
Need help?
Do you have a question about the CLOUDLAB Series and is the answer not in the manual?
Questions and answers