Advertisement
Advertisement

Related Manuals for AC Infinity CLOUDLAB Series


Summary of Contents for AC Infinity CLOUDLAB Series
- Page 1 CLOUDLAB SERIES HEAVY-DUTY GROW TENT USER MANUAL...
- Page 3 WELCOME Thank you for choosing AC Infinity. We are committed to product quality and friendly customer service. If you have any questions or suggestions, please don’t hesitate to contact us. Visit www.acinfinity.com and click contact for our contact information. EMAIL LOCATION support@acinfinity.com...
- Page 4 MANUAL CODE CL2010X1 PRODUCT MODEL UPC-A CLOUDLAB 422 AC-CBA422 819137021532 CLOUDLAB 632 AC-CBA632 819137021556 CLOUDLAB 642 AC-CBA642 819137021549 CLOUDLAB 733 AC-CBA733 819137021563 CLOUDLAB 844 AC-CBA844 819137021570 CLOUDLAB 866 AC-CBA866 819137021587...
-
Page 5: Table Of Contents
................. Page 5 Key Features ................. Page 6 Product Contents ................Page 7 Tent Set Up ..................Page 9 Mounting Guide ................Page 15 Ventilation Guide ................Page 16 Other AC Infinity Products ............. Page 17 Warranty ..................Page 18... -
Page 6: Key Features
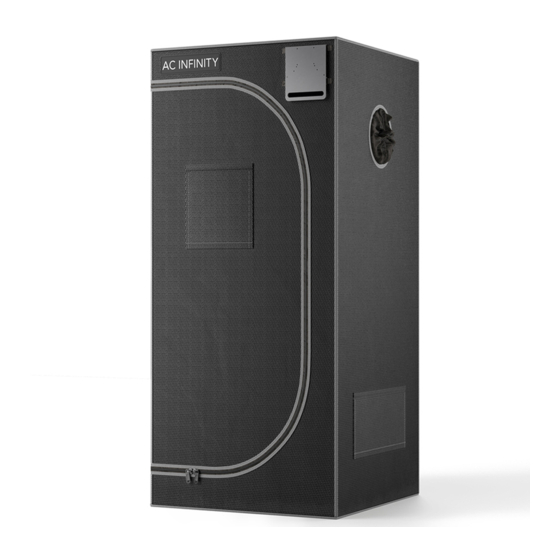
KEY FEATURES VIEWING WINDOW HIGH-DENSITY CANVAS CONTROLLER PLATE Clear and adjustable window Mylar canvas with 2000D density Aluminum plate designed to mount offers you a snapshot of the rating to be 100% external light- fan and lighting controllers. Their interior without compromising cords can enter the tent securely proof. -
Page 7: Product Contents
PRODUCT CONTENTS CLOUDLAB SERIES Included in all series CANVAS STORAGE SPILL FILTER CONTROLLER CONTROLLER INNER FLAP TENT TRAY STRAPS SCREWS VELCRO VELCRO (x1) (x1) (x1) (x2) (x10) (x6) (x2) CLOUDLAB SERIES Included only with AC-CBA844 CLOUDLAB 844 AC-CBA866 CLOUDLAB 866... - Page 8 PRODUCT CONTENTS CLOUDLAB SERIES Included only with CLOUDLAB 422 AC-CBA422 AC-CBA733 CLOUDLAB 733 CONTROLLER x8 x4 x4 PLATE (*SHORT) FRAME POLES (x1) CLOUDLAB SERIES Included only with AC-CBA632 CLOUDLAB 632 CONTROLLER x4 x4 PLATE (*SHORT) (x1) FRAME POLES CLOUDLAB SERIES...
-
Page 9: Tent Setup
TENT SETUP STEP 1 Insert the eight (A) poles into the floor end of the corner (D) pieces to create two bases. A / A1 When assembling, make sure the feet of each corner (D) piece faces the floor with the arrow facing down. - Page 10 TENT SETUP STEP 3 Unzip the tent so that three of the walls lay flat. Door Roof Bottom STEP 4 Guide Base One into the floor of the tent, making sure its corners meet the tent’s corners. Base One Bottom...
- Page 11 TENT SETUP Base Two STEP 5 Insert the poles of Base Two into the poles of Base One to complete the frame. *Two people is recommended for this portion of the tent assembly. Base One STEP 6 Pull the roof over the assembled frame. *Two people is recommended for this portion of the tent assembly.
- Page 12 TENT SETUP STEP 7 Pull the upper and lower zippers to close the walls and door. *Two people is recommended for this portion of the tent assembly. STEP 8 You can neatly hold the window wall open any time by using its attached Velcro strap.
- Page 13 STEP 10 Mount your controller onto the included bracket. Use the included screws to mount an AC Infinity controller. Use the Velcro adhesive to attach a non-AC Infinity controller. Refer to page 15 for mounting locations of your controller.
- Page 14 TENT SETUP STEP 11 Slide the controller bracket assembly into the tent straps below the logo. STEP 12 Route your inline duct fan’s power connector through the opening inside and plug it into your controller. Plug the probe into the controller and route its cables through the opening.
-
Page 15: Mounting Guide
Mount your controller to the corresponding holes on the bracket. Route its wires through the oval opening and through the grow tent’s flap. To attach non-AC Infinity controllers, use the included Velcro adhesive to hold it onto the bracket. ONLY INCLUDED WITH... -
Page 16: Ventilation Guide
VENTILATION GUIDE INLINE FAN AND GROW LIGHT First hang your inline duct fan by the roof support beams. Position the fan on the opposite end of your intake hole to optimize airflow. If you are installing a carbon filter inside, use the included straps to hang the carbon filter. -
Page 17: Other Ac Infinity Products
AC INFINITY PRODUCTS Inline Fans The CLOUDLINE series is a line of duct fans designed to quietly ventilate AV rooms and closets, as well as various DIY air circulation and exhaust projects. Features a thermal controller with intelligent programming that will automatically adjust duct fan speeds in response to changing temperatures. -
Page 18: Warranty
WARRANTY This warranty program is our commitment to you, the product sold by AC Infinity will be free from defects in manufacturing for a period of two years from the date of purchase. If a product is found to have a defect in material or workmanship, we will take the appropriate actions defined in this warranty to resolve any issues. - Page 20 COPYRIGHT © 2020 AC INFINITY INC. ALL RIGHTS RESERVED No part of the materials including graphics or logos available in this booklet may be copied, photocopied, reproduced, translated or reduced to any electronic medium or machine readable form, in whole or in part,...
- Page 24 www.acinfinity.com...
Need help?
Do you have a question about the CLOUDLAB Series and is the answer not in the manual?
Questions and answers
Looking for 4x8 frame set up instructions
1. Insert the eight (A) poles into the floor end of the corner (D) pieces to create two bases.
2. Ensure the feet of each corner (D) piece face the floor with the arrow pointing correctly.
This answer is automatically generated