Table of Contents
Advertisement
Quick Links
REF TEK 151D Broadband
Seismometer Users Guide
This REF TEK manual provides installation and basic operating procedures for the
151D Seismometer and its related products. Guidelines for initial installation with
and without thermal cover are also provided.
Reftek Systems Inc.
75 MacDonald Ave, Unit 1
Dartmouth, NS B3B 1T6
Canada
Phone: 1-902-444-0539
Email: support@reftek.com
www.reftek.com
151D-UG
Rev A
12/4/2023
Advertisement
Table of Contents

Related Manuals for Reftek 151D


Summary of Contents for Reftek 151D
- Page 1 Rev A 12/4/2023 This REF TEK manual provides installation and basic operating procedures for the 151D Seismometer and its related products. Guidelines for initial installation with and without thermal cover are also provided. Reftek Systems Inc. 75 MacDonald Ave, Unit 1...
- Page 2 Rev A REF TEK 151D Broadband Seismometer Users Guide 12/4/2023 151D-UG Revision History: Revision Date Reason for change Pages 2023.12.04 Initial Release Copyright© 2023 Reftek Systems Inc. All rights are reserved. No part of this manual may be reproduced, copied or transmitted in any form outside the approved recipient’s organization without written permission from Reftek Systems Inc.
- Page 3 Rev A REF TEK 151D Broadband Seismometer Users Guide 12/4/2023 151D-UG REF TEK Support and update notifications As a valued user of REF TEK equipment we would like to provide the best support possible by keeping you up to date with our product updates.
-
Page 4: Table Of Contents
Checklist for environment .......................... 4 Site Preparation ............................5 Unpack ................................ 6 Installation ..........................7 Move and position the REF TEK 151D ......................7 Level and Power-Up ........................9 Level ................................9 Install the Optional REF TEK Thermal Cover ................10 Configuring the DAS and Start Up Procedure ................ -
Page 5: General Description
Z-N-E outputs. The 151D incorporates the following functions: control, power-conversion and feedback. The 151D offers low self-noise, large dynamic range, good stability and quick installation as well as easy to use features. The main characteristics of the 151D are as follows: •... -
Page 6: Specifications
Rev A REF TEK 151D Broadband Seismometer Users Guide 12/4/2023 151D-UG 1.2 Specifications Item Specifications Sensor Type Symmetrical Tri-axial Feedback Force balance with capacitive displacement transducer Frequency Response 120 sec — 80 Hz (Flat to ground velocity) /m/s Sensitivity 2000 V (Differential output) ±... -
Page 7: Leveling And Orientation Controls
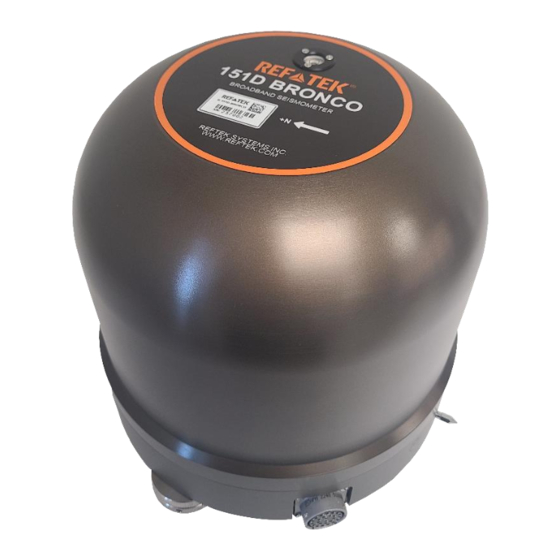
REF TEK 151D Broadband Seismometer Users Guide 12/4/2023 151D-UG 1.3 Leveling and Orientation Controls Setup and adjustment is provided through controls on the outside of the unit. These controls allow leveling and orientation of the 151D. Bubble Level Top Orientation Marker Leveling feet (x3) -
Page 8: 151D Pre-Installation
REF TEK 151D Broadband Seismometer Users Guide 12/4/2023 151D-UG 2 151D Pre-Installation The frequency response of the 151D-120 is 0.00833 (120 sec) ~ 80 Hz. The working environment should meet the requirements for accurate observation of mid and long period seismic waves. 2.1 151 Kit Contents... -
Page 9: Site Preparation
The 151D seismometer should be installed so that it is aligned and orientated North to South. To facilitate this, it is recommended that the user mark a permanent (or semi-permanent) scribe line onto the mounting surface before installing the 151D. -
Page 10: Unpack
12/4/2023 151D-UG 2.4 Unpack The 151D is shipped from REF TEK in a reusable insulated shipping container with seismometer case. The 151D comes in the Vertical position with the masses locked. It is ready for use so adjustment should not be necessary*. -
Page 11: Installation
Figures 3-2 and the North arrow on the top of the 151D (See Figure 3-4). 4. Make sure that the 151D is secure. The 3 Adjustable Feet should not shift or rock relative to the installation surface. - Page 12 Rev A REF TEK 151D Broadband Seismometer Users Guide 12/4/2023 151D-UG 3-3 N IGURE ORTH RROW Reftek Systems Inc.
-
Page 13: Level And Power-Up
Note: Very small changes in levels can greatly affect the mass position of the seismometer. Locknut Ring 3. Verify the leveling does not change when the locknut rings are tightened. 4. Wait at least for 2 hours for the 151D to adjust to the surrounding temperature before powering up. Reftek Systems Inc. -
Page 14: Install The Optional Ref Tek Thermal Cover
151D connector. Reference Figure 5-1. 4. Align and position the cover’s slots with the orientation pins. 5. Make sure that the 151D is secure. The 3 Adjustable Feet should not shift relative to the installation surface. Check the orientation and bubble levels to be ensuring the 151D has not shifted. -
Page 15: Configuring The Das And Start Up Procedure
1. Connect the seismometer cable to the 151D. 2. Connect the other end of the seismometer cable to the digitizer (DAS). Note: Do not connect the 151D with an improper cable. Do not apply voltage beyond rated values to any inputs. -
Page 16: Check Mass Positions
(one for each component) and center the mass for each component. This process can take several minutes and up to 20 minutes. During this time, the 151D is in a short period (1 second) mode. See section 9-1 for more technical information on the mass centering process. -
Page 17: Mass Position Troubleshooting
12V as well, this also typically requires a mass recenter. Issue a manual Mass Recenter from the Control>Sensor menu for the Channels the 151D is connected to. Click Mass Recenter. The WebUI of the Wrangler should confirm the command is sent. The recentering procedure can take 20 minutes. -
Page 18: Check On Data Output/Sensor Operation
The Monitor page of the Wrangler WebUI can be used to check the 151D operation. 1. Click on the Monitor button and select the stream activated to record the 151D. 2. Wait for the data image to display . Note: The display shows the Midpoint of the data and the peak-to-peak Range of the data in counts Reftek Systems Inc. -
Page 19: Pin-Out
Rev A REF TEK 151D Broadband Seismometer Users Guide 12/4/2023 151D-UG 7 Pin-Out The 151D connector is the FL-570125-26S. The standard 151D cable is the which is meant to connect the 151D to a 180-Wrangler. The R-180-C021-XX 7-1 C IGURE... -
Page 20: Technical Reference
If the timeout is reached and the centering process is not completed the 151D will stop the process and the seismometer will be switched back to its long period mode, even if all the components have not been centered. In this case, the user may need to initiate another centering process (See Section 6.2.2 for user-initiated centering). -
Page 21: Calibration
151D-UG 8.2 Calibration Three in-series calibration coils, one for each component of the 151D, are used to examine or test its response. The calibration input signal is isolated from the seismometer calibration coil by a relay that is switched on while the Cal Enable Pin is activated. - Page 22 Manual Calibrate to send the signal. If the signal is active the Channel Status will read Calibrating (Manual). The 151D upon receiving the calibration signal will switch to UVW output mode automatically. This can appear as a shift in the data.
-
Page 23: Step Pulse Calibration Example
5.49 Note: Values 10 (Cal Sensitivity) and 2000 (Output Voltage Sensitivity) should be taken from the 151D Seismometer Data Sheet The 180 Wrangler recorder can be used to generate a step signal for confirmation. This can be accomplished in the WebUI through the Parameters>Sensor Calibration Signal menu. - Page 24 Manual Calibrate to send the signal. If the signal is active the Channel Status will read Calibrating (Manual). The 151D upon receiving the calibration signal will switch to UVW output mode automatically. This can appear as a shift in the data.
- Page 25 Rev A REF TEK 151D Broadband Seismometer Users Guide 12/4/2023 151D-UG Reftek Systems Inc.
-
Page 26: 151D Characteristics
REF TEK 151D Broadband Seismometer Users Guide 12/4/2023 151D-UG 9 151D Characteristics 9.1 151D-120 Transfer Function The sensitivity of each 151D-120 is based on the test data chart in the product package. The transfer function is as follows: �� �� ∙ ��... -
Page 27: Characteristic Curves
151D-UG 9.2 Characteristic curves The following figures show the Magnitude-frequency and Phase-frequency characteristic curves of the 151D, in which the horizontal axial unit is Hz, while the vertical ones are V/(m/s) and deg respectively. The transfer Function in the low frequency is consistent with that of traditional velocity- output seismometers which have 120 second natural periods and a 0.707... -
Page 28: Packing And Transportation
2. Disconnect the cable ((R-180-C021-XX) from the 151D. 3. Remove the optional cover. 4. Before moving the 151D over a long distance be sure to pack the seismometer in the provided shock-absorbing shipping container. 5. Do not place the 151D package on its side or upside-down when shipping. -
Page 29: Warranty Statement
Rev A REF TEK 151D Broadband Seismometer Users Guide 12/4/2023 151D-UG 10.1 Warranty Statement REF TEK instruments are warranted free from defects of manufacture for one year from date of shipment. For the full text covering the Product Limited Warranty, Warranty Remedies,... -
Page 30: Static Sensitive Device Protection
Rev A REF TEK 151D Broadband Seismometer Users Guide 12/4/2023 151D-UG 10.3 Static sensitive device protection WARNING: All REF TEK circuit boards are Static Sensitive and appropriate handling is required to protect each board from damage due Static discharge. 1. Please ensure that when handling REF TEK circuit boards, the handler and the work bench are grounded. - Page 31 Reftek Systems Inc. 75 MacDonald Avenue, Unit 1 Dartmouth, NS B3B 1T8 CANADA Support Phone: 1-902-444-0539 Email: support@reftek.com www.reftek.com...
Need help?
Do you have a question about the 151D and is the answer not in the manual?
Questions and answers