Advertisement
Quick Links
Advertisement

Subscribe to Our Youtube Channel
Related Manuals for VABCHES D8L241HS03


Summary of Contents for VABCHES D8L241HS03
- Page 1 D8L241HS03 WhatsApp community↑ service@vabchesofficial.com 1/16...
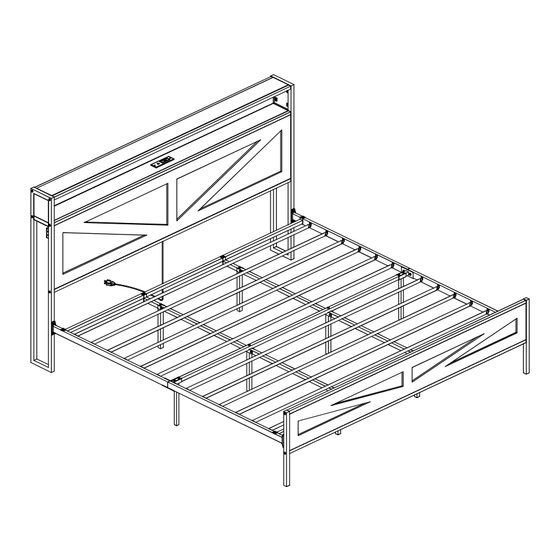
- Page 2 2/16...
-
Page 3: Parts Identification
Parts Identification Not actual size x 12 3/16... - Page 4 Parts Identification Not actual size 4/16...
-
Page 5: Hardware List
Hardware List BOLT BOLT BOLT BOLT SCREW BOLT WIRE CLIP Plastic buckle LED STRIP CLIP S ALLEN KEY ALLEN KEY SOCKET MODE SPEED DEMO SPEED MODE COLOR BRIGHT COLOR BRIGHT RF Wireless 5/16... - Page 6 STEP 1 Pls do not tighten all bolts until the bed is assembled completely 1/4" x 50mm STEP 2 1/4" x 13mm x 10 6/16...
- Page 7 STEP 3 Front Please pay attention to the direction 1/4" x 50mm of the metal bolt plate. STEP 4 7/16...
- Page 8 STEP 5 STEP 6 8/16...
- Page 9 STEP 7 MODE SPEED SPEED DEMO MODE COLOR BRIGHT COLOR BRIGHT RF Wireless Stick LED strip underneath THE ENDS OF LAMP BELT SUGGESTED TO BE Ø3.5 x 15mm REINFORCED BY THE EXTRA CLIPS STEP 8 The LED switch is free to put onto the board or hidden underneath the board.
- Page 10 STEP 9 WIRE CLIP STEP 10 10/16...
- Page 11 STEP 11 STEP 12 11/16...
- Page 12 STEP 13 STEP 14 1/4" x 13mm 12/16...
- Page 13 STEP 15 STEP 16 13/16...
- Page 14 STEP 17 Expand the folded portion STEP 18 14/16...
- Page 15 STEP 19 15/16...
- Page 16 STEP 21 K x12 Assemble the slats 3.Put the plastic clamp(L) into the 4.Press tight the upper part of lower part of hole on 45 degree. clamp to fix its position. 16/16...
Need help?
Do you have a question about the D8L241HS03 and is the answer not in the manual?
Questions and answers