
Related Manuals for Atlantic Calypso FS 172L


Summary of Contents for Atlantic Calypso FS 172L
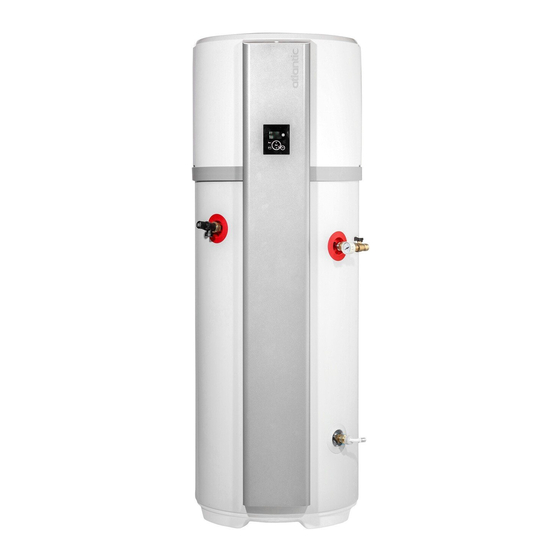
- Page 1 Calypso The energy efficient heat pump water heater INSTALLATION MANUAL *Image for illustration purposes only 19 Feb 24 UIN 235818 A03 B 700U07382380...
- Page 2 This manual is to be left with the end user as it includes instructions for maintenance, troubleshooting, after sales service, and is used as a service record. The products included in this manual have been independently confirmed to comply with BS EN 12897: 2016.
-
Page 3: Table Of Contents
Warnings Description Installation Maintenance CONTENTS CONTENTS .......................3 WARNINGS .......................4 DESCRIPTION .......................11 Technical Characteristics ................11 Declaration of conformity ................13 Safety instructions ..................13 Transportation and storage ................13 Packaging contents ..................14 Handling .......................15 Manual handling ...................16 Dimensions ....................17 INSTALLATION ......................18 Installation ....................18 10. Hydraulic connection ..................19 11. -
Page 4: Warnings
Warnings Description Installation Maintenance WARNINGS INSTALLATION: CAUTION: Heavy product, handle with care: 1/ Install the appliance in a frost-free room. The appliance is not covered by the warranty if it is permanently damaged as a result of overpressure caused by the expansion relief valve being blocked. - Page 5 Warnings Description Installation Maintenance 9/ The HPWH installation must be in accordance with the relevant requirements of the Building Regulations, IET Wiring Regulations and the Water Fitting Regulations (England and Wales) or Water Byelaws (Scotland). 10/ Calypso is covered by Section G3 of the Building Regulations (England and Wales) Technical Standard P3 (Scotland) and Building Regulation P5 (Northern Ireland).
- Page 6 Modifications should not be made to this product. Replacement parts, including immersion heaters, should be purchased from Atlantic , or agents approved by them. Unvented hot water storage vessels need regular routine checks, and these are detailed below. It is for this reason that this manual must always be left with the Calypso.
- Page 7 Maintenance periods will vary for many reasons. Atlantic recommend a maximum of 12 months to coincide with heat pump maintenance. Experience of local water conditions may indicate that more frequent maintenance...
- Page 8 Warnings Description Installation Maintenance Adjustable PRV’s are available. The additional PRV’s need to be fitted upstream of the inlet control group and in multiple occupancy sites may be fitted as a whole site solution. The expansion relief valve can be coupled with the TPRV discharge pipework prior to the tundish.
- Page 9 Warnings Description Installation Maintenance The Calypso is supplied with a drain elbow. This should be fitted to the cold water supply connection to enable draining the cylinder. IMPORTANT - DRAIN DOWN PROCEDURE: 1. Switch off the HPWH. 2. Open the nearest hot tap and run all hot water until cold, then close it.
- Page 10 Warnings Description Installation Maintenance ELECTRICAL CONNECTION: WARNING: Do not attempt the electrical work unless you are competent to do so. Before removing the cover, ensure that the power supply is switched off to avoid any risk of injury or electric shock. The electrical installation must include an all-pole cut-out device (circuit breaker, fuse) upstream of the appliance in accordance with BS 7671 Requirements for electrical...
-
Page 11: Description
Warnings Description Installation Maintenance DESCRIPTION Technical Characteristics Product Details Product reference CALYPSO FS 172L CALYPSO FS 210L Model Code/Number AH876509 AH886123 ATL CV4 STAINLESS ATL CV4 STAINLESS Product Name STEEL FS 172L STEEL FS 210L Heat Pump Performance Air operating range (ducted configuration) °C... - Page 12 Dimensions and Connections Dimensions 1700 x 605 x 695 1940 x 605 x 695 Weight with packaging 96.6 97.0 Weight without packaging 83.6 84.0 Weight empty (full) 15.5 (187.5) 18.0 (228.0) Air duct diameter 50Pa @ 400 m³/hr >> COP=3,15 with 172L HPWH [L profile @7°C/86%RH] Max.
-
Page 13: Declaration Of Conformity
Warnings Description Installation Maintenance Declaration of conformity This device complies with the following directives: • 2014/35/EU with respect to low voltage • 2014/53/EU with respect to RED (Radio Equipment Directive) • 2014/30/EU with respect to electromagnetic compatibility (EMC) • 2015/863/EU and 2017/2102/EU with respect to restricting hazardous substances (RoHS) •... -
Page 14: Packaging Contents
Warnings Description Installation Maintenance Packaging contents Item Description Installation instructions Operating instructions 160 mm Ø ducting adaptors Cold water inlet PRV combination valve/expansion relief -Maximum inlet pressure to16 bar -Operating pressure (PRV setting) 3 bar -Expansion relief valve setting 4.5 bar Pressure and temperature relief valve (supplied fitted to comply with UK Building Regulation G3*) -Opening pressure of P &... -
Page 15: Handling
Warnings Warnings Description Description Installation Installation Maintenance Maintenance Handling Use the tilt handle (A) to tilt the water heater backwards. Use the carrying handles (B) and the carrying straps (C) to carry the water heater. Do not lift with the tilt handle (A). Please follow the transportation and handling recommendations shown on the water heater packaging. -
Page 16: Manual Handling
Warnings Warnings Description Description Installation Installation Maintenance Maintenance Manual handling MANUAL HANDLING OF APPLIANCE PRODUCTS e. Taking the lead for team lifts- As Description more than one person is required for these products ensure that one Manual handling means any transporting or supporting of a load (including lifting, person is taking the lead. -
Page 17: Dimensions
Warnings Description Installation Maintenance Dimensions 172 litres 210 litres Total height irrespective of the orientation of the openings 1693 mm 1940 mm Height of the control unit 1310 mm 1550 mm Height of the PTRV 1010 mm 1253 mm Height of the siphon condensates drain 780 mm 1020 mm Height of the hot water outlet... -
Page 18: Installation
Warnings Description Installation Maintenance Installation Minimum floor-to-ceiling height The legend plate located above required to lift the product: the hot water outlet must be accessible at all �mes 172L : 1747mm 210L : 1978mm Before filling, the water heater must be levelled with shims if necessary Fix the water heater to the floor with the strap (the fixing lug can be positioned on the... -
Page 19: Hydraulic Connection
Warnings Description Installation Maintenance 10. Hydraulic connection Installing a secondary circulation loop on the appliance is prohibited. If the appliance fails on an installation with looping, the warranty does not apply. For more information, please contact the after-sales service. The highest hot or cold water draw off point should not exceed 10 metres above the Pressure Reducing Valve. - Page 20 Warnings Description Installation Maintenance Mains Water Supply Existing properties with a 15mm supply will be satisfactory provided the local mains pressure is good, but should be confined to single bathroom properties. For new properties where simultaneous demand is required to more than one bathroom or a bathroom and one or more en-suites, the communication and service pipe into the dwelling should be a minimum of 22mm (usually in the form of a 25mm MDPE supply).
- Page 21 Warnings Description Installation Maintenance 10.2. Hot water connection WARNING: When showering or bathing water above 44°C increases the risk of serious injury, scalds or fatality. Reference HSE document HSIS6 for further information. WARNING: Storing hot water at temperatures below 60°C can increase the risk of Legionella bacteria growth.
- Page 22 Warnings Description Installation Maintenance 10.3. Condensates drainage 10.3.1. Implementation of the siphon Cut the condensates drain pipe so that it does not create a loop in the pipe. Connect the end of the pipe to the waste water drain. With the product stopped, fill the siphon with water up to the arrow via the condensates drain tube.
- Page 23 This must be completed during commissioning and left with the product to meet the Warranty conditions offered by Atlantic. 10.5. Insulate the Pipework In new systems, pipes should be insulated to comply with building regs, the maximum permissible heat loss is indicated in the table opposite, and labelled accordingly as follows: i.
- Page 24 Warnings Description Installation Maintenance system, any pipes that are exposed as part of the work or are otherwise accessible should be insulated as recommended for new systems, or to some lesser standard where practical constraints dictate. Insulation of Pipework Pipe outside diameter Maximum heat loss 15 mm 7.89 W/m...
- Page 25 Warnings Description Installation Maintenance Specification for design installation, testing and maintenance of services supplying water for domestic use within buildings and their curtilages. b) Have a vertical section of pipe at least 300mm long, below the tundish before any el- bows or bends in the pipe work.
- Page 26 Warnings Description Installation Maintenance 3. Discharges at a high level; e.g. into metal hopper and metal down pipe with the end of the discharge pipe clearly visible (tundish visible or not) or onto a roof capable of withstanding high temperature discharges of water and 3m from any plastic guttering systems that would collect such discharges.
-
Page 27: Air Connection
Warnings Description Installation Maintenance Air connection The energy performance capability of the heat pump water heater is linked to the temperature of the intake air. The warmer the intake air, the better the COP (Coefficient of Performance). • In the case of ducting, 160 mm diameter insulated air ducts should be selected. The use of flexible ducts is by no means recommended. - Page 28 Warnings Description Installation Maintenance Worked example: Air Inlet Calculations Component Pressure drop [Pa] Total [Pa] Straight 1m 15.0 Elbow 10.0 20.0 Inlet terminal 30.0 30.0 Total pressure drop for air outlet duct plan 65.0 Air Outlet Calculations Component Pressure drop [Pa] Total [Pa] Straight 1m 18.0...
- Page 29 Warnings Description Installation Maintenance 11.3. Installing the ducting connections 1 2 0 m m 6 0 2 m m m in i 368 mm The wall grids must orient downwards to prevent any water ingress in the pipes.
- Page 30 Warnings Description Installation Maintenance 3 At least a frost-free room (T > 1°C) 3 Selected installation parameter: Outside/Outside (see chapter «13. Installation parameters», page <?>) 3 Recommended room: living space (heat loss from the water heater is not lost), close to the outside walls.
-
Page 31: Electrical Connection
Warnings Description Installation Maintenance 12. Electrical connection Please refer to the electrical connection diagrams on the back of the cover. Only switch on the water heater after it has been filled with water. The water heater must have a constant electrical power supply. Qualified personnel must complete the electrical connection with the power off. -
Page 32: Filling The Water Heater
Warnings Description Installation Maintenance 12.3. Connection to a photovoltatic station When combined with a photovoltaic system, the surplus energy produced by the photovoltaic system can be stored as hot water in the water heater practically free of charge. Once the photovoltaic sys- tem has enough energy, the installation’s inverter automatically sends a signal to the thermodynamic water heater that activates the forced operation of the heat pump (PV mode). -
Page 33: Initial Start-Up
Warnings Description Installation Maintenance 14. Initial start-up Display of information Installation Following Please take a few instructions minutes to complete the various settings Continue Selection of the Scroll up/Navigate Mode and operating parameters Confirm One-off boost Back of hot water production Scroll down/Navigate If the water heater has been tilted, wait at least 1 hour before start-up. -
Page 34: Installation Parameters
Warnings Description Installation Maintenance 15. Installation parameters Re-access the various installation settings: for 5 seconds, then Configurations • Locking The operating modes and heating periods are not accessible. • Hot water - Heating periods (also accessible via the User menu if locking is not activated) This parameter defines the start-up authorisation periods for the heat pump and the electric booster depending on the hot water requirement. - Page 35 Warnings Description Installation Maintenance Setting the programming periods is subject to certain rules: - The resolution of the program is 15 minutes; - The sum of the durations of the 2 periods must be greater than or equal to 8 hours; - The duration of the first programming period must be between 4 hrs and 12 hrs;...
- Page 36 Warnings Description Installation Maintenance • ate and time (accessible after the initial start-up via the main menu) Set the day, then confirm. Repeat for the month, year, hour, minutes. • Language (accessible after the initial start-up via the main menu) Set the language of your choice.
-
Page 37: Verification Of Correct Operation
Warnings Description Installation Maintenance 16. Verification of correct operation Verification of operation is accessible in INSTALLER MODE Simultaneously press MENU and the up arrow for 5 seconds. Complete the verifications To exit, return to the MENU. Simultaneously press MENU and the up arrow (or wait 10 minutes). -
Page 38: Commissioning Checklist
MAINS PRESSURE HOT WATER STORAGE SYSTEM COMMISSIONING CHECKLIST This Commissioning Checklist is to be completed in full by the competent person who commissioned the storage system as a means of demonstrating compliance with the appropriate Building Regulations and then handed to the customer to keep for future reference. 17. -
Page 39: Service Record
SERVICE RECORD It is recommended that your hot water system is services regularly and that the appropriate Service Record is completed. Service Provider described Before completeing the appropriate Service Record below, please ensure you have caried out the service in the manufaturer’s instructions. SERVICE 01 SERVICE 02 Date:... -
Page 40: Maintenance
Warnings Description Installation Maintenance MAINTENANCE 19. User instructions The water heater must be drained if the absence mode cannot be used or when the appliance is switched off. Proceed as follows: Switch off the power supply. Close the cold water supply to the safety unit. Open a hot water tap. - Page 41 Warnings Description Installation Maintenance 20.2. Professional maintenance The appliance must be switched off before opening the covers. 20.2.1. Access to the water heater elements Turn the screw cap by 1/2 turn. Remove the locking screw from ...
- Page 42 Warnings Warnings Description Description Installation Installation Maintenance Maintenance Unscrew the 4 screws on the front Tilt the front cover of the heat pump cover of the heat pump. forwards. To remove the control unit ...
- Page 43 Warnings Description Installation Maintenance 20.2.2. Operations to be performed by the installer What? When? How? Ducting Once a year Check that the ducts are properly in place and not crushed. Condensates flow Once a year Check that the condensates drain pipe is clean.
- Page 44 Warnings Description Installation Maintenance 20.3. Ohmic values of the probes according to temperatures Air probe / Immersion sleeve probe / Evaporator probe °C Resistance K ohm °C Resistance K ohm 97.9 73.6 55.8 42.7 32.9 25.5 15.8 12.5 Température [°C] Temperature [°C]...
-
Page 45: Troubleshooting
Warnings Description Installation Maintenance 21. Troubleshooting In the event of an anomaly, lack of heating or the release of steam when bleeding, switch off the power supply and notify the installer. Troubleshooting operations should only be performed by a professional. 21.1. - Page 46 Warnings Description Installation Maintenance Displayed Cause Consequences Diagnostic and repair code Lower evaporator Stop the heat pump. Check the connections and temperature probe De-icing function that the probe is properly W.22.1 defective. compromised. seated on its tube. Problem with probe •...
- Page 47 Warnings Description Installation Maintenance Displayed Cause Consequences Diagnostic and repair code No heat exchange Stop the heat pump. Overconsumption or Heating using the recycling loop or leak on the W.30.1 Heat pump has electric booster at the hot water network. been operating programmed setpoint.
- Page 48 Warnings Description Installation Maintenance 21.2. Other faults without error codes displayed Fault found Possible cause Diagnostic and repair No more heating. • No power supply to the • Check for voltage on the No hot water. water heater: fuses, wiring, water heater power wires.
- Page 49 Warnings Description Installation Maintenance Fault found Possible cause Diagnostic and repair Low flow rate at hot • Line strainer/filter blocked. • Clean the filter. water tap. • Build-up of scale in the water heater. • Descale the water heater. Water not hot •...
- Page 50 Warnings Description Installation Maintenance Fault found Possible cause Diagnostic and repair Smell • No siphon on the safety • Install a siphon. unit. • No water in the siphon of • Fill the siphon. the safety unit. Steam is released •...
-
Page 51: After-Sales Service
Warnings Description Installation Maintenance 22. After-sales service Only use original manufacturer's spare parts. Any work undertaken on the electrical parts must be performed by a specialist. When ordering from a company distributor, please state the exact type of water heater and its serial number as found on the legend plate. - Page 52 Warnings Description Installation Maintenance 1 Front cover 2 Compressor condenser 3 Compressor insulation jacket 4 Compressor 5 Air inlet probe 6 Fitted rear housing 7 Evaporator 8 Upper evaporator probe 9 Fan 10 Lower evaporator probe 11 Volute assembly 12 Control panel 13 Electronic regulation (1 or 2 boards depending on the product) 14 ECS regulation probe...
- Page 53 AMD. SEP 2023 CONDITIONS OF SALE & GUARANTEE TERMS Atlantic (“We” or “Ideal”) only do business upon the Conditions which appear below and no The guarantee for the stainless steel vessel is for twenty other. Unless we so agree in writing these Conditions shall apply in full to any supply of goods by us five years against material defect or manufacturing to the exclusion of any Conditions or terms sought to be imposed by any purchaser.
- Page 54 caused and even if foreseeable by us or in our contemplation:- (i) shall be held in trust for us in a manner which (i) economic loss which shall include loss of profits, business revenue, goodwill enables such proceeds to be identified as oranticipated savings such, and: (ii) damages in respect of special indirect or consequential loss or damage (other than...
- Page 55 WIRING DIAGRAM For your heat pump water heater maintenance Wiring diagram Air temperature sensor N P E Fan motor (according to models) Top evaporating TYPE 1 TYPE 2 temp. sensor Compressor Motor winding protector Bottom evaporating temp. sensor High pressure switch Compressor start capacitor...
- Page 56 Kingston Upon Hull, HU5 4JN 700U07382380 Atlantic is part of Ideal Boilers Limited. Ideal Boilers Ltd. pursues a policy of continuing improvement in the design and performance of its products. The right is therefore reserved to vary specification without notice.
Need help?
Do you have a question about the Calypso FS 172L and is the answer not in the manual?
Questions and answers