
Subscribe to Our Youtube Channel
Related Manuals for Thor Broadcast H-IP-HDMI


Summary of Contents for Thor Broadcast H-IP-HDMI
- Page 1 User Manual 4K HEVC IP and USB HD Video Decoder IP Stream Input HDMI Output H-IP-HDMI...
- Page 2 H-IP-HDMI A Note from Thor Broadcast about this Manual Intended Audience This user manual has been written to help people who have to use, integrate and to install the product. Some chapters require some prerequisite knowledge in electronics and especially in broadcast technologies and standards.
- Page 3 H-IP-HDMI SAFETY INSTRUCTIONS CONNECTING TO THE POWER SUPPLY This product has to be connected to the power supply. Before carrying out maintenance operation or modification of the installation, the Device has to be disconnected. OVERVOLTAGE An over-voltage cause short-circuits or fire. Never overload the power lines. Always use the 12VDC power supply provided for single channel series.
-
Page 4: General Description
GENERAL DESCRIPTION The Decoder can bring IP streaming, USB storage to any HDMI devices and also playback your multimedia files to come from FTP server. The H-IP-HDMI can be widely used in broadcasting, Hotel TV systems, advertising signage etc. APPLICATION DIAGRAM... -
Page 5: Key Features
H-IP-HDMI KEY FEATURES ■ HEVC/H.265/H.264/MPEG-2 decoder ■ Resolution up to 1920x1080 @60fps, 3840x2160 @30fps ■ Multiple network streaming protocols ■ Local media player ■ USB playback SPECIFICATIONS Interface RJ45x2 10/100 Base-T (1x Management, 1x Streaming) Input USB2.0-(FAT32) Micro SD-Delivered 16GB USB flash... -
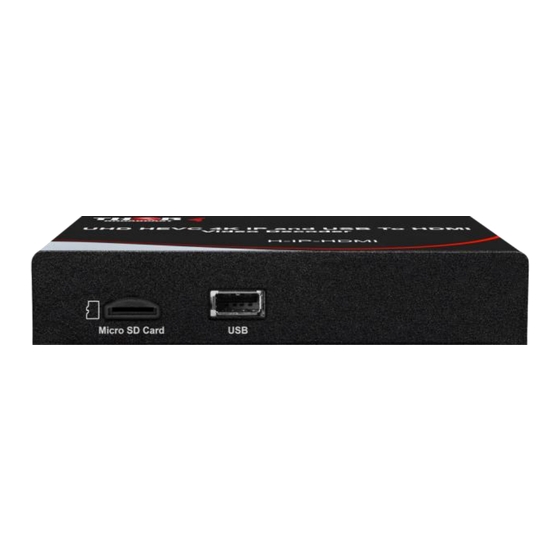
Page 6: Appearance Introduction
H-IP-HDMI APPEARANCE INTRODUCTION 1. USB Port 5. Power & Status LED 2. SD Card Port 6. Factory Reset Button 3. IP Data Port 7. NMS control Port 4. HDMI Output 8. Power Input CONNECTION DIAGRAM Typical Connection The HDMI connector is connected directly to a monitor. - Page 7 H-IP-HDMI UDP Server Connection Decoder and computer are connected to the same network(switch). The UDP settings, description as the “UDP server streaming”. Router Video Encoder GIGA Switch UDP Server Internet URL:239.1.1.1 RJ45 RJ45 Port:1234 IP:192.168.2.1 HDMI Input RJ45 Data IP: Data 192.168.2.5...
- Page 8 H-IP-HDMI OPERATION INSTRUCTION The device is configured using NMS. Access to the NMS is via the network connection. FTP configuration and system settings are performed. IP Address of Computer Setting The IP Address of the computer must be in the same participation as the IP Address of the IP Video Decoder.
- Page 9 H-IP-HDMI Status Here you can know the NMS FW version, System FW version, IP information, current playback source. Click “Status” label and click the “ Refresh ” button to read the current status. Media Source Settings 1. IP streaming Click IP Streaming item in Media Source.
- Page 10 H-IP-HDMI (ex. http://ivi.bupt.edu.cn/hls/cctv1hd.m3u8) (ex. https://www.youtube.com/watch?v=cSUtWVFaG4I) Click the “Apply” button to start playing. Remark: You can enter the URL of the network stream such as RTSP, RTMP, Http, etc. 2. M3U Playlist Click M3U Playlist item in Media Source, then click the “Choose file” button to select your m3u or m3u8 file.
- Page 11 In the IP Address / Subnet Mask / Default Gateway / MAC Address field, click the back grid to modify the content. Click “Apply” button to save settings. Remark: IP addresses of H-IP-HDMI player and SMB server need to be in the same area network. Update Which has two items “Update NMS”...
- Page 12 H-IP-HDMI Upgrade System Firmware via USB Put these two update files [ UpdateInfo.txt & H-IP-HDMI_xxxxxx.image ] into the USB root directory. Insert USB driver on device. Click “USB Firmware Upgrade” button, it will show a message box as next picture.
Need help?
Do you have a question about the H-IP-HDMI and is the answer not in the manual?
Questions and answers