
Related Manuals for Amazone EDX 6000-2


Summary of Contents for Amazone EDX 6000-2
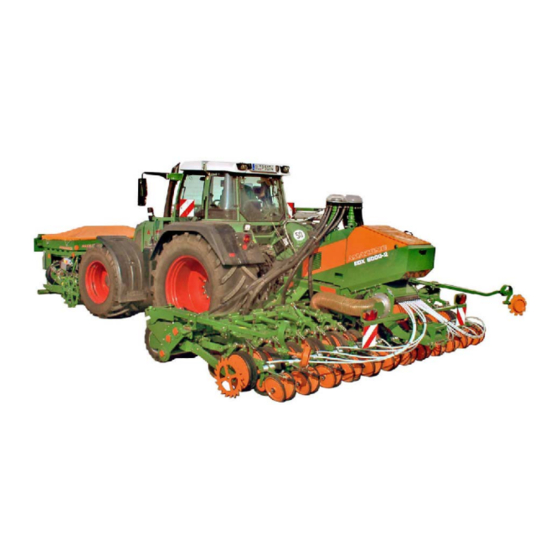
- Page 1 Operating Manual Precision airplanter EDX 6000-2 EDX 6000-2FC Please read this operating manual before first com- missioning. MG4340 BAH0056-3 09.14 Keep it in a safe place for future use.
- Page 2 Only this way, you would be satisfied both with the machine as also with yourself. To achieve this is the purpose of this instruction manual. Leipzig-Plagwitz 1872. EDX 6000-2/2FC BAH0056-3 09.14...
- Page 3 + 49 (0)5405 501-234 E-mail: amazone@amazone.de Spare part orders Spare parts lists are freely accessible in the spare parts portal at www.amazone.de. Please send orders to your AMAZONE specialist retailer. Formalities of the operating manual Document number: MG4340 Compilation date: 09.14 ...
- Page 4 Send us your suggestions by fax. AMAZONEN-WERKE H. DREYER GmbH & Co. KG Postfach 51 D-49202 Hasbergen Tel.: + 49 (0)5405 501-0 Fax: + 49 (0)5405 501-234 E-mail: amazone@amazone.de EDX 6000-2/2FC BAH0056-3 09.14...
-
Page 5: Table Of Contents
Design and function .................. 50 Radar ............................. 52 AMATRON control terminal ....................53 Frame and machine extension arms ..................54 Stands ............................ 54 Seed singling and application ....................55 5.5.1 Seed hopper........................... 55 5.5.2 Singling drum ......................... 56 EDX 6000-2/2FC BAH0056-3 09.14... - Page 6 Adjusting the seed placement depth ..................96 8.1.5.1 Setting the coulter pressure ....................97 8.1.6 Closing the seed furrow by adjusting the press roller ............98 8.1.7 Adjusting the star clearer ...................... 98 8.1.8 Adjusting the clod clearer ...................... 99 EDX 6000-2/2FC BAH0056-3 09.14...
- Page 7 Installation and removal of hydraulic hose lines (specialist workshop) ....... 148 12.6.5 Repairs to the pressure tank (specialist workshop) ............. 149 12.7 Bolt tightening torques ......................150 Hydraulic diagram..................151 13.1 Hydraulic diagram EDX 4500/6000-2 (tractor hydraulics connection) ......... 151 EDX 6000-2/2FC BAH0056-3 09.14...
- Page 8 Table of Contents EDX 6000-2/2FC BAH0056-3 09.14...
-
Page 9: User Information
Numbers in round brackets refer to the item numbers in the diagrams. The first number refers to the diagram and the second number to the item in the figure. Example: (Fig. 3/6) • Figure 3 • Item 6 EDX 6000-2/2FC BAH0056-3 09.14... -
Page 10: General Safety Instructions
If the user discovers that a function is not working properly, then they must eliminate this fault immediately. If this is not the task of the user or if the user does not possess the appropriate technical knowledge, then they should report this fault to their superior (operator). EDX 6000-2/2FC BAH0056-3 09.14... - Page 11 • Unauthorised structural changes to the machine. • Insufficient monitoring of machine parts which are subject to wear. • Improperly executed repairs. • Disasters through the impact of foreign objects and acts of God. EDX 6000-2/2FC BAH0056-3 09.14...
-
Page 12: Representation Of Safety Symbols
Non-compliance with these instructions can cause faults on the machine or in the environment. NOTE Indicates handling tips and particularly useful information. These instructions will help you to use all the functions of your machine to the optimum. EDX 6000-2/2FC BAH0056-3 09.14... -
Page 13: Organisational Measures
As well as all the safety information in this operating manual, comply with the general, national regulations pertaining to accident prevention and environmental protection. When driving on public roads and routes, then you should comply with the statutory road traffic regulations. EDX 6000-2/2FC BAH0056-3 09.14... -
Page 14: User Training
The personnel of a specialist workshop shall possess the appropriate knowledge and suitable aids (tools, lifting and support equipment) for carrying out the maintenance and repair work on the machine in a way which is both appropriate and safe. EDX 6000-2/2FC BAH0056-3 09.14... -
Page 15: Safety Measures During Normal Operation
Carefully fix and secure larger subassemblies to lifting gear when carrying out replacement work. Check all the screw connections for a firm seat. On completing maintenance work, check the function of safety and protection equip- ment. EDX 6000-2/2FC BAH0056-3 09.14... -
Page 16: Structural Changes
It is forbidden to: • Drill holes in the frame or on the running gear. Increase the size of existing holes on the frame or the running gear. • • Welding support parts. EDX 6000-2/2FC BAH0056-3 09.14... -
Page 17: Spare And Wear Parts And Auxiliary Materials
Immediately replace any machine parts which are not in a perfect state. Use only genuine AMAZONE spare and wear parts or parts approved by AMAZONEN-WERKE so that the operating permit retains its validi- ty in accordance with national and international regulations. The use... -
Page 18: Warning Symbols And Other Labels On The Machine
2. The consequence of non-observance of the risk-avoidance in- structions. For example: Causes serious injuries to fingers or hands. 3. Risk-avoidance instructions. For example: Do not touch machine parts until they have come to a complete stop. EDX 6000-2/2FC BAH0056-3 09.14... - Page 19 It is forbidden to stand in the swivel area of the machine when machine parts are being lowered. • Direct persons away from the swivel area of any machine parts which can be lowered before you lower the parts. EDX 6000-2/2FC BAH0056-3 09.14...
- Page 20 Read and observe the information in the • operating manual before carrying out maintenance work on the hydraulic hose lines. • If you are injured by hydraulic fluid, contact a doctor immediately. EDX 6000-2/2FC BAH0056-3 09.14...
- Page 21 Secure the tractor and the machine against unintentional start-up and rolling before any intervention in the machine. • Depending on the type of intervention, read and understand the information in the rele- vant sections of the operating manual. EDX 6000-2/2FC BAH0056-3 09.14...
- Page 22 MD110 This symbol identifies parts of the machine that serve as a handle. MD119 Nominal speed (maximum 1000 rpm) and direc- tion of rotation of the machine-side drive shaft. EDX 6000-2/2FC BAH0056-3 09.14...
- Page 23 This danger can result in extremely serious and potentially fatal injuries. Secure the entire machine against inadvertent lowering before entering the danger zone be- neath the machine. For this purpose, use the mechanical support devices on the machine. EDX 6000-2/2FC BAH0056-3 09.14...
-
Page 24: Positioning Of Warning Symbols And Other Labels
General Safety Instructions 2.13.1 Positioning of warning symbols and other labels Warning symbols The following diagrams show the arrangement of the warning symbols on the machine. Fig. 1 Fig. 2 EDX 6000-2/2FC BAH0056-3 09.14... -
Page 25: Risks If The Safety Information Is Not Observed
Besides the safety information in this operating manual, the national general workplace safety and accident prevention regulations are binding. Comply with the accident prevention instructions on the warning sym- bols. When driving on public roads and routes, comply with the appropriate statutory road traffic regulations. EDX 6000-2/2FC BAH0056-3 09.14... -
Page 26: Safety Information For The Operator
ο The approved total tractor weight ο The approved tractor axle loads ο The approved load capacities of the tractor tyres • Secure the tractor and the machine against unintentional rolling EDX 6000-2/2FC BAH0056-3 09.14... - Page 27 Must easily give way to all movements in bends without tensioning, kinking or rubbing ο Must not scour other parts. • The release ropes for quick couplings must hang loosely and may not release themselves when lowered. • Also ensure that uncoupled machines are stable. EDX 6000-2/2FC BAH0056-3 09.14...
- Page 28 Always fix the front or rear weights to the intended fixing points • according to regulations. • Comply with the maximum load of the connected machine and EDX 6000-2/2FC BAH0056-3 09.14...
- Page 29 Before driving downhill, switch to a low gear. • Before moving off, always switch off the independent wheel braking (lock the pedals). • Observe the maximum permissible total weight. Only transport the machine with empty seed and fertiliser hoppers. EDX 6000-2/2FC BAH0056-3 09.14...
-
Page 30: Attached Tools
Repair, maintenance and cleaning work or rectifying malfunc- tions must always only be carried out with ο the ignition key removed ο the on-board computer switched off • Leave safety devices attached and always position them in the protective position. EDX 6000-2/2FC BAH0056-3 09.14... -
Page 31: Hydraulic System
• Replace the hydraulic hose lines if damaged or worn. Only use original AMAZONE hydraulic hose lines. • The hydraulic hose lines should not be used for longer than six years, including any storage time of maximum two years. Even... -
Page 32: Electrical System
ο Ensure that the retrofitted electrical and electronic compo- nents comply with the EMC directive 2004/108/EEC in the appropriate version and carry the CE mark. EDX 6000-2/2FC BAH0056-3 09.14... -
Page 33: Universal Joint Shaft Operation
Do not approach too near to the machine during this time. You must only start work on the machine once all machine parts are at a complete standstill. EDX 6000-2/2FC BAH0056-3 09.14... -
Page 34: Operation Of The Seed Drill
• Spare parts must meet at least the specified technical require- ments of AMAZONEN-WERKE. This is ensured through the use of original AMAZONE spare parts. EDX 6000-2/2FC BAH0056-3 09.14... -
Page 35: Loading And Unloading
EDX is secured in the transport posi- tion. After transportation, fold out the stand as shown in the illustration (Fig. 4) and secure with the lynch pin (Fig. 4/1). Fig. 4 EDX 6000-2/2FC BAH0056-3 09.14... -
Page 36: Product Description
Overview of subassemblies Fig. 5 (1) Seed hopper (5) Track marker (2) Singling (6) Fertiliser distributor heads (3) Seed line hoses (4) Double disc type coulter with hydraulic coul- ter pressure adjustment EDX 6000-2/2FC BAH0056-3 09.14... - Page 37 ο the digital scales Fig. 6 Fig. 7/… AMATRON control terminal Fig. 7 Fig. 8/… (1) Radar Fig. 8 Fig. 9/… (1) Upper link coupling point (2) Lower link coupling points (3) Hose cabinet Fig. 9 EDX 6000-2/2FC BAH0056-3 09.14...
- Page 38 Fig. 11/… Blower fan (not visible behind the machine panelling ) for singling and fertiliser transportation Fig. 11 Fig. 12/... (1) Level sensor (seed) Fig. 12 Fig. 13/... (1) Setting lever for seed shutter Fig. 13 EDX 6000-2/2FC BAH0056-3 09.14...
- Page 39 Fig. 14 Fig. 15/... (1) Setting lever for sealing lip Fig. 15 Fig. 16/... (1) Setting lever of the mech. adjustable seed scraper Fig. 16 Fig. 17/... (1) Pointer of the electr. adjustable seed scraper Fig. 17 EDX 6000-2/2FC BAH0056-3 09.14...
- Page 40 Product description Fig. 18/… Double disc type coulter Fig. 18 EDX 6000-2/2FC BAH0056-3 09.14...
-
Page 41: Safety And Protection Equipment
Product description Safety and protection equipment Fig. 19/… (1) Mechanical transport locking mechanism Fig. 19 Fig. 19/… Stands required for setting down the machine and for adjustment work. Fig. 20 EDX 6000-2/2FC BAH0056-3 09.14... -
Page 42: Overview - Supply Lines Between The Tractor And The Machine
The tractor control unit must be used in different types of activa- tion, depending on the hydraulic function. Latched, for a permanent oil circulation Tentative, activate until the action is executed Float position, free oil flow in the control unit EDX 6000-2/2FC BAH0056-3 09.14... - Page 43 Pressure hose with priority (approx. 38 l/min.) Pressure-free return flow blower fan connec- (see section "Installation instructions for tion to tractor hydraulics ", Seite 80) Designation Function Machine plug (see section 5.2, Seite 53) AMATRON on-board computer Connector (7-pin) Road-use lighting system EDX 6000-2/2FC BAH0056-3 09.14...
-
Page 44: Transportation Equipment Without Front Tank
(2) 2 reflectors, yellow (3) 2 brake and tail lights (4) 2 red reflectors (5) 2 rear-facing warning boards Fig. 22 Fig. 23/... (1) 2 forward-facing warning boards (2) 2 forward-facing limiting lights (3) 2 forwards-facing indicators Fig. 23 EDX 6000-2/2FC BAH0056-3 09.14... -
Page 45: Intended Use
Compliance with all the instructions in this operating manual. • Execution of prescribed inspection and maintenance work. • Exclusive use of original AMAZONE spare parts. Other uses to those specified above are forbidden and shall be con- sidered as improper. For any damage resulting from improper use: •... -
Page 46: Danger Area And Danger Points
When folding the machine extension arms in/out near overhead power lines • When climbing onto the machine • Behind the machine in the area of the seed hopper. If the seed tube is torn off, seed shoots out of the optical sensor. EDX 6000-2/2FC BAH0056-3 09.14... -
Page 47: Rating Plate And Ce Mark
EU directives. The rating plate shows: • Mach. ident. no. • Type • Basic weight (kg) • Perm. total weight, kg • Factory • Model year • Year of construction (beside the CE mark). Fig. 24 EDX 6000-2/2FC BAH0056-3 09.14... -
Page 48: Technical Data
8 sowing units, row spacing 75 cm 4200 kg 800 mm • with full seed and fertiliser hopper EDX 6000-2 4500 kg 800 mm • with 8 sowing units, row spacing 75 cm • with full seed and fertiliser hopper EDX 6000-2/2FC BAH0056-3 09.14... -
Page 49: Necessary Tractor Equipment
The workplace-related emission value (acoustic pressure level) is 70 dB(A), measured in operating condition at the ear of the tractor driver with the cabin closed. Measuring unit: OPTAC SLM 5. The sound power level is primarily dependent on the vehicle used. EDX 6000-2/2FC BAH0056-3 09.14... -
Page 50: Design And Function
The front tank has a blower fan to generate the air current for convey- ing the fertiliser. The hydraulic fan motor is driven by the tractor hy- draulics. EDX 6000-2/2FC BAH0056-3 09.14... - Page 51 The cross-section of the furrow generated is rectangular. A positive closure is formed between the catcher roller and the edge of the fur- row which ensures optimum placement, even with varying ground conditions and at high working speeds. EDX 6000-2/2FC BAH0056-3 09.14...
-
Page 52: Radar
• tramlines can be created. Fig. 29 Radar The radar (Fig. 30/1) measures the distance covered. The on-board computer requires this data to calculate the drive speed and area cultivated (hectare counter). Fig. 30 EDX 6000-2/2FC BAH0056-3 09.14... -
Page 53: Amatron Control Terminal
For a commenced order, the AMATRON stores • the daily and total volume of seed/fertiliser applied [kg] • the daily and total area cultivated [ha] • the daily and total sowing time [h] • the average work performance [ha/h] EDX 6000-2/2FC BAH0056-3 09.14... -
Page 54: Frame And Machine Extension Arms
(Fig. 32/1) • two machine extension arms which can be folded in for transport (Fig. 32/2). Stands The machine has: • two front stands (Fig. 33/1) • one rear stand (Fig. 33/2). Fig. 33 EDX 6000-2/2FC BAH0056-3 09.14... -
Page 55: Seed Singling And Application
(Fig. 34/2). The lid is opened with the assistance of two gas- pressure springs. Fig. 34 The seed hopper (Fig. 35/1) is located above the singling drum housing (Fig. 35/2). Fig. 35 EDX 6000-2/2FC BAH0056-3 09.14... -
Page 56: Singling Drum
4.5 mm for a long grain, so that it does not fall through the larger hole • the drum with hole diameter 5.5 mm for a round grain, so that it is held in the drum. EDX 6000-2/2FC BAH0056-3 09.14... -
Page 57: Seed Shutter
(Fig. 38/2). Fig. 38 The sight glass should be half full with seed when the machine is at rest. The setting of the seed shutter depends on the working speed and the seed. Fig. 39 EDX 6000-2/2FC BAH0056-3 09.14... - Page 58 The fluid bed contains too much seed: Move the lever (Fig. 40/1) anti-clockwise (+). The fluid bed contains too little seed: If the lever points to the Scale value "0", the supply from the seed hopper is closed. EDX 6000-2/2FC BAH0056-3 09.14...
-
Page 59: Air Guide
Check the results of the adjustment in the sight glass (Fig. 26/3). Move the lever (Fig. 43/1) clockwise (-). Reduce the air volume in the fluid bed: Move the lever (Fig. 43/1) anti-clockwise (+). Increase the air volume in the fluid bed: EDX 6000-2/2FC BAH0056-3 09.14... -
Page 60: Seed Scraper
If at working speed the AMATRON indicates gaps or double occupancy, rectify the scraper position. Adjust the pointer anti-clockwise In event of double occupan- to a higher scale value. Adjust the pointer clockwise In event of gaps to a lower scale value. EDX 6000-2/2FC BAH0056-3 09.14... -
Page 61: Seed Scraper, Mech. Adjustable
If at working speed the AMATRON indicates gaps or double occupancy, rectify the scraper position as described in the AMATRON operat- ing manual. Fig. 47 An electric setting motor (Fig. 48/1), controlled by the AMATRON, adjusts the seed scrapers. Fig. 48 EDX 6000-2/2FC BAH0056-3 09.14... -
Page 62: Baffle Plates (Optional) For Working On A Slope
If the seed level reaches the level sensor, the AMATRON displays a warning message. An alarm signal sounds simultaneously. This alarm signal is intended to remind the trac- tor driver to promptly replenish the hopper. Fig. 50 EDX 6000-2/2FC BAH0056-3 09.14... -
Page 63: Blower Fan For Seed Singling
• if the system is air-tight (pressure tank). The AMATRON initiates an alarm if singling drum holes are not sealed with seed grains. The alarm is triggered if no seed is detected by the optosensors. EDX 6000-2/2FC BAH0056-3 09.14... -
Page 64: Blower Fan Hydraulic Motor With Connection To The Tractor Hydraulics
5.5.8.2 Blower fan hydraulic pump with universal joint shaft connection (optional) The blower fan hydraulic motor can be driven by a hydraulic pump (Fig. 53) which is mounted on the tractor universal joint shaft. Fig. 53 EDX 6000-2/2FC BAH0056-3 09.14... -
Page 65: Double Disc Type Coulter
Check the placement depth and grain spacing • Following every adjustment to the seed placement depth • When changing from light to heavy soil and vice-versa. The car- rier rollers penetrate the ground more deeply with light soil than with heavy soil. EDX 6000-2/2FC BAH0056-3 09.14... -
Page 66: Coulter Pressure (Double Disc Type Coulter)
Adjustment of the electr. coulter pressure is de- scribed in the AMATRON operating manual. Fig. 56 The pressure indicated on the pressure gauge (Fig. 56/2) changes until the fan blower driven by the tractor hydraulics is running at con- stant speed. EDX 6000-2/2FC BAH0056-3 09.14... -
Page 67: Ground Contact Pressure And Intensity Of Press Rollers
(Fig. 57/4). Adjust the position of the press rollers to the ground or the seed furrow. If the desired work result is not achieved, adjust the press rollers by rotating the axle. The lever (Fig. 58/1) serves for ad- justment. Fig. 58 EDX 6000-2/2FC BAH0056-3 09.14... -
Page 68: Star Clearer (Optional)
Each carrier roller can be equipped with a scrap- er arm (Fig. 61/1). With a scraper arm, the ma- chine row spacing must not be less than 45 cm. The scrapers (Fig. 61/2) are adjustable. Fig. 61 EDX 6000-2/2FC BAH0056-3 09.14... -
Page 69: Fertiliser Dosing And Application
The maximum fertiliser placement depth is 15 cm. In the tractor tramline, the placement depth of individual fertiliser coulters can be adjusted, in addition to the hydr. adjustment, by means of the adjusting screws. Fig. 63 EDX 6000-2/2FC BAH0056-3 09.14... - Page 70 The distance between fertiliser and seed placement is adjustable. (Specialist workshop). On very light soil, the single-disc fertiliser coulter can be guided at depth by the sowing coulter via a length-adjustable chain (option, Fig. 65/1). Fig. 65 EDX 6000-2/2FC BAH0056-3 09.14...
-
Page 71: Track Markers
After passing the obstacle the tractor driver folds the track marker out again by actuating the control unit. EDX 6000-2/2FC BAH0056-3 09.14... -
Page 72: Tractor Wheel Mark Eradicators (Optional)
The working area of the tools can be lit up during night working. Fig. 69 The switch for the lighting can be fitted on the machine or in the tractor cab. Connect the lighting to the 12-volt socket in the tractor cab. Fig. 70 EDX 6000-2/2FC BAH0056-3 09.14... -
Page 73: Commissioning
This does not apply to equipment movements that: • are continuous or • are automatically locked or • due to their function require a float position or pressure position. EDX 6000-2/2FC BAH0056-3 09.14... -
Page 74: Checking The Suitability Of The Tractor
The front axle of the tractor must always be subjected to at least 20% of the empty weight of the tractor. The tractor must achieve the brake delay specified by the tractor manufacturer, even with the machine connected. EDX 6000-2/2FC BAH0056-3 09.14... -
Page 75: Calculating The Actual Values For The Total Tractor Weight, Tractor Axle Loads And Load Capacities, As Well As The Minimum Ballast
§ 70 of the German Regulations Authorising the Use of Vehicles for Road Traffic and the required approval according to § 29, paragraph 3 of the Ger- man Road Traffic Regulations. EDX 6000-2/2FC BAH0056-3 09.14... -
Page 76: Data Required For The Calculation (Attached Machine)
See section "Technical data for the calcula- link connection point and the centre of gravi- tion of tractor weights and tractor axle load", ty of the rear-mounted machine or rear bal- Seite 48 last (centre of gravity distance) EDX 6000-2/2FC BAH0056-3 09.14... -
Page 77: Of The Tractor To
(section 6.1.1.7). 6.1.1.6 Tractor tyre load-bearing capacity Enter the double value (two tyres) of the approved load capacity (see, for example, tyre manufacturer's documentation) in the table (section 6.1.1.7). EDX 6000-2/2FC BAH0056-3 09.14... -
Page 78: Table
ο If you do not achieve the minimum ballast at the rear ) from the weight of the rear-mounted machine (G H min you must use ballast weights in addition to the rear- mounted machine. EDX 6000-2/2FC BAH0056-3 09.14... -
Page 79: Securing The Tractor / Machine Against Unintentional Start-Up And Rolling
2. Lower the raised, unsecured machine / raised, unsecured parts of the machine. → This is how to prevent unintentional lowering: 3. Shut down the tractor engine. 4. Remove the ignition key. 5. Apply the tractor parking brake. EDX 6000-2/2FC BAH0056-3 09.14... -
Page 80: Installation Instructions For Blower Fan Connection To Tractor Hydraulics
The capacity of the tractor's oil tank (Fig. 72/4) should be at least twice the oil flow rate. If the hydraulic fluid heats up excessively, the installation of an oil radiator is re- quired at a specialist workshop. EDX 6000-2/2FC BAH0056-3 09.14... -
Page 81: Coupling And Uncoupling The Machine
Actuate the operating controls for the tractor's three-point hydraulic system • only from the designated workstation • if you are outside of the danger area between the tractor and the machine. EDX 6000-2/2FC BAH0056-3 09.14... -
Page 82: Hydraulic Hose Lines
2. Clean the hydraulic connectors of the hy- draulic hose lines before you couple the hy- draulic hose lines to the tractor. 3. Connect the hydraulic hose line(s) to the tractor control unit(s). Fig. 73 EDX 6000-2/2FC BAH0056-3 09.14... -
Page 83: Uncoupling The Hydraulic Hose Lines
Instruct people to leave the danger area between the tractor and the machine before you approach the machine. Any helpers may only act as guides standing next to the tractor and the machine, and may only move between the vehicles when both are at a standstill. EDX 6000-2/2FC BAH0056-3 09.14... - Page 84 • must not scour other parts. DANGER The lower link of the tractor must not have any lateral play so that the machine always runs centrically behind the tractor and does not knock back and forth. EDX 6000-2/2FC BAH0056-3 09.14...
- Page 85 Minor oil impurities from particles can cause a failure of the hydraulic system. During work the tractor control unit yellow is actuated more frequently than all other control units. Assign the connections of control unit 1 to an easily reachable control unit in the tractor cab. EDX 6000-2/2FC BAH0056-3 09.14...
- Page 86 14. Insert the connector (Fig. 77/1) of the coul- ter frame lighting into the socket in the trac- tor cab. Lay the cable in the tractor cab. The switch (Fig. 77/2) serves to switch the lighting on and off (Fig. 77/3). Fig. 77 EDX 6000-2/2FC BAH0056-3 09.14...
- Page 87 Extended stands collide when the machine extension arms are folded out. Push in the front stands before folding out the machine extension arms. Fig. 80 EDX 6000-2/2FC BAH0056-3 09.14...
-
Page 88: Aligning The Machine After Attachment
Fig. 81 1. Sow approximately 100 m on the field at working speed. 2. Adjust the tractor's upper link so that the horizontal vial (Fig. 82/1) on the coulter frame indicates horizontal positioning. Fig. 82 EDX 6000-2/2FC BAH0056-3 09.14... -
Page 89: Uncoupling The Machine
7. Pull the tractor forward approx. 25 cm. The free space between tractor and machine allows convenient access for disconnecting the supply lines. DANGER While pulling the tractor forwards no personnel are allowed to be between the tractor and the machine. EDX 6000-2/2FC BAH0056-3 09.14... -
Page 90: Uncoupling The Folded-Out Machine From The Tractor
(see section "Position of the stands", Seite 91). 5. Fold out the rear stand (Fig. 85/2) (see sec- tion "Position of the stands", Seite 91). Decouple the machine from the tractor (see section “Uncoupling the machine”, Seite Fig. 85 89). EDX 6000-2/2FC BAH0056-3 09.14... -
Page 91: Position Of The Stands
Position of stands when machine is lowered • Extended Position of stands for machine calibration. Fig. 87 The rear stand is foldable and must be located in both positions with a bolt (Fig. 88/1) and secured with a clip pin. Fig. 88 EDX 6000-2/2FC BAH0056-3 09.14... -
Page 92: Settings
• unintentional lowering of raised, unsecured machine parts. • Unintentional start-up and rolling of the tractor-machine combination. Secure the tractor and the machine against unintentional start-up and rolling before making any adjustments to the machine. EDX 6000-2/2FC BAH0056-3 09.14... -
Page 93: Seed Dosing And Application
This setting influences the occupancy of the seed grains in the holes of the singling drum. Multiple occupancy and gaps in the holes of the singling drum are detected by the optosensors after working speed has been reached. The AMATRON issues an alarm. EDX 6000-2/2FC BAH0056-3 09.14... -
Page 94: Adjusting The Air Guide
This setting influences the occupancy of the seed grains in the holes of the singling drum. Multiple occupancy and gaps in the holes of the singling drum are detected by the optosensors after working speed has been reached. The AMATRON issues an alarm. EDX 6000-2/2FC BAH0056-3 09.14... -
Page 95: Setting The Seed Scraper
Seed scraper (electronic setting) Set the pointer (Fig. 93/1) of the seed scraper in the AMATRON. Take the provisional setting from the table (Fig. 45). For a more detailed description, refer to the AMATRON operating manual. Fig. 93 EDX 6000-2/2FC BAH0056-3 09.14... -
Page 96: Adjusting The Seed Placement Depth
(see section "Setting the coul- ter pressure", Seite 97). 6. Adjust all sowing units to match the value of the first sowing unit and check the placement depth of each sowing unit. EDX 6000-2/2FC BAH0056-3 09.14... -
Page 97: Setting The Coulter Pressure
Read of the pressure at the pressure gauge (Fig. 96/3). 3. Tighten the lock nut. Fig. 96 This setting influences the placement depth of the seed. Check the setting (see section „Checking the placement depth and grain spacing“, Seite 99). EDX 6000-2/2FC BAH0056-3 09.14... -
Page 98: Closing The Seed Furrow By Adjusting The Press Roller
Fig. 98 8.1.7 Adjusting the star clearer Secure the star clearer (Fig. 99/1) with two bolts (Fig. 99/2) and 4 washers (Fig. 99/3) on the coul- ter. Secure the bolts with lynch pins (Fig. 99/4). Fig. 99 EDX 6000-2/2FC BAH0056-3 09.14... -
Page 99: Adjusting The Clod Clearer
The speed of the electric motor that drives the singling drum is a re- sult of the calibration value (pul./100 m). If the required grain spacing is not achieved (see AMATRON operat- ing manual), determine the calibration value (pul./100 m) by complet- ing a new calibration distance. EDX 6000-2/2FC BAH0056-3 09.14... -
Page 100: Adjusting The Track Marker Length And Working Intensity
8. Fully tighten all screws. 9. The machine is equipped with two track markers. Repeat the procedure as described. EDX 6000-2/2FC BAH0056-3 09.14... -
Page 101: Calculating The Track Marker Length
(Fig. 104/2). 2. Remove the bolt (Fig. 104/3). 3. Adjust the tractor wheel mark eradicator ο vertically ο peg it in place with the pin Fig. 104 ο secure the pin with the lynch pin sup- plied. EDX 6000-2/2FC BAH0056-3 09.14... -
Page 102: Adjusting Blower Fan Speed
If the fan is put back into operation after a long stoppage period, the pre-set fan speed is not attained until the hydraulic fluid has heated up to working temperature. DANGER Do not exceed the maximum fan speed of 4000 rpm. EDX 6000-2/2FC BAH0056-3 09.14... -
Page 103: Setting The Blower Fan Speed (Tractor Hydraulics Connection)
If the pressure relief valve has been moved out of position, make the following adjustments 1. Set the pressure relief valve with the hexagon socket wrench to the factory setting "21 mm" (Fig. 107). 2. Tighten the lock nut (Fig. 106). EDX 6000-2/2FC BAH0056-3 09.14... -
Page 104: Adjust The Blower Speed On The Machine Pressure Limiting Valve
AMATRON is 55 mbar. For an 8-row machine (maize setting) the blower fan speed is approx. 3900 rpm. The required blower fan speed is set when the tractor universal joint shaft speed is approx. 800 rpm. EDX 6000-2/2FC BAH0056-3 09.14... - Page 105 1000 rpm. Fig. 109 The max. permissible system pressure is 210 bar, and can be read off at the pressure gauge (Fig. 110/1) next to the blower fan hydraulic motor. Fig. 110 EDX 6000-2/2FC BAH0056-3 09.14...
-
Page 106: Transportation
That the tractor parking brake is released completely. ο The warning boards and yellow reflectors must be clean and undam- aged. Switch on the all round lighting (if present), which is subject to author- isation, prior to starting a journey and check operation. EDX 6000-2/2FC BAH0056-3 09.14... - Page 107 Risk of being crushed, cut, caught, drawn in or struck if the ma- chine is unintentionally released from its attached or hitched position. Carry out a visual check that the upper and lower link pins are firmly secured with original clip pins against unintentional release. EDX 6000-2/2FC BAH0056-3 09.14...
-
Page 108: Putting The Machine Into The Transport Position
Incorrect use leads to the risk of accidents! CAUTION Switch off the on-board computer • before transport • before adjustment, maintenance and repair work. Risk of accident due to unintentional movement of the dosing unit or other machine components caused by radar impulse. EDX 6000-2/2FC BAH0056-3 09.14... - Page 109 3. Retract the machine extension arms (see section "Folding the machine extension arms and track markers out/in", Seite 111). 4. Check the function of the lighting system. 5. Disable the tractor control units during transport. Fig. 111 EDX 6000-2/2FC BAH0056-3 09.14...
-
Page 110: Use Of The Machine
Risk of crushing, being caught and/or drawn in and trapped if the intended protective equipment is not used during machine operation. Only ever start up the machine when the protective equipment is fully installed. Only actuate the tractor control units from inside the tractor cab. EDX 6000-2/2FC BAH0056-3 09.14... -
Page 111: Folding The Machine Extension Arms And Track Markers Out/In
The bars (Fig. 112/1) form the mechanical transport locking mechanism of the machine extension arm. The cables (Fig. 112/2) serve to release the bars. Operate the cables only from inside the tractor cab. Fig. 112 EDX 6000-2/2FC BAH0056-3 09.14... -
Page 112: Folding Out The Machine Extension Arms (From Transport Position To Working Position)
3 secs. so that the hydraulic accumula- tor (Functional description of the standard pressure tank, Seite 149) is filled with hydraulic fluid. Leave the tractor control unit green in float posi- tion during work on the field. Fig. 114 EDX 6000-2/2FC BAH0056-3 09.14... -
Page 113: Working Without Track Markers
Direct people away from the danger area of the track markers. 1. Press the "Park" button (see AMATRON operating manual). 2. Actuate control unit yellow until both track markers butt against the machine extension arms (see Fig. 116). Fig. 116 EDX 6000-2/2FC BAH0056-3 09.14... -
Page 114: Folding In The Machine Extension Arms (From Working Position To Transport Position)
2. Fold in the machine extension arms fully. 2.1 Actuate control unit green (see sec- tion "Overview – Supply lines between the tractor and the machine", Seite 42) until the machine extension arms are fully folded in. Fig. 119 EDX 6000-2/2FC BAH0056-3 09.14... - Page 115 The bars (Fig. 120/1) form the me- chanical transport locking mecha- nism. Fig. 120 3. Lower the tractor lower link to a central position. Ensure that the machine has suffi- cient ground clearance in all driving situations. Fig. 121 EDX 6000-2/2FC BAH0056-3 09.14...
-
Page 116: Filling The Seed Hopper
Place the machine on the coulters. ο 2. Switch off the fan. 3. Apply the tractor parking brake, switch off the tractor engine and remove the ignition key. Fig. 122 4. Raise the step (Fig. 123) and fold down. Fig. 123 EDX 6000-2/2FC BAH0056-3 09.14... - Page 117 A pneumatic spring assists cover opening. 5.2 Release two clips (Fig. 124/2). Fig. 124 5.2 Slowly open the cover. 6. Fill the seed hopper. Fig. 125 7. Close and lock the cover. 8. Fold up the step (Fig. 123). EDX 6000-2/2FC BAH0056-3 09.14...
-
Page 118: Starting Work
The blower fan speed is correctly set when the AMATRON indicates an air pressure of 55 mbar in the singling unit. The max. blower fan speed of 4000 rpm must not be exceeded. EDX 6000-2/2FC BAH0056-3 09.14... - Page 119 100 m travelled at working speed ο after switching from light to heavy soil or vice-versa ο at regular intervals, at the latest when filling the seed hop- per. Dirty seed delivery channels may result in deficient sowing. EDX 6000-2/2FC BAH0056-3 09.14...
-
Page 120: During The Work
Fig. 127 Avoid abrupt braking and accelerate to prevent placement areas in distribution along the row. The speed of the singling drum is regulated according to the tractor speed and adjusts only to normal speed changes. EDX 6000-2/2FC BAH0056-3 09.14... -
Page 121: End Of Work In The Field
4. Place the machine on the front stands (Fig. 33/1). 5. Apply the tractor parking brake, switch off the tractor engine and remove the ignition key. Fig. 128 DANGER Apply the tractor parking brake, switch off the engine and re- move the ignition key. EDX 6000-2/2FC BAH0056-3 09.14... - Page 122 "0". Fig. 129 7. Open the bottom flap (Fig. 130/1). The bottom flap is secured with quick- release clamps (Fig. 130/2). Fig. 130 8. Fold the mount down and secure [lynch pin (Fig. 131/1)]. Fig. 131 EDX 6000-2/2FC BAH0056-3 09.14...
- Page 123 Use of the machine 9. Place the collecting trough in the mount. Fig. 132 10. Release the screen slider. Fig. 133 Use the hexagon wrench provided. Fig. 134 EDX 6000-2/2FC BAH0056-3 09.14...
- Page 124 133 Pour the collected seed into the seed hopper for re-use. .14. Close and seal the singling housing or clean it when it is open (see section “Daily quick cleaning of the singling unit and the spur gears”, Seite 132). Fig. 136 EDX 6000-2/2FC BAH0056-3 09.14...
-
Page 125: Faults
If the residual supply in the tank is undercut (and if the level sensor is set correctly), a warning message appears in the on-board computer, accompanied by an acoustic signal (see on-board computer operating manual). The residual supply should be large enough to prevent fluctuations in the spread rate. EDX 6000-2/2FC BAH0056-3 09.14... -
Page 126: Cleaning The Seed Tube
In event of blockage in the seed placement area (Fig. 137/1), proceed as follows: • Clean the seed tube • Eliminate seed accumulation at the sealing Fig. 137 EDX 6000-2/2FC BAH0056-3 09.14... - Page 127 4. Fold up the press rollers and hook onto the clamp (Fig. 139/1). 5. Clear the blockage in the shoot pipe (Fig. 139/2), remove the shoot pipe to clean it if necessary. 6. Put the coulter in the working position. Fig. 139 EDX 6000-2/2FC BAH0056-3 09.14...
- Page 128 141/1) to its initial position until it stops. Fig. 141 The collecting hopper (Fig. 142/1) is usually emptied after completion of the field work (see section “Seed singling and/without seed hopper draining”, Seite 121). Fig. 142 EDX 6000-2/2FC BAH0056-3 09.14...
-
Page 129: Fault Table
Incorrect message from the op- Seed dressing deposits impair Clean the optosensor with a tosensor the optics of the optosensor damp cloth. Important! Do not use any strong cleaning agents. Eliminate severe contamination with technical alcohol. EDX 6000-2/2FC BAH0056-3 09.14... -
Page 130: Cleaning, Maintenance And Repairs
(see section 10.1, Seite 111) • the tractor parking brake is engaged • the tractor's universal joint shaft is switched off • the tractor engine switched off • the ignition key removed EDX 6000-2/2FC BAH0056-3 09.14... -
Page 131: Cleaning The Machine
• Always maintain a minimum jet distance of 300 mm between the pressure washer or steam jet cleaning nozzle and the machine. • Comply with safety regulations when working with pressure washers. EDX 6000-2/2FC BAH0056-3 09.14... -
Page 132: Daily Quick Cleaning Of The Singling Unit And The Spur Gears
Do not fold out the rear stand. 2. Secure the tractor against unintentional starting and unintentional movement. Fig. 143 1. Open the bottom flap (Fig. 144/1). The bottom flap is secured with quick- release clamps (Fig. 144/2). Fig. 144 EDX 6000-2/2FC BAH0056-3 09.14... - Page 133 Removal of the scale plate, as shown, is not necessary. Fig. 146 7. After cleaning, close the singling housing. Thorough cleaning should be carried out after emptying the seed hopper and the singling unit (see section "Thorough cleaning of the machine", Seite 134). EDX 6000-2/2FC BAH0056-3 09.14...
-
Page 134: Thorough Cleaning Of The Machine
Clean the dirty blower fan guard screen to ensure an unobstructed air flow. If the required air quantity is not achieved, there may be problems with the seed distribution. Clean the blower fan of any deposits. Deposits lead to imbalance and bearing damage. EDX 6000-2/2FC BAH0056-3 09.14... -
Page 135: 12.1.2.1 Cleaning The Fertiliser Distributor Head
(Fig. 147/1) from the distributor head. 4. Remove any impurities with a brush, and wipe out the distributor head and plastic cap with a dry cloth. 5. Refit the plastic cap. Fig. 147 EDX 6000-2/2FC BAH0056-3 09.14... -
Page 136: Assembly Work On The Machine
2. Disconnect the exhaust air hose (Fig. 148/1) from the housing cover (Fig. 148/2). Fig. 148 3. Release the screws (Fig. 149/2) with the hexagon wrench provided. 4. Remove the bolt (Fig. 149/3). 5. Remove the housing cover (Fig. 149/1). Fig. 149 EDX 6000-2/2FC BAH0056-3 09.14... - Page 137 If excessive force is used, the spoke may be damaged. When installing the housing cover, pay attention to the recesses (Fig. 151/1). Fig. 151 Secure the bearing seat with the bolt (Fig. 151/1). Fig. 152 EDX 6000-2/2FC BAH0056-3 09.14...
-
Page 138: Securing The Seed Tubes
(from Fuchs) before securing the collar nut. • Only tighten the collar nut by hand to prevent damage. The optosensor wrench (Fig. 155) serves to re- lease and secure the collar nuts, in particular for narrow seed drills. Fig. 155 EDX 6000-2/2FC BAH0056-3 09.14... -
Page 139: Adjusting The Carrier Roller Scrapers
The gap (arrow) can be adjusted, like a toggle, by variously tightening the two screws (Fig. 157/3). Do not tighten the screws too hard. It should be possible to move the furrow former with average force. Lock the screws after each adjustment. Fig. 157 EDX 6000-2/2FC BAH0056-3 09.14... -
Page 140: Lubrication Specifications
Fig. 158 Lubricants For lubrication, use a lithium saponified, multipurpose grease with EP additives: Company Lubricant designation ARAL Aralub HL2 FINA Marson L2 ESSO Beacon 2 SHELL Retinax A EDX 6000-2/2FC BAH0056-3 09.14... -
Page 141: Overview Of Lubrication Points
50 h Machine extension arm Fig. 163/1 50 h Fig. 163/2 50 h Coulter pressure (Sowing and fertiliser coulter) Fig. 163/3 50 h Fig. 163/4 50 h Fig. 159 Fig. 160 Fig. 161 Fig. 162 Fig. 163 EDX 6000-2/2FC BAH0056-3 09.14... -
Page 142: Maintenance Schedule - Overview
• Blower fan intake guard screen Remove surplus grains from sealing lips Section 11.2 Check fertiliser distributor head During the work for contamination Section and clean if necessary (see section 12.1.2.1 "Cleaning the fertiliser distributor head") EDX 6000-2/2FC BAH0056-3 09.14... - Page 143 Check and service the hydraulic hose Section 12.6 Every 6 months shop lines. This inspection has to be recorded by (before the start of the operator. the season) Checking the tyre pressure of the sup- Section 12.4.1 port wheels EDX 6000-2/2FC BAH0056-3 09.14...
-
Page 144: Checking The Tyre Pressure Of The Support Wheels
Servicing roller chains and chain wheels After the season carry out the following work on all roller chains: • Clean (including the chain wheels and chain tensioner) • Check their condition • Lubricate with low-viscosity mineral oil (SAE30 or SAE40). EDX 6000-2/2FC BAH0056-3 09.14... -
Page 145: Specialist Workshop - Adjustment And Repair Work
• Have the hydraulic hose lines checked at least once a year by a specialist for proper functioning. • Replace the hydraulic hose lines if damaged or worn. Only use original AMAZONE hydraulic hose lines. EDX 6000-2/2FC BAH0056-3 09.14... -
Page 146: Labelling Hydraulic Hose Lines
2. If necessary, tighten screw unions. Before each start-up 1. Check hydraulic hose lines for visible damage. 2. Eliminate any scouring points on hydraulic hose lines and pipes. 3. Replace worn or damaged hydraulic hose lines immediately (specialist workshop). EDX 6000-2/2FC BAH0056-3 09.14... -
Page 147: Inspection Criteria For Hydraulic Hose Lines
If the date of manufacture on the assembly is "2012", then the hose should not be used after February 2018. For more information, see "La- belling of hydraulic hose lines". EDX 6000-2/2FC BAH0056-3 09.14... -
Page 148: Installation And Removal Of Hydraulic Hose Lines (Specialist Workshop)
Installation and removal of hydraulic hose lines (specialist workshop) When installing and removing hydraulic hose lines, always observe the following information: • Only use original AMAZONE hydraulic hose lines. • Ensure cleanliness. • The hydraulic lines must always be installed so that, under all operating conditions: ο... -
Page 149: Repairs To The Pressure Tank (Specialist Workshop)
For all work on the pressure tank and the hydraulic system connected to it observe the standard EN 982 (safety requirements for fluid sys- tems). DANGER The hydraulic system and the pressure tank connected to it are under a constant high pressure (approx. 100 bar). EDX 6000-2/2FC BAH0056-3 09.14... -
Page 150: Bolt Tightening Torques
M 20 M 20x1.5 M 22 M 22x1.5 1050 M 24 1000 1200 M 24x2 1100 1300 M 27 1050 1500 1800 M 27x2 1150 1600 1950 M 30 1450 2000 2400 M 30x2 1600 2250 2700 EDX 6000-2/2FC BAH0056-3 09.14... -
Page 151: Hydraulic Diagram
Fertiliser coulter pressure 0250 Control block, coulter pressure 0260 Coulter pressure changeover valve 0270 Non-return valve. 0280 Folding mechanism pressure accumulator 0400 Tractor blower fan drive 0410 Hydr. motor 8.5 ccm All position specifications in direction of travel EDX 6000-2/2FC BAH0056-3 09.14... - Page 152 Hydraulic diagram Fig. 167 EDX 6000-2/2FC BAH0056-3 09.14...
- Page 155 + 49 (0) 5405 501-0 D-49202 Hasbergen-Gaste Telefax: + 49 (0) 5405 501-234 Germany e-mail: amazone@amazone.de http:// www.amazone.de Plants: D-27794 Hude • D-04249 Leipzig, Germany • F-57602 Forbach, France Branches in England and France Manufacturers of mineral fertiliser spreaders, field sprayers, seed drills,...
Need help?
Do you have a question about the EDX 6000-2 and is the answer not in the manual?
Questions and answers