Table of Contents
Advertisement
Quick Links
Installation Instructions
Please Read Before Installing
Overview
The HRD-6D, -6ND, -10D, -10ND, -5NE dimmers and the
HRD-8ANS switch are for use with HomeWorks systems.
The dimmers and switch may be installed in either single-
pole, 3-way or 4-way applications.
The dimmers may be used with the HD-RD Remote
Dimmer, and the switch may be used with the HD-RS
Remote Switch for control from up to 9 additional
locations.
Important Notes
Codes: Install in accordance with all local and national
electrical codes.
Danger: These controls must not be used to
control equipment which is not visible from
every control location. They must also not be
used to control equipment which could create
hazardous situations such as entrapment if operated
accidentally. Examples of such equipment which must not
be operated by these controls include (but are not limited
to) motorized gates, garage doors, industrial doors,
microwave ovens, heating pads, etc. It is the installer's
responsibility to ensure that the equipment being
controlled is visible from every control location and that
only suitable equipment is connected to these controls.
Overheat Damage: To reduce the risk of overheating and
possibly damaging other equipment, do not install
to control receptacles or motor-operated appliances.
Environment: Ambient operating temperature:
0-40°C, 32-104°F, 0-90% humidity, non-condensing.
Indoor use only. It is normal for dimmers and switches to
feel warm to the touch during operation.
Spacing: If mounting one control above another, leave at
least 4.5" (114mm) vertical space between them.
Lamp Type: -6D, -6ND, -10D and -10ND are designed for
use with permanently installed incandescent, magnetic
low-voltage, or tungsten halogen only. -5NE is designed
for use with permanently installed incandescent or
electronic low-voltage only. -8ANS is designed for use
with all permanently installed lighting loads.
Low-Voltage Applications: Use -6D, -6ND, -10D and
-10ND with magnetic (core and coil) low-voltage
transformers only. Not for use with electronic (solid-state)
low-voltage transformers.
Use -5NE with electronic (solid-state) low-voltage
transformers only. Not for use with magnetic (core and
coil) low-voltage transformers.
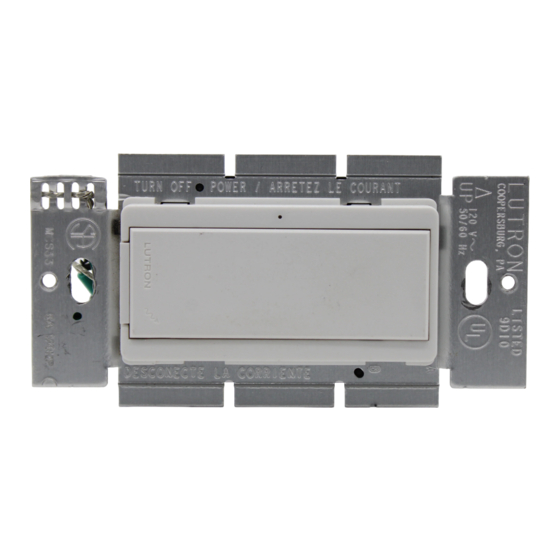
Designer-Style RF Maestro
Switches, and Remotes
HRD-6D, -6ND, -10D, -10ND, -5NE*, -8ANS
HD-RD, -RS
120/127 V ~, 50/60Hz
HRD-6D
HRD-6ND
HRD-10D
HRD-10ND
HRD-5NE
HRD-8ANS
Operation of a low-voltage circuit with lamps inoperative
or removed may result in transformer overheating and
premature failure. Lutron strongly recommends the
following:
a. Do not operate low-voltage circuits without operative
lamps in place.
b. Replace burned-out lamps as quickly as possible.
c. Use transformers that incorporate thermal protection
or fused transformer primary windings to prevent
transformer failure due to overcurrent.
Load Specifications:
Control
Min. Load
-5NE
40W
-6D
50W/VA
-10D
50W/VA
-6ND
10W/VA
-10ND
10W/VA
-8ANS
10W/VA
Wallplates: Lutron Claro
®
are recommended for best color match and aesthetic
appearance. Do not paint controls or wallplates.
*
HRD-5NE available 2Q 2003.
Dimmers,
®
HD-RD
HD-RS
Max. Load
500W
600W/VA
1000W/VA
600W/VA
1000W/VA
8A
and Satin Colors
wallplates
TM
1
Advertisement
Table of Contents

Related Manuals for Lutron Electronics Homeworks RF Maestro HRD-6D


Summary of Contents for Lutron Electronics Homeworks RF Maestro HRD-6D
- Page 1 Designer-Style RF Maestro Dimmers, ® Switches, and Remotes HRD-6D, -6ND, -10D, -10ND, -5NE*, -8ANS Installation Instructions HD-RD, -RS Please Read Before Installing 120/127 V ~, 50/60Hz Overview The HRD-6D, -6ND, -10D, -10ND, -5NE dimmers and the HRD-8ANS switch are for use with HomeWorks systems. The dimmers and switch may be installed in either single- pole, 3-way or 4-way applications.
- Page 2 Multigang Installations Cleaning: To clean, wipe with a clean damp cloth. DO NOT use any chemical cleaning solutions. In multigang installations, several controls are grouped Wallboxes: Lutron recommends using 3.5" (89mm) deep horizontally in one multigang wallbox. wallboxes for easier installation. Several controls may be •...
- Page 3 Installation Push all wires back into the wallbox and loosely fasten the control to the wallbox using the control Danger - Locate and remove fuse or lock mounting screws provided. Do not pinch the wires. circuit breaker in the OFF position before proceeding.
- Page 4 Wiring Diagram 1 Wiring Diagram 2 Single Location Installation Single Location Installation with Neutral -6D, -10D -6ND, -10ND, -5NE, -8ANS Dimmer Dimmer/Switch Hot/Live Black Hot/Live Black Blue Blue Lighting Lighting Cap Off* Cap Off* Load 120/127VAC 120/127VAC Load 50/60Hz 50/60Hz Green Green White...
- Page 5 Wiring Diagram 5 Installation with Power NGRX-PB Booster or ELV Interface 1, 2 -6ND, -10ND with HD-RD Dimmer ELVI-1000 Remote Dimmer Black Lighting Hot/Live Black Load 120/127VAC Green Blue Green Blue 50/60 Hz White Neutral Wiring Diagram 6 Installation with Fluorescent Dimming Ballast Interface 1, 2 -6ND, -10ND with HD-RD...
- Page 6 Local Operation Setting High/Low-End Trim (Dimmer Only) Pressing the Tapswitch on any Dimmer, Switch, or High/Low-End levels may be adjusted with the following Remote will alternately turn the lights ON and OFF. procedure: a. Press the Dimming Rocker to set the dimmer to the For -5NE, -6D, -6ND, -10D, -10ND, and HD-RD, the ON desired new High/Low-End level (>50% for high-end, level will be the level previously set using the Dimming...
- Page 7 Troubleshooting Guide Symptom Cause and Action No lights at all Power not present • Circuit breaker OFF or tripped. Perform Short Circuit Check (see page 3). • FASS in the OFF position. Move FASS to the ON position by sliding it to the right. Check both the dimmer/switch and all of the remote dimmers/switches.
- Page 8 Claro, Maestro, Hi-Lume and HomeWorks are registered trademarks and Satin Colors, HP Visit our Web site at www.lutron.com 2•4•6, FASS and the HomeWorks Logo are trademarks of Lutron Electronics Co., Inc. © 2003 Lutron Electronics Co., Inc. Lutron Electronics Co., Inc.
Need help?
Do you have a question about the Homeworks RF Maestro HRD-6D and is the answer not in the manual?
Questions and answers