Advertisement
Quick Links
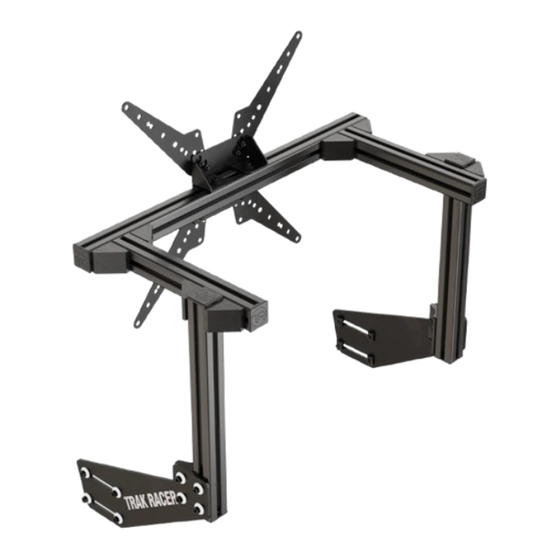
MONITOR STAND
Assembly Guide
IMPORTANT: As there are different versions of each rig depending on your
region, please ensure that you are using the correct instruction set. The
part number below should match the part number labeled on your box
MS-CM-SML2
Published 2023‑12‑22
Advertisement

Subscribe to Our Youtube Channel
Related Manuals for TRAK RACER MS-CM-SML2


Summary of Contents for TRAK RACER MS-CM-SML2
- Page 1 Assembly Guide IMPORTANT: As there are different versions of each rig depending on your region, please ensure that you are using the correct instruction set. The part number below should match the part number labeled on your box MS-CM-SML2 Published 2023‑12‑22...
- Page 2 TABLE OF CONTENTS Symbol Legend Part list Assembly Notes MS-CM-SML2 Assembly Instructions...
- Page 3 IMPORTANT: As there are different versions of each rig depending on your region, please ensure that you are using the correct instruction set. The part number below should match the part number labeled on your box IMPORTANT: Due to the nature of cut aluminium profile, some metal shavings may still be present after our extensive QA cleaning process.
- Page 4 IMPORTANT: As there are different versions of each rig depending on your region, please ensure that you are using the correct instruction set. The part number below should match the part number labeled on your box MS-CM-SML2 PARTS LIST Part # Description...
- Page 5 IN THE BOX 4 0 x 4 0 0 x 3 0 0 m m P r o f i l e 4 0 x 4 0 0 x 4 0 0 m m P r o f i l e 4 0 x 4 0 0 x 6 0 0 m m P r o f i l e 4 0 x 8 0 C o r n e r Bra c k e t 4 0 x 4 0 C o r n e r Bra c k e t...
- Page 6 NOTE TOP SIDE INSIDE FRONT SIDE OUTSIDE...
- Page 7 NOTE T-NUTS It is strongly advised that spring T-Nuts are inserted by sliding from the ends of profiles. Please take careful note of each step of all T-nuts as some are to be installed in anticipation of future steps. If T-Nuts are skipped, and the ends are no longer accessible, they can be inserted by “rocking”...
- Page 8 NOTE FOR LOGO PLATE BUTTON SCREWS M 8 1 6 b u t t o n s c r e w...
- Page 9 NOTE ALUMINUM PROFILE ASSEMBLY M8x20...
- Page 10 600mm Profile 300mm Profile NS-M8 M8x20mm BC-40 SH-M8-20 W-M8 LP-160...
- Page 11 BC-40 See note ALUMINUM PROFILE ASSEMBLY at page 9...
- Page 12 NS-M8 400mm Profile See note ALUMINUM PROFILE ASSEMBLY at page 9...
- Page 13 M8x20mm SH-M8-20 W-M8 LP-160 BC-40 See note ALUMINUM PROFILE ASSEMBLY at page 9...
- Page 14 BC-40...
- Page 15 M8x16 mm NS-M8 BA-80-S M8-16-FS...
- Page 16 M8x20mm NS-M8 NF-M8 LP-160 SH-M8-20 W-M8 L-01...
- Page 18 M8x16mm L-01 SH-M8-16 W-M8 NS-M8...
- Page 19 M6x16mm SF-M6-16 NL-M8...
- Page 20 EC-40...
- Page 24 FINISHED...
Need help?
Do you have a question about the MS-CM-SML2 and is the answer not in the manual?
Questions and answers